Basic Workflow for Web 3D and Augmented Reality
Creating a Scene in 3ds Max
To get started, open a new scene in 3ds Max.
As an example, we'll use the Teapot object, which you can find under Create 1 > Standard Primitives 2 on the right panel.
Simply click on Teapot 3 and drag it into the viewport.
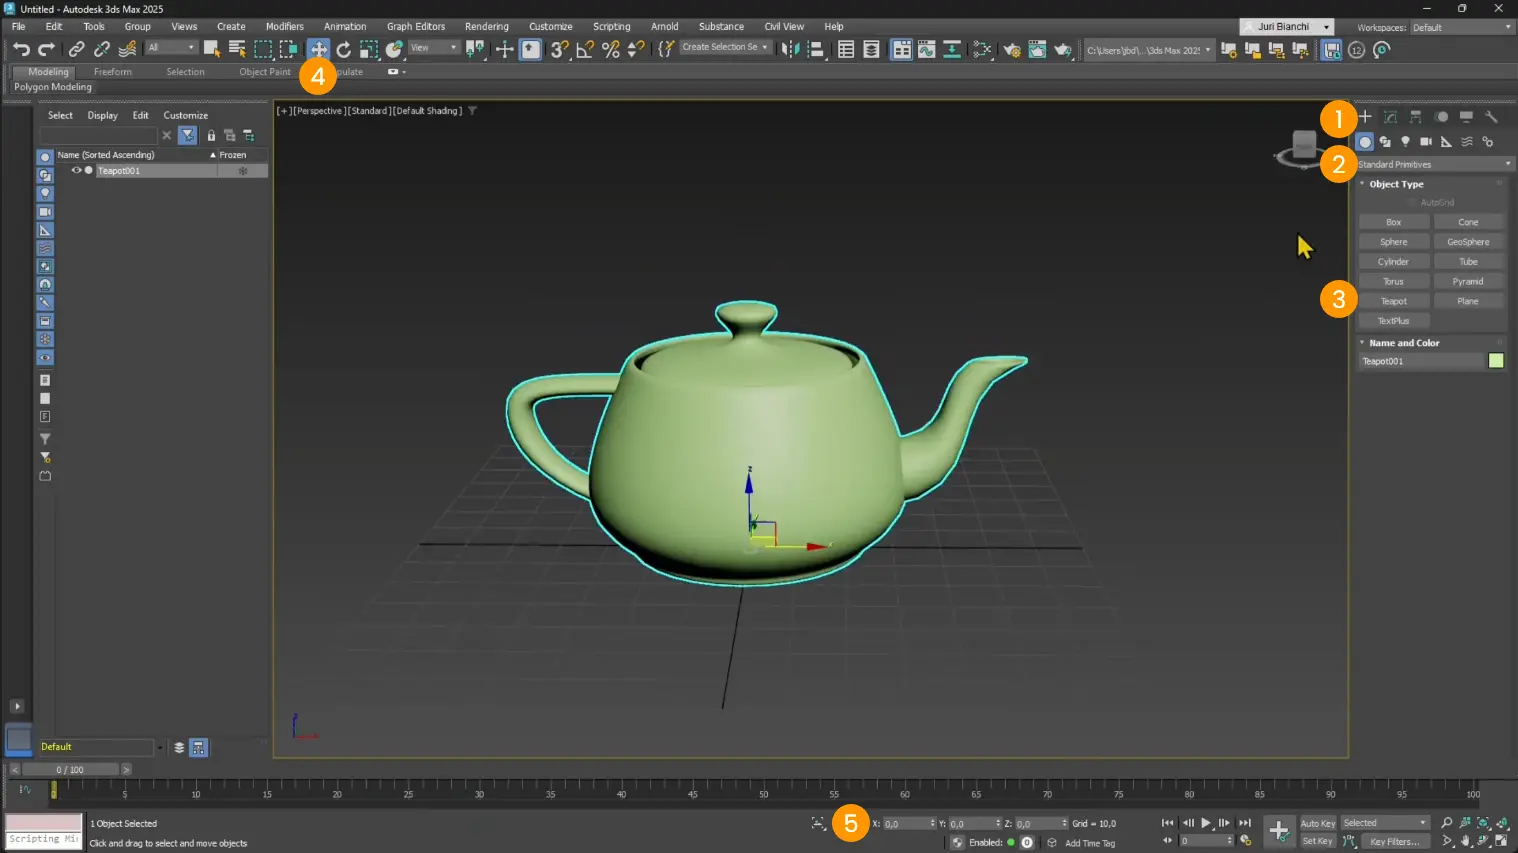
Tip: Make sure to position it at the center of the scene, at the origin coordinates.
You can do this quickly by selecting the object, clicking on Select and Move 4, and entering 0 for X, Y, and Z at the bottom 5.
This ensures your object will appear well-centered on the ground plane in AR.
Units and Realistic Dimensions
Another important step is setting the correct units.
Go to Customize 1 > Units Setup 2.
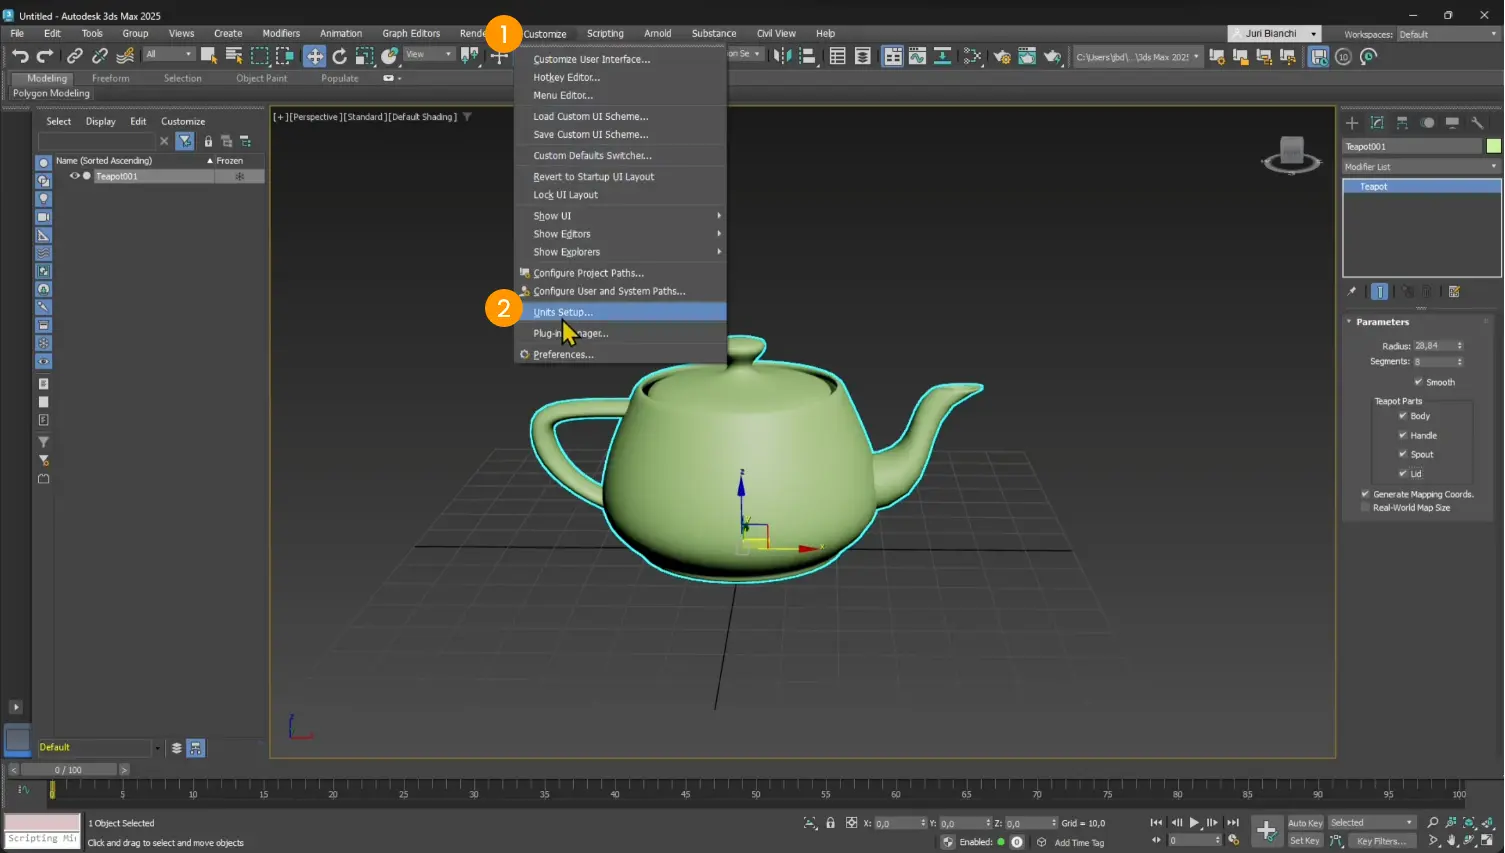
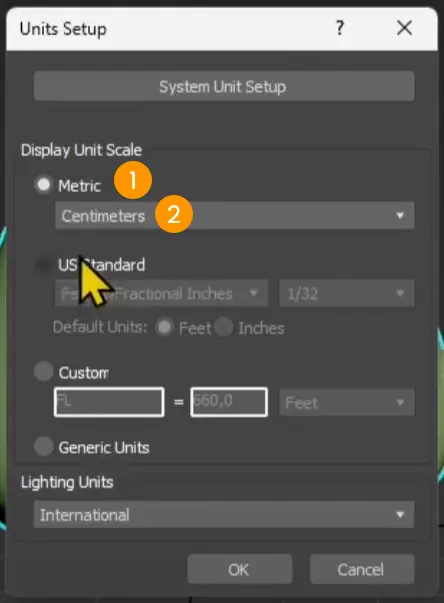
Choose Metric 1 and then select centimeters or millimeters 2, depending on your object's scale.
This helps maintain realistic proportions when viewed in the real world.
Segments and Polygon Count
Next, let's check the object's complexity.
In the Modify panel 1, you can adjust the number of Segments 2. More segments mean more detail, but also a heavier file.
To monitor polygon count in real time, click on 3 > Configure Viewports 4.
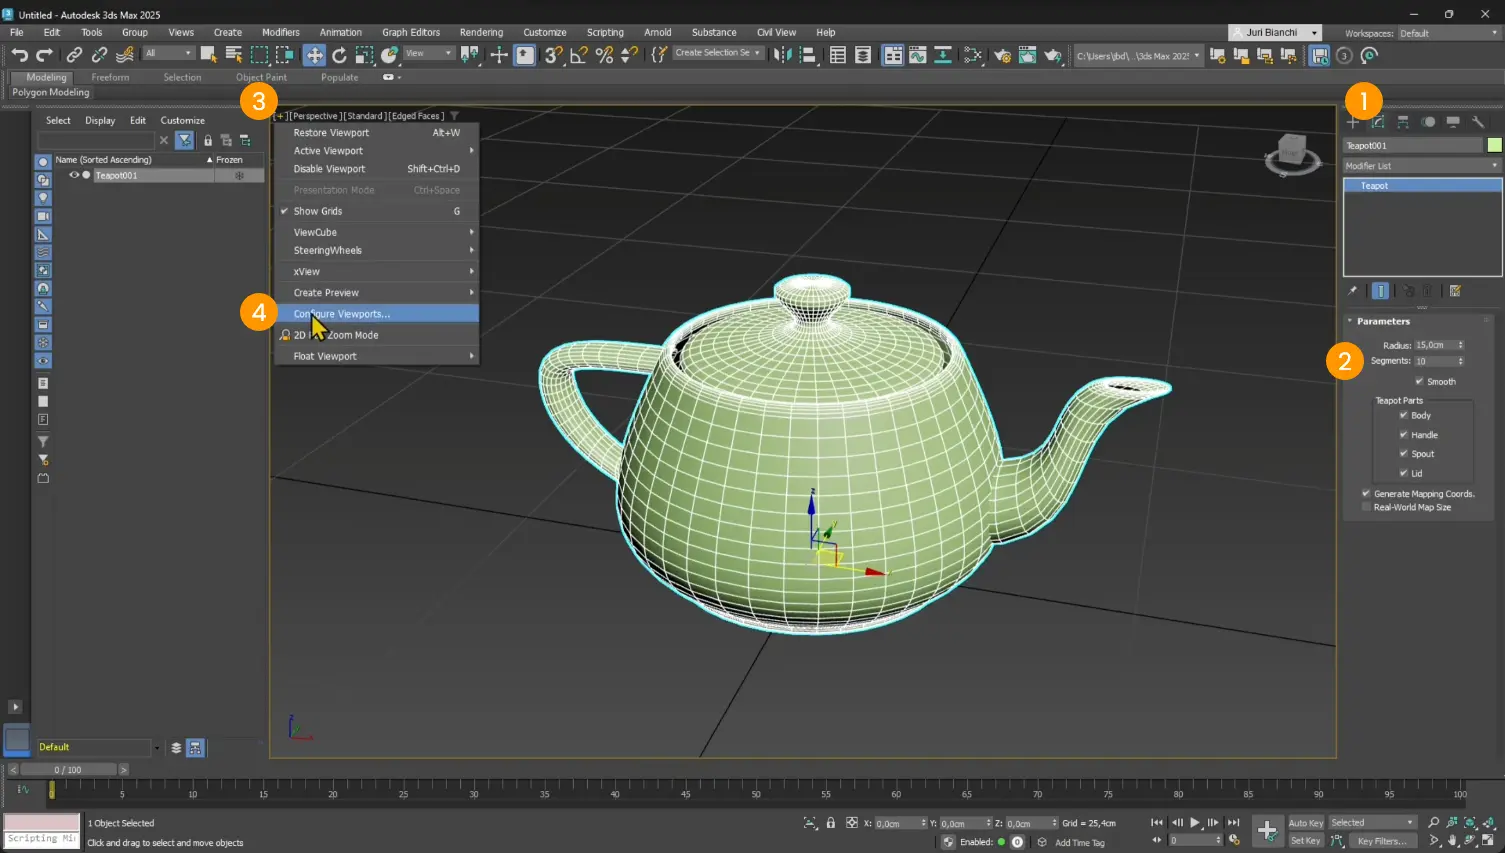
Then go to Statistics 1 and enable Show Statistics in Active View 2.
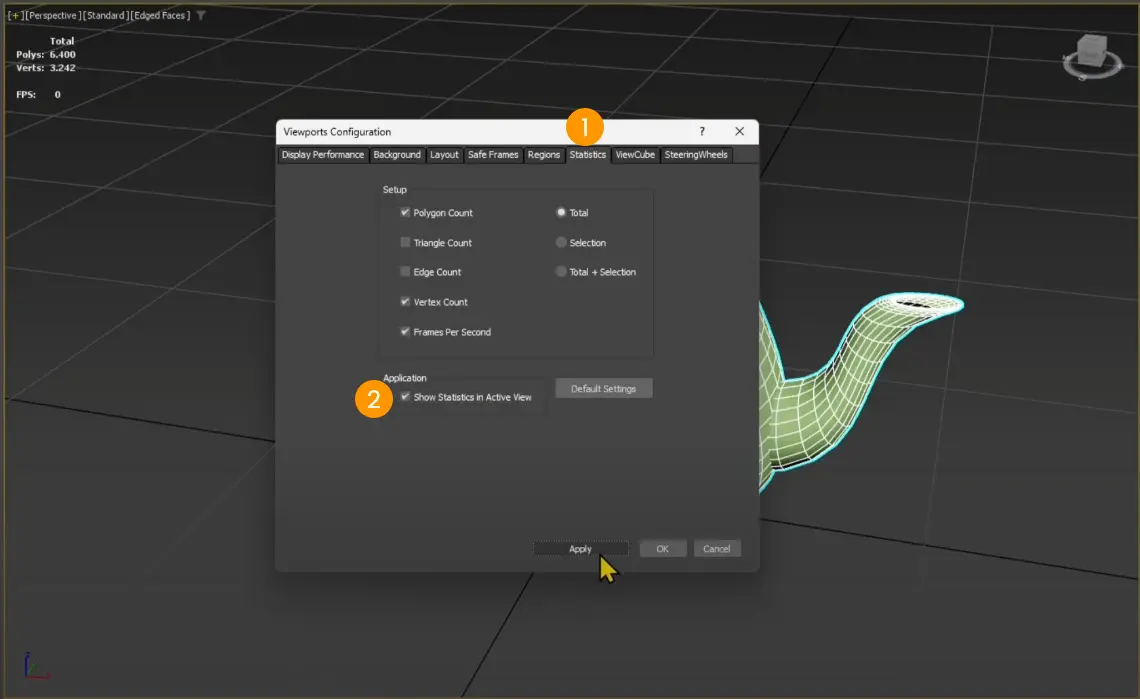
Tip: Aim for 4,000-10,000 polygons for simple objects.
In any case, try not to exceed 100,000 polygons and keep the file under 5 MB to avoid loading issues on mobile devices or in the cloud.
Exporting as GLB Format
Once everything is ready, it's time to export.
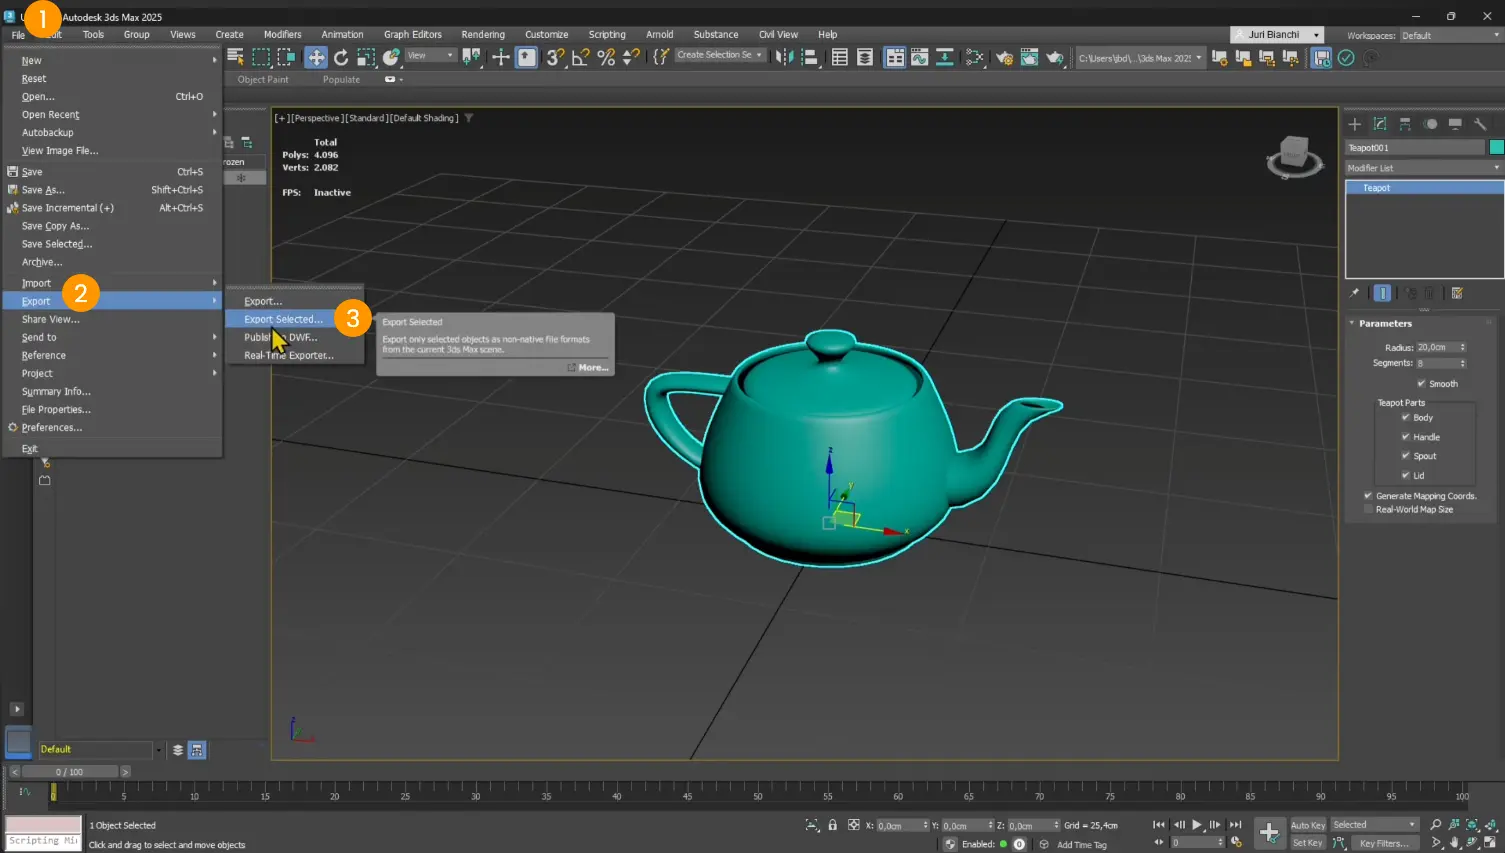
Select your object and go to File 1 > Export 2 > Export Selected 3.
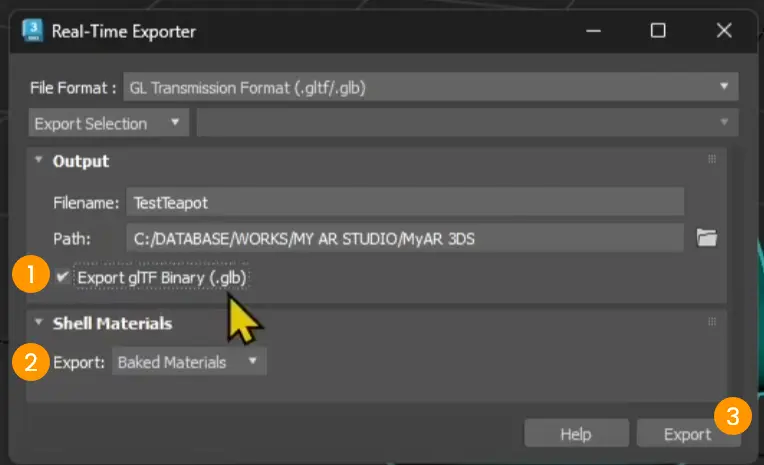
Name your file (e.g., Test_Teapot) and choose the GL Transmission Format (.glb).
In the export window, select GLB Binary 1 and enable Baked Materials 2 (this keeps your assigned color or material).
Then click Export 3.
Uploading to My AR Studio
Go to My AR Studio, log in with your account or create one by clicking Try It Now.
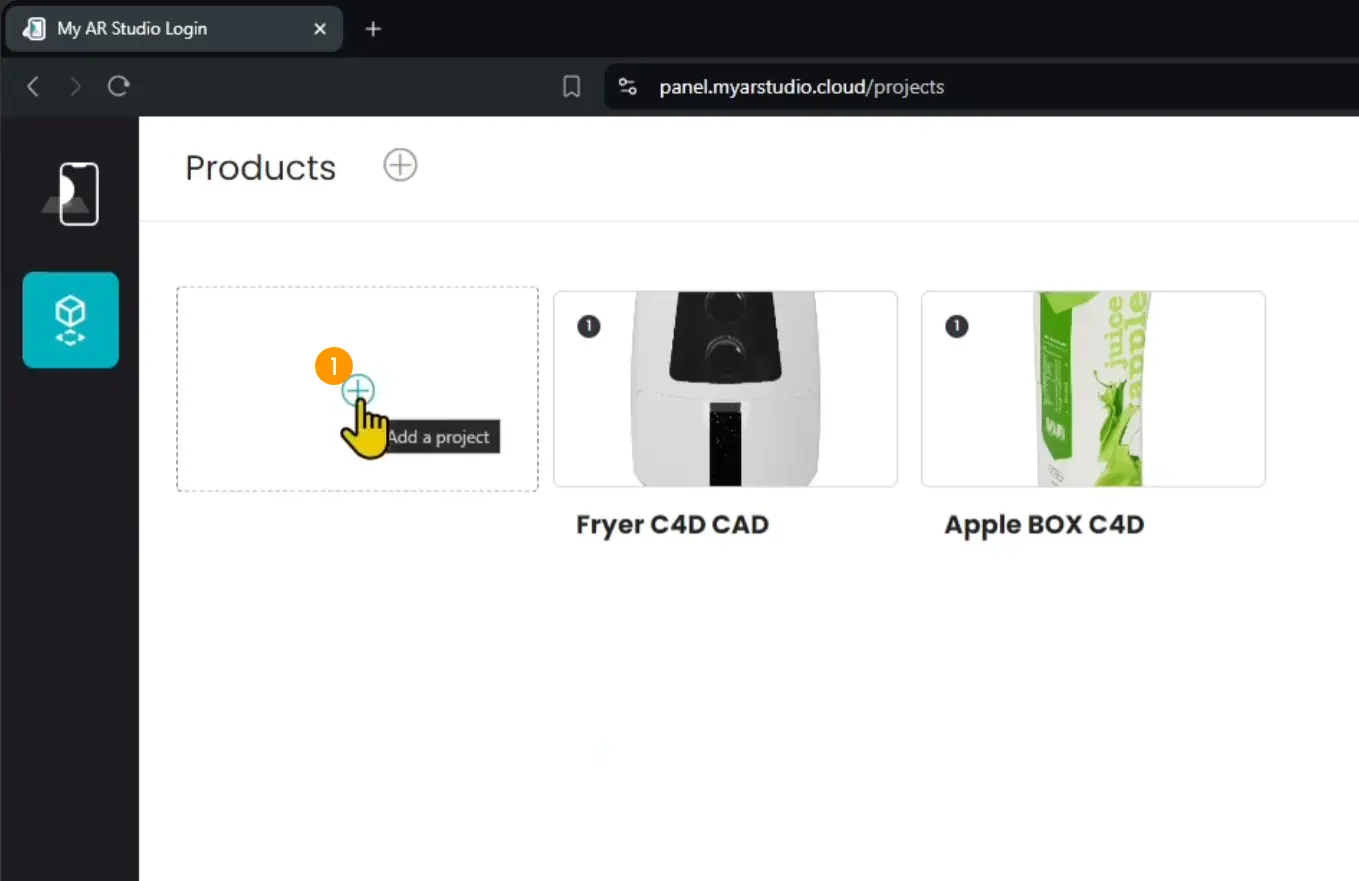
Once inside, click on 1 to add a new product.
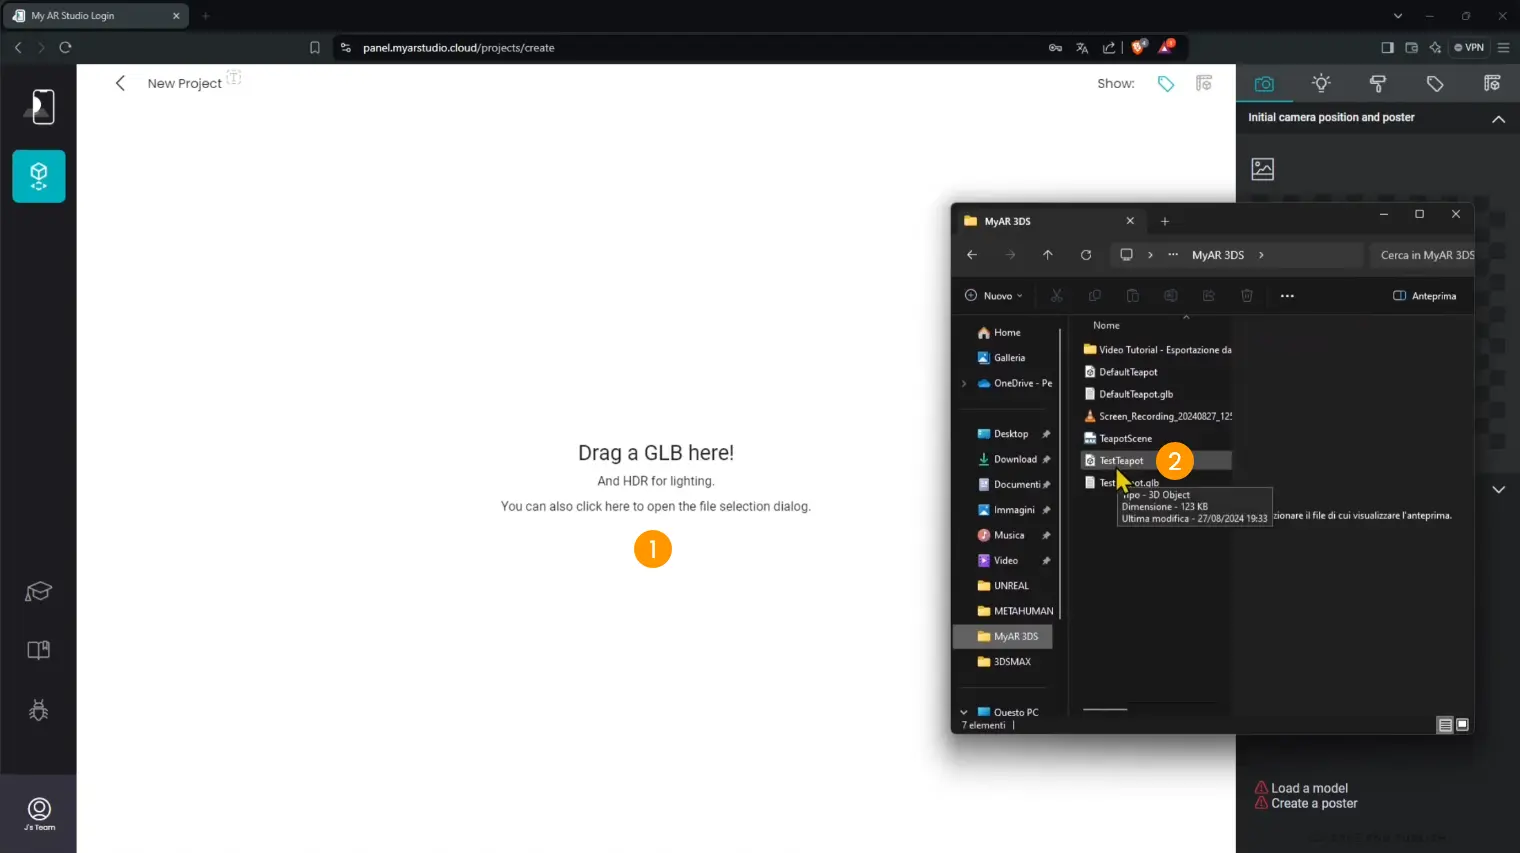
Click inside the white area 1 to open the file selector and choose your GLB file 2, or simply drag and drop it.
Once uploaded, you'll see an instant preview.
Adjusting Materials and Scale
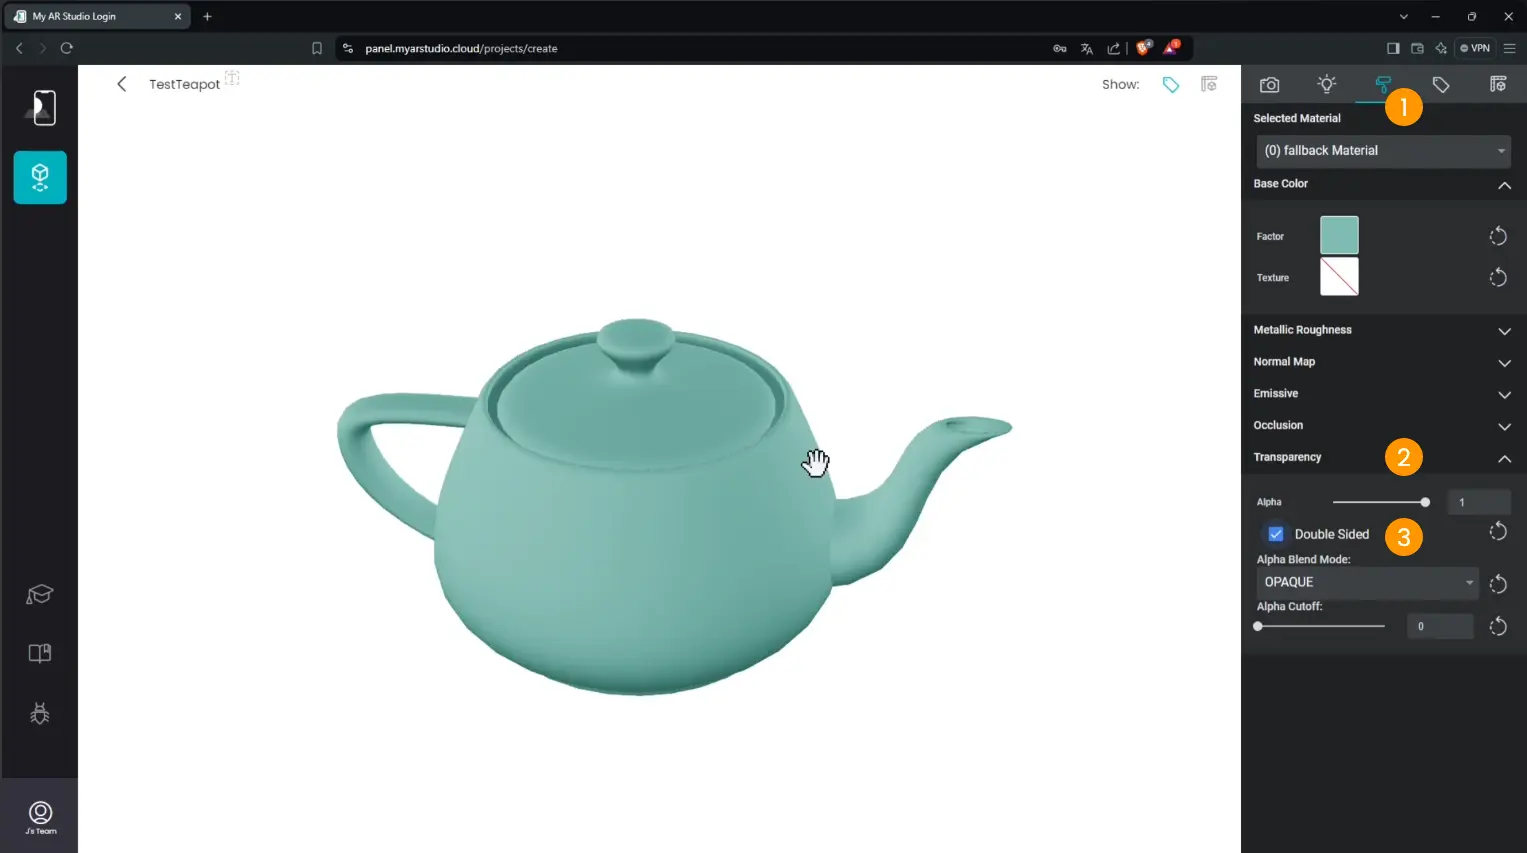
If any parts of your model look transparent or one-sided, go to the Materials panel 1, find the Transparency section 2, and enable Double Sided 3.
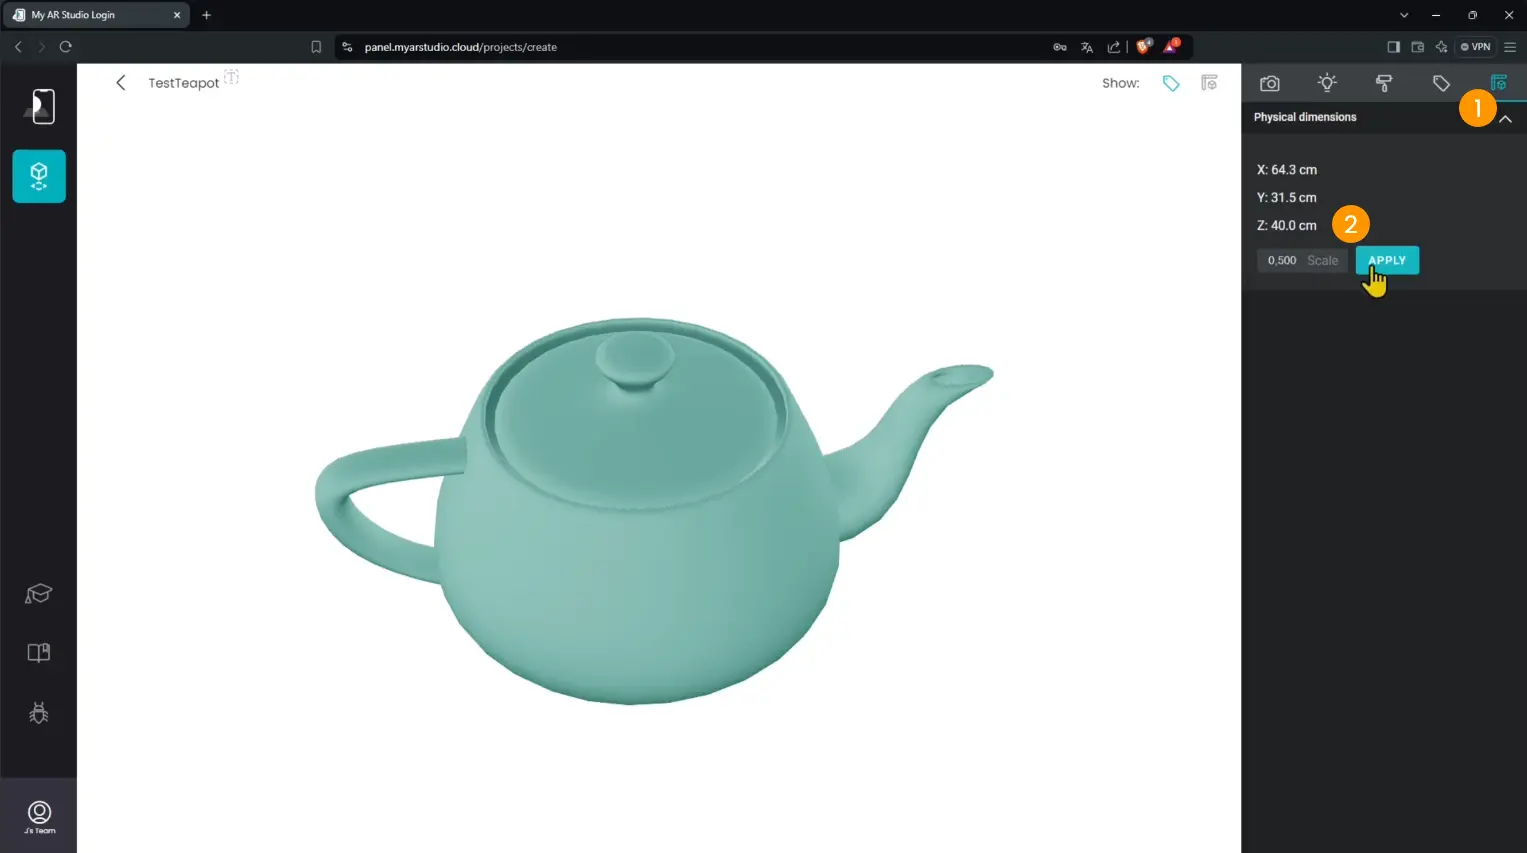
Also check the size in the Transform panel 1. If the model looks too big or too small, adjust the scale and click Apply 2.
Generating the AR Poster
Now it's time to generate a poster to trigger AR.
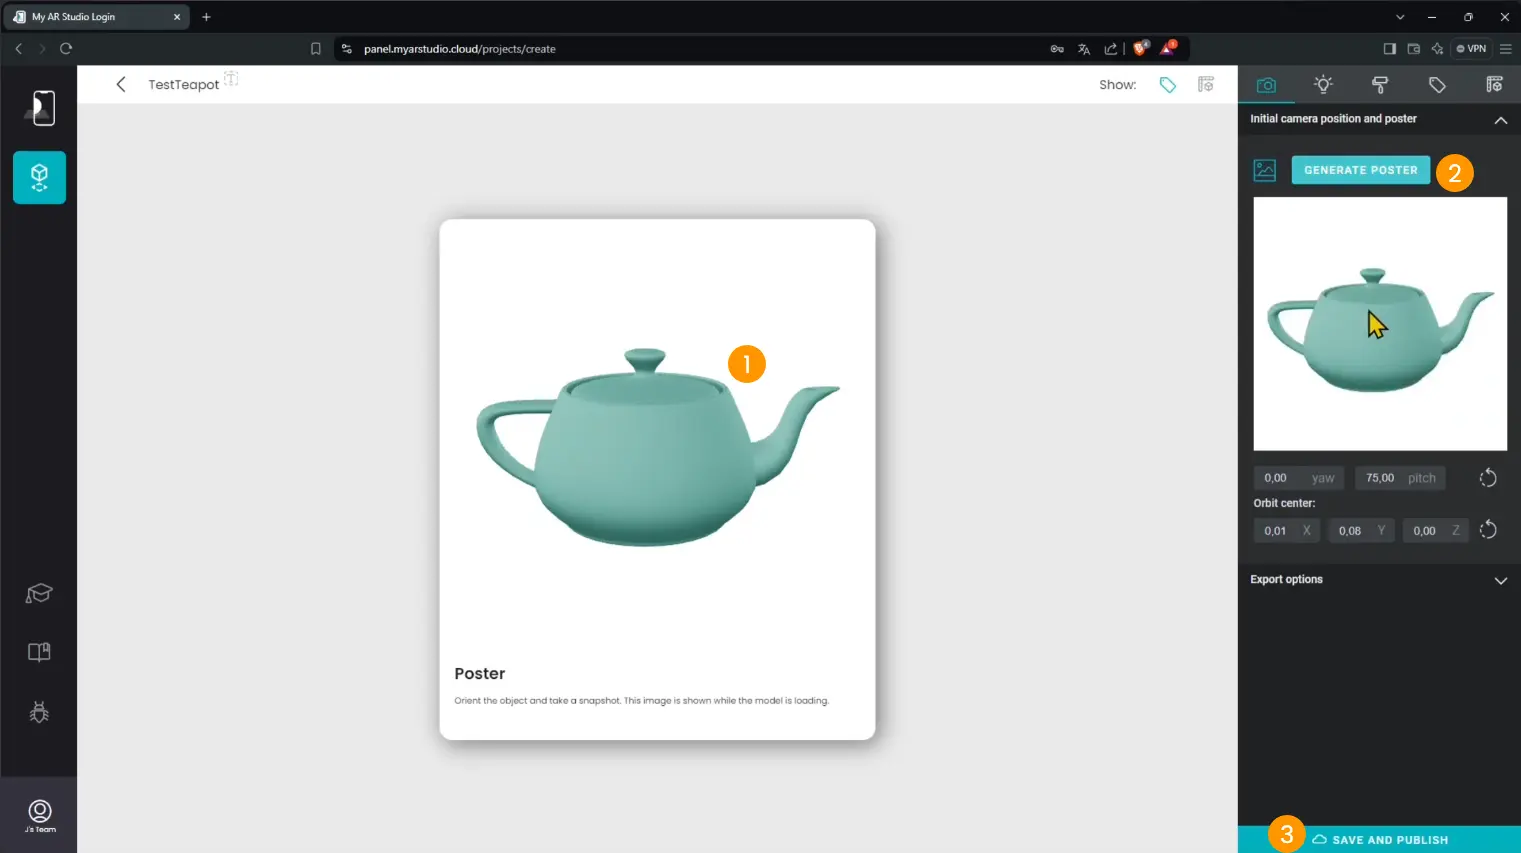
Click the 1 button to enter Polaroid Mode.
Use the Generate preview function 2 to capture a poster view of your 3D object.
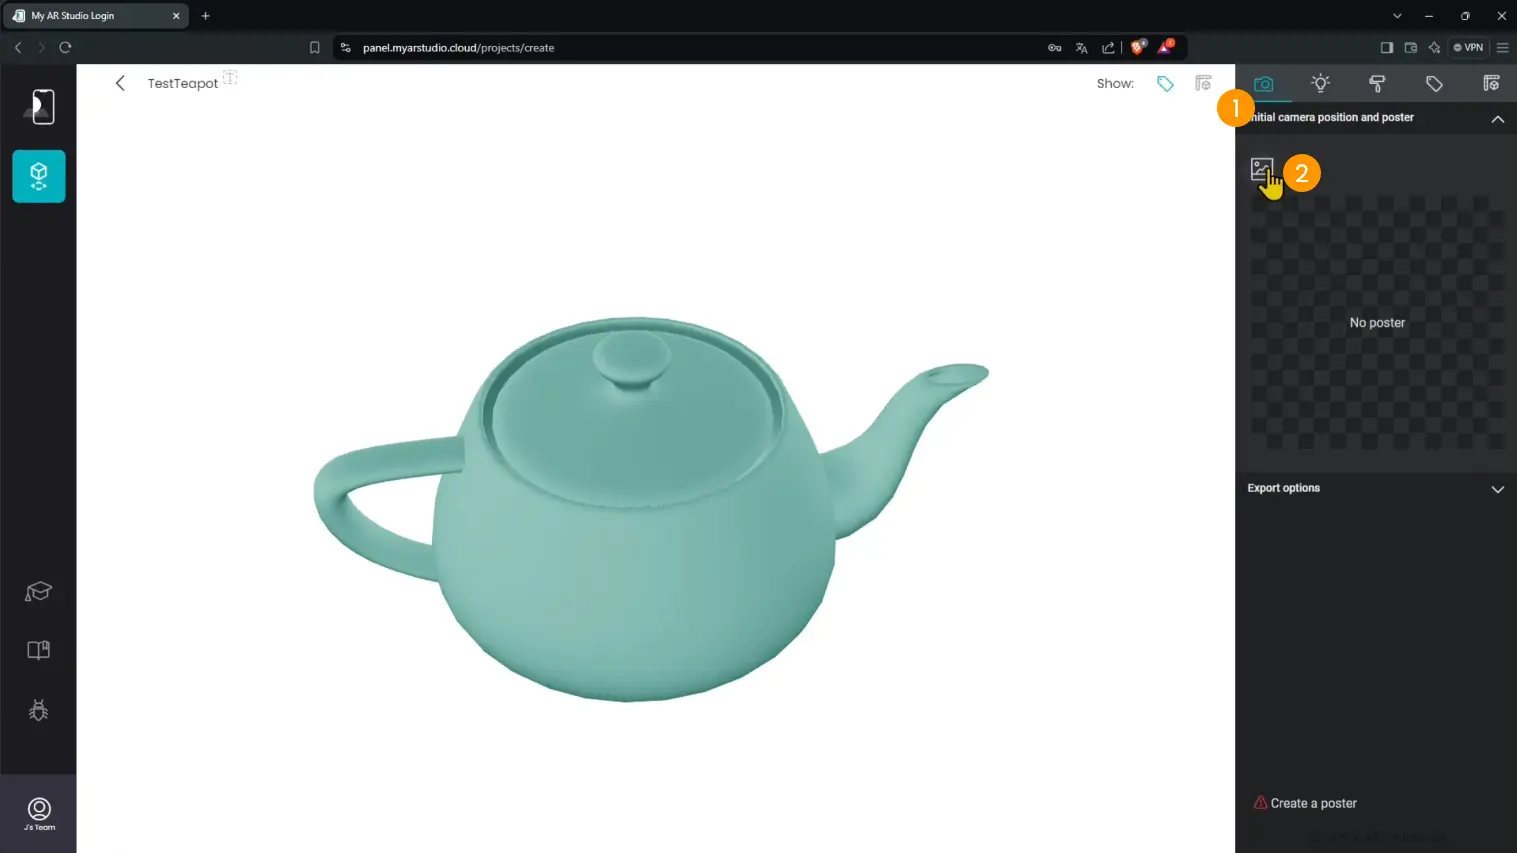
Click and drag to adjust the object's orientation 1, zoom in/out, and pan the view.
Once satisfied, click Generate Poster 2.
Then click Save and Publish 3.
My AR Studio will convert your file for AR. This takes just a few seconds.
Sharing and Viewing in AR
Your project is now published and ready to share:
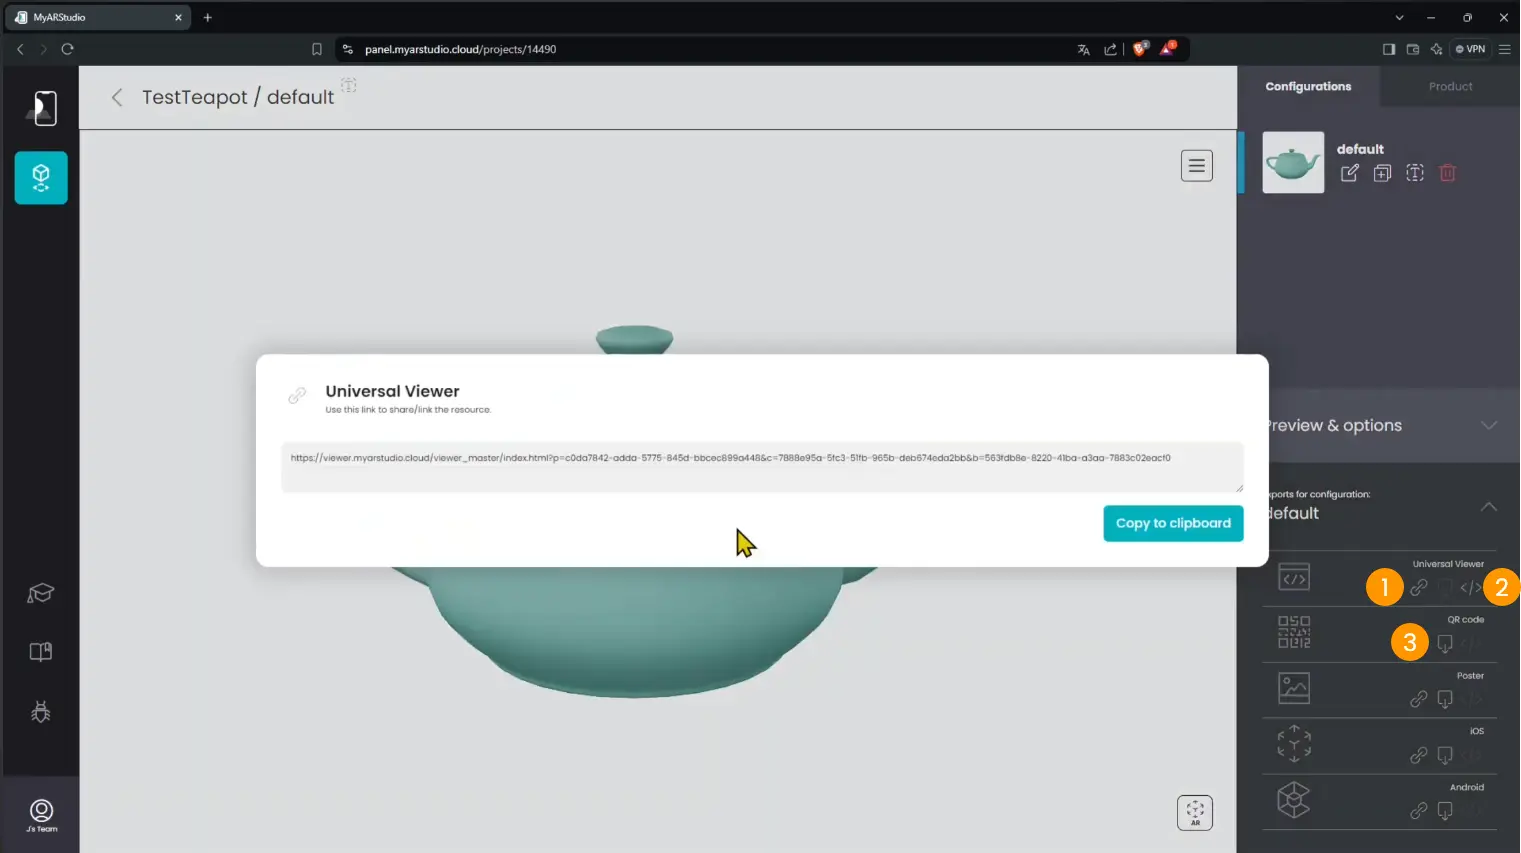
- You can copy the link and share it 1.
- You can embed it on a website using iframe code 2.
- Or generate a QR Code for quick smartphone access 3.
To view the model in AR:
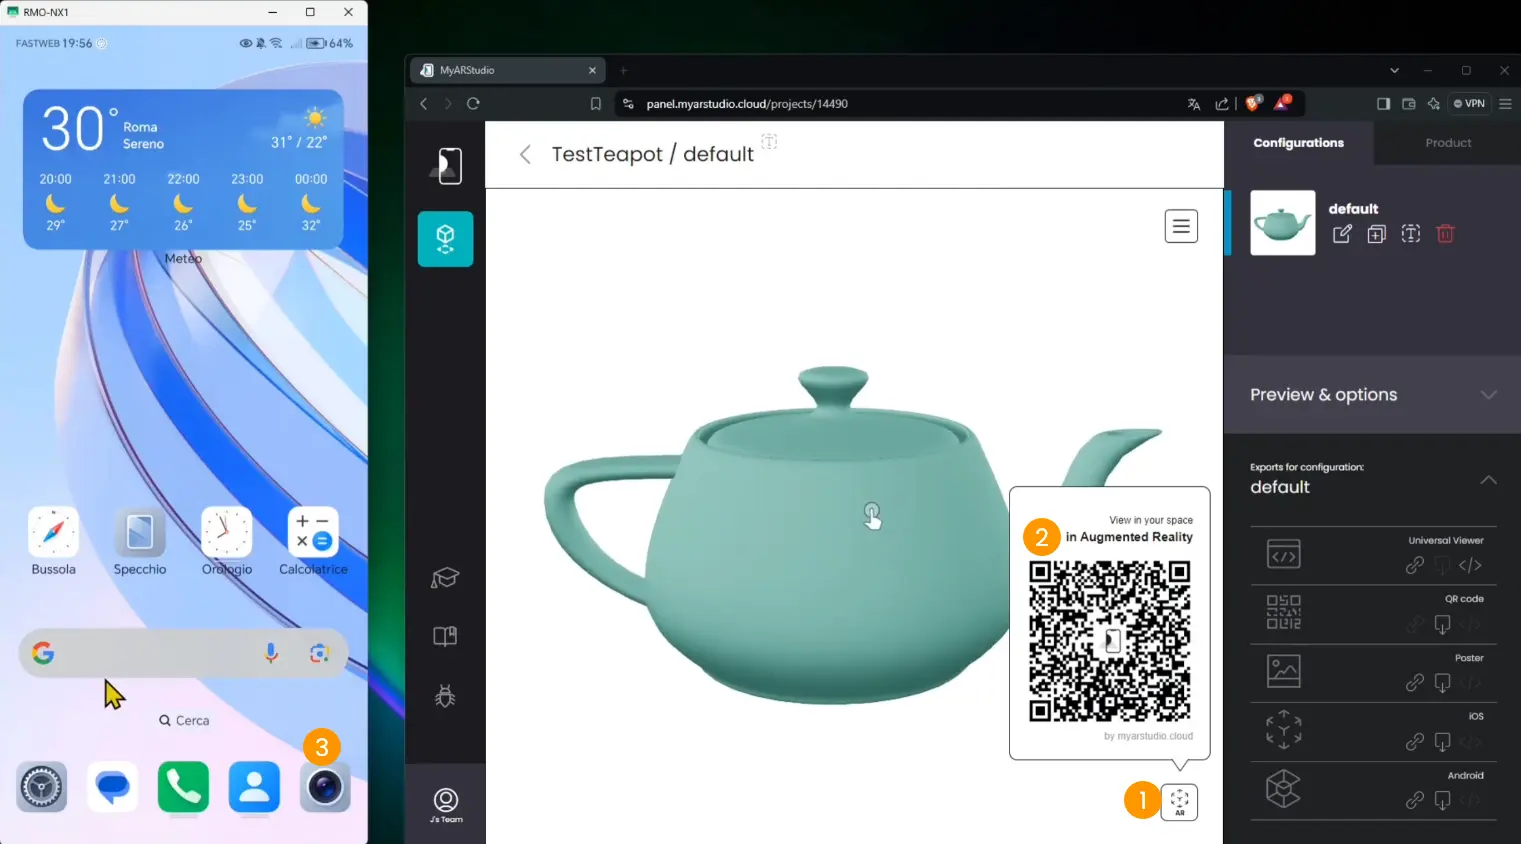
Click the AR button at the bottom right 1. A popup with a QR code will appear 2.
Grab your phone and open the camera 3.
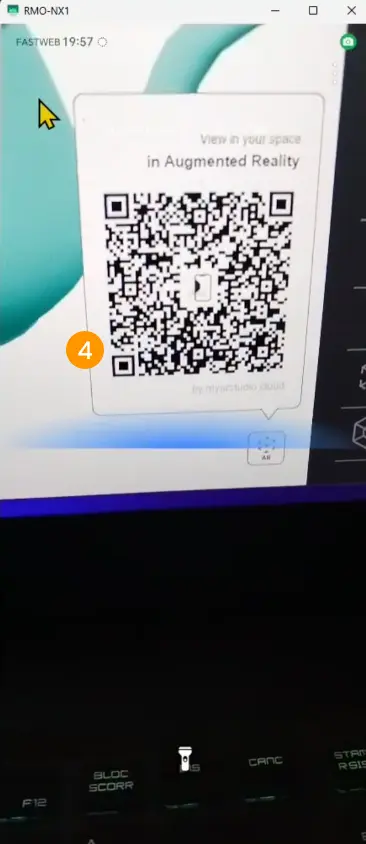
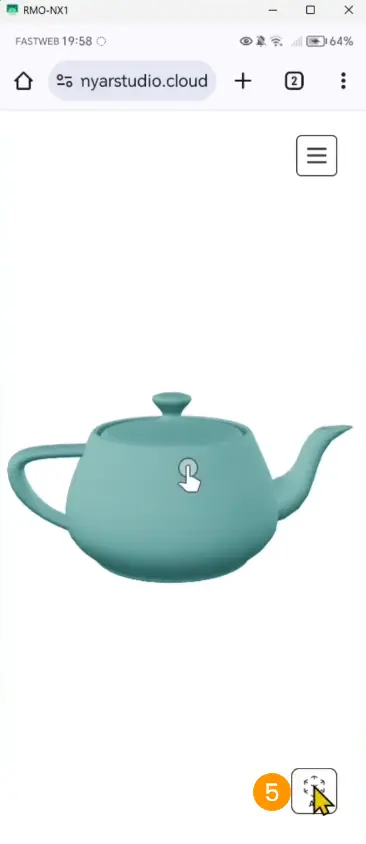
Your smartphone will read the QR code and open the web-based 3D viewer 4.
Click the AR button 5 to enter Augmented Reality.
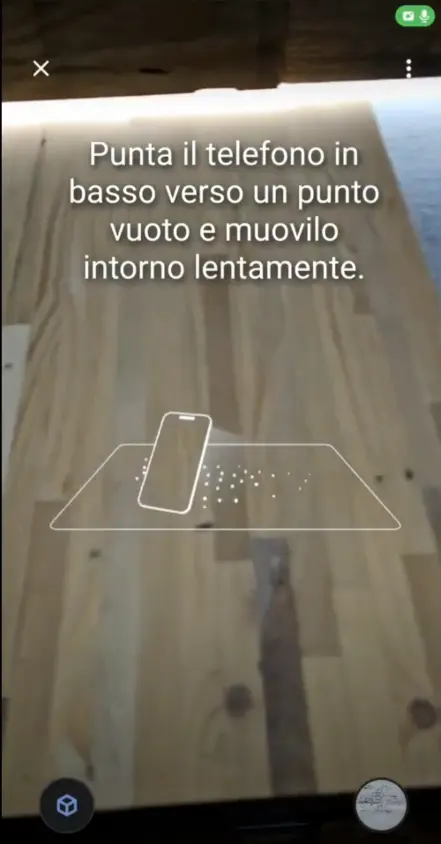
Move your device slightly to detect a flat surface.
Your object will appear in the real space.
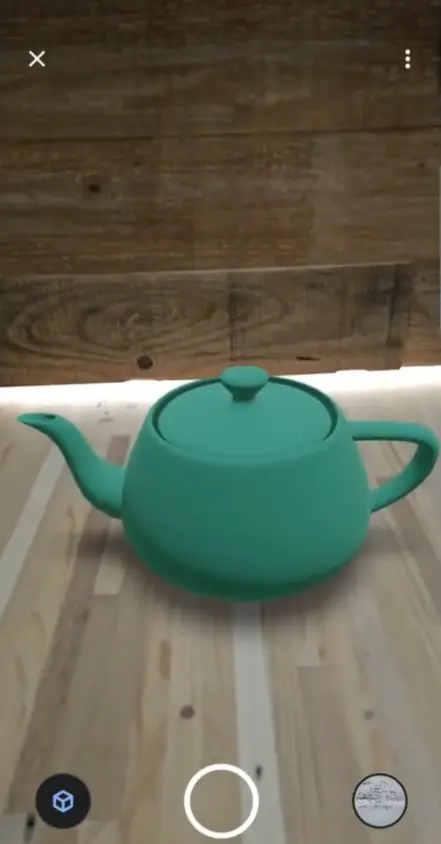
You can also tap to move it, rotate with two fingers, or scale it by pinching.
Just make sure you're in a well-lit environment with a visible flat surface (a table, the floor, etc.).
And that's it: your 3ds Max model is now fully viewable in augmented reality with My AR Studio!