How to take photos
Transforming a physical object into a high-fidelity 3D model has never been easier. With My AR Studio, you can digitize a shoe (or any other object) using an optimized workflow based on photogrammetry and our Object Capture module. This guide will walk you through each step, from preparing your workspace to exporting the model in GLB or USDZ formats, ready for augmented reality or integration into 3D software like Blender or 3DS Max.
Required Tools
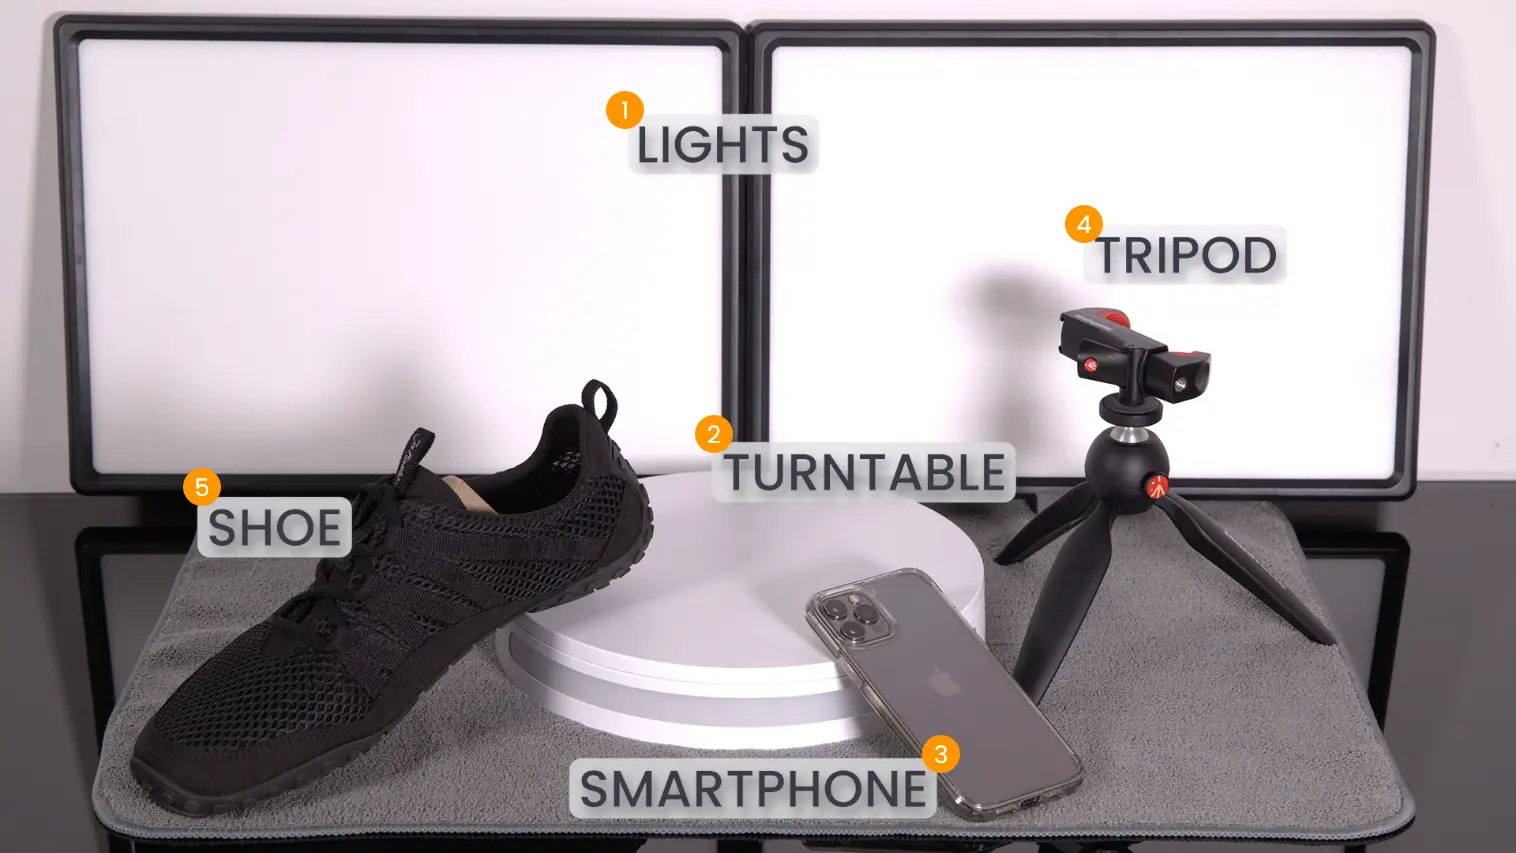
To achieve professional results and minimize errors during photogrammetry, make sure you have the following tools:
- Diffused lighting to eliminate shadows and reflections 1.
- Motorized turntable (app-controlled), optional but recommended 2.
- Smartphone with at least a 12-megapixel camera or DSLR 3.
- Stable tripod 4.
- Object to capture (e.g., a shoe) 5.
- Object Capture in My AR Studio.
Workspace Setup
A well-organized workspace is the foundation for successful capture:
- Place the object at the center of the turntable 1 to ensure smooth rotation.
- Avoid reflective materials: matte surfaces improve texture fidelity.
- Choose a neutral, controlled space away from external light sources.
Recommended setup:
- Front light angled from above (Key light) 2.
- Two symmetrical side lights at 80°-90° to balance shadows (Fill light) 3.
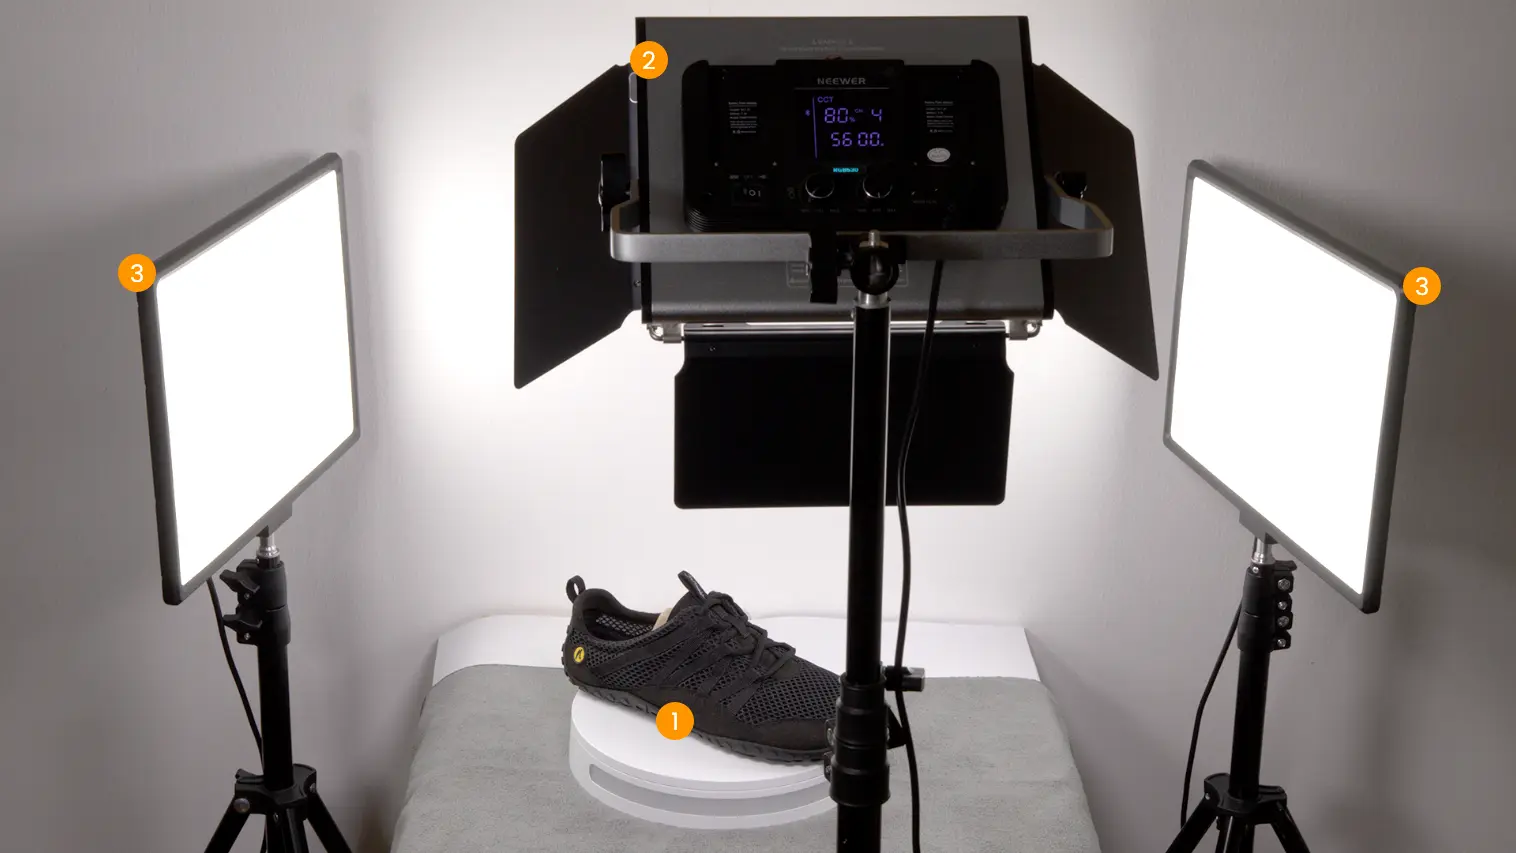
Photo Capture
To obtain an accurate 3D model, it's essential to take a series of well-aligned and evenly distributed photos around the object.
Recommended Settings
- Image resolution: 3024 x 3024 pixels
- Number of shots per rotation: 36
Ensure each photo is sharp, well-lit, and taken from consistent angles to guarantee precise reconstruction during model processing.
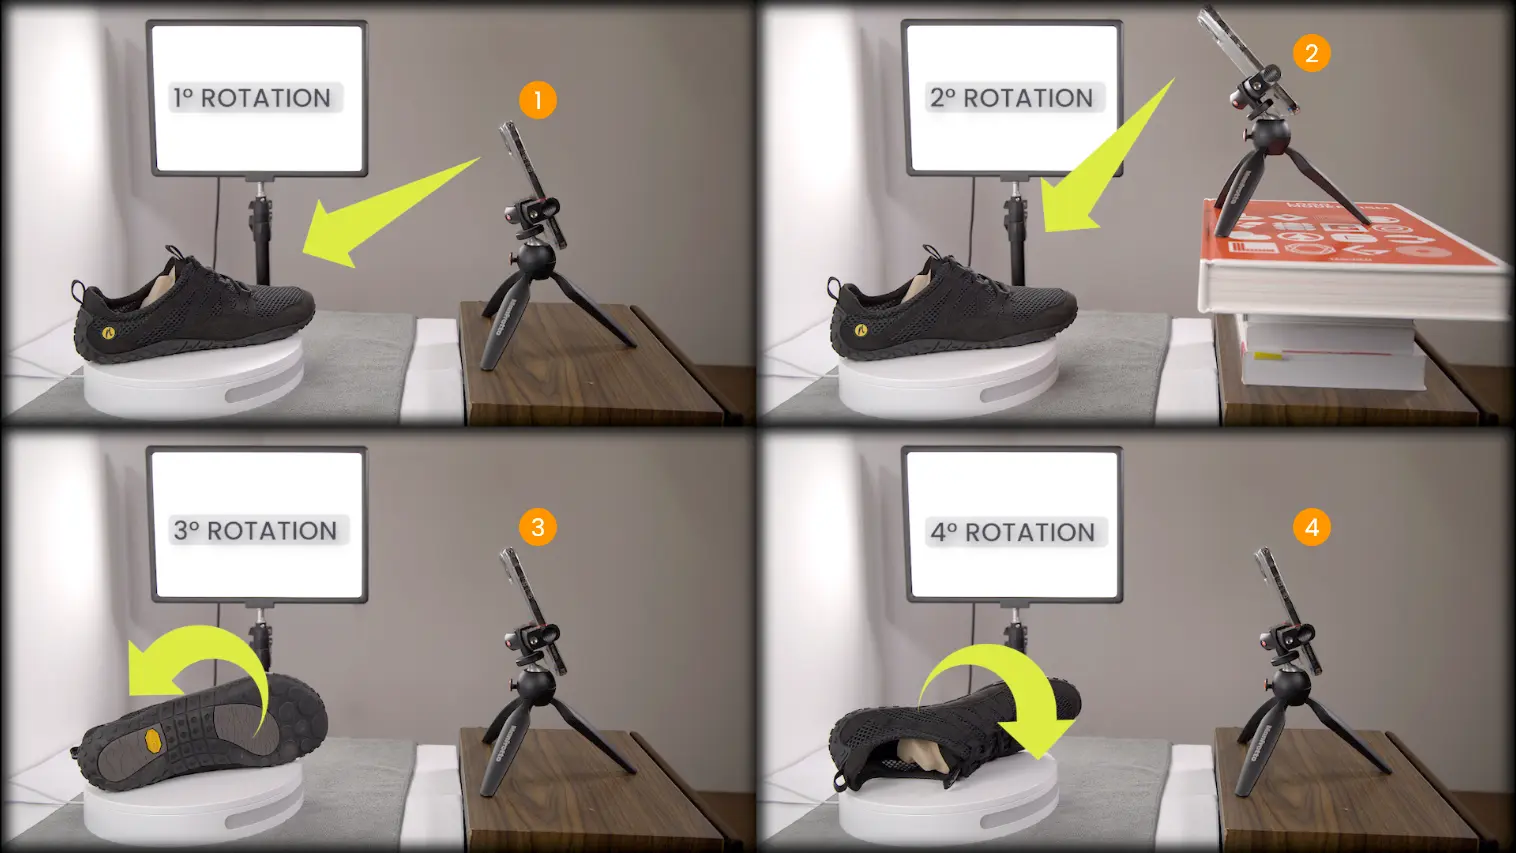
Suggested Workflow
- First rotation 1: smartphone level with the object, 36 shots.
- Second rotation 2: raise the smartphone about 20 cm, another 36 shots.
- Third 3 and fourth rotation 4: rotate the object 90° on both sides and repeat the process.
Extra Tips
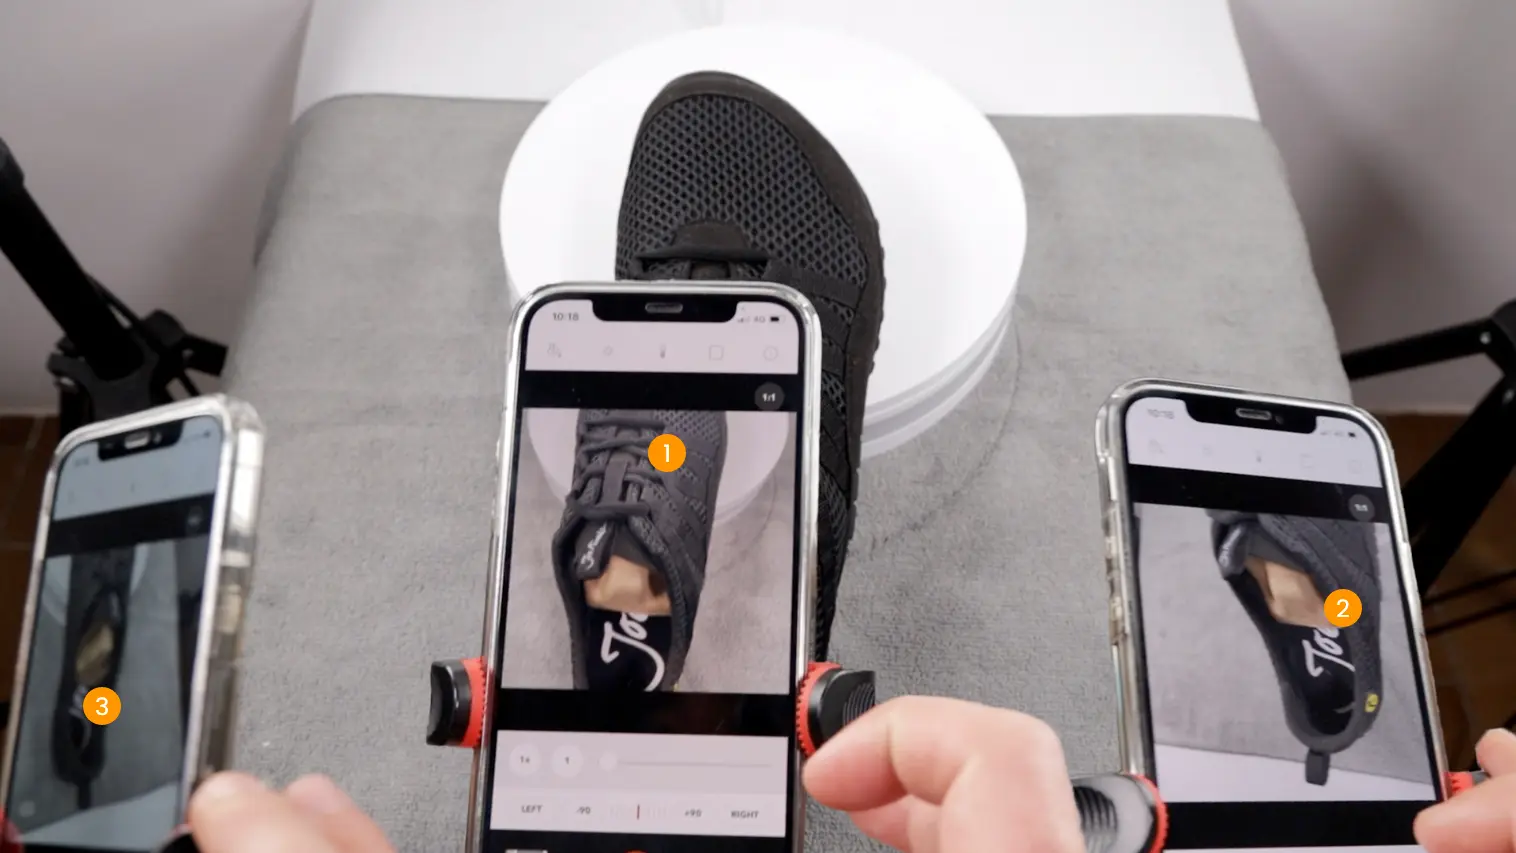
- Capture significant details (e.g., laces 1, stitching 2, interiors 3).
- Take a total of 140-160 photos to achieve a high-definition mesh.
Importing Images
- Transfer the photos to your computer (via AirDrop, cable, etc.) 1.
- Rename and organize the images in a dedicated folder 2.
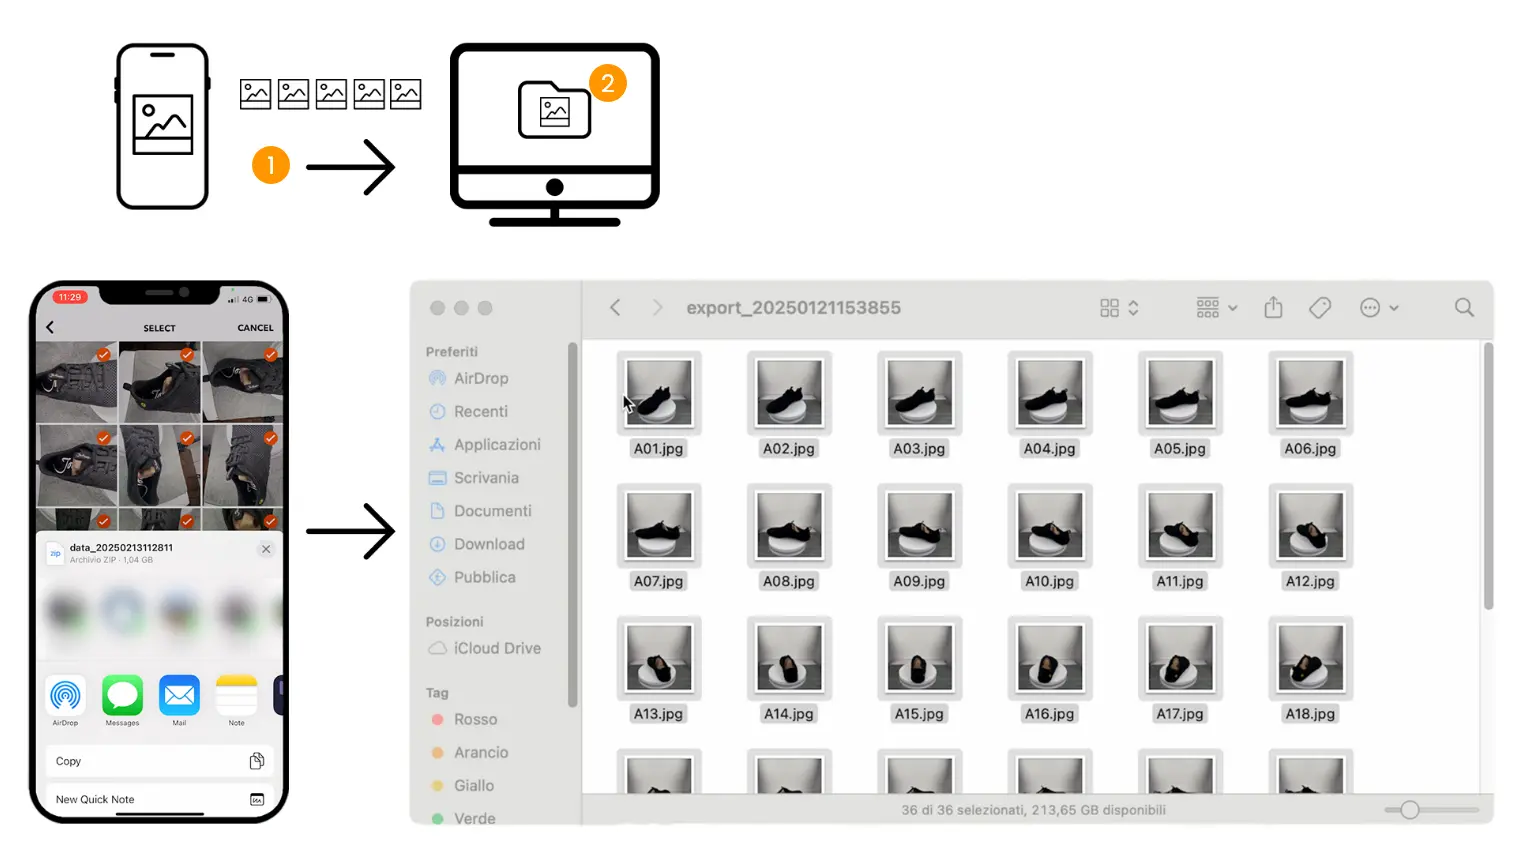
You are now ready to upload the photos into My AR Studio and capture your object!