How to fix 3D Models
This guide explains how to easily fix defects that may appear in 3D models generated with My AR Studio's Object Capture. Sometimes the mesh may have small imperfections. Let's see how to fix them without rebuilding the model from scratch, following a step-by-step cleaning and refinement process in Blender and Photoshop, through three practical examples.
Exporting the Model from My AR Studio
To export a model:
- Log in to My AR Studio.
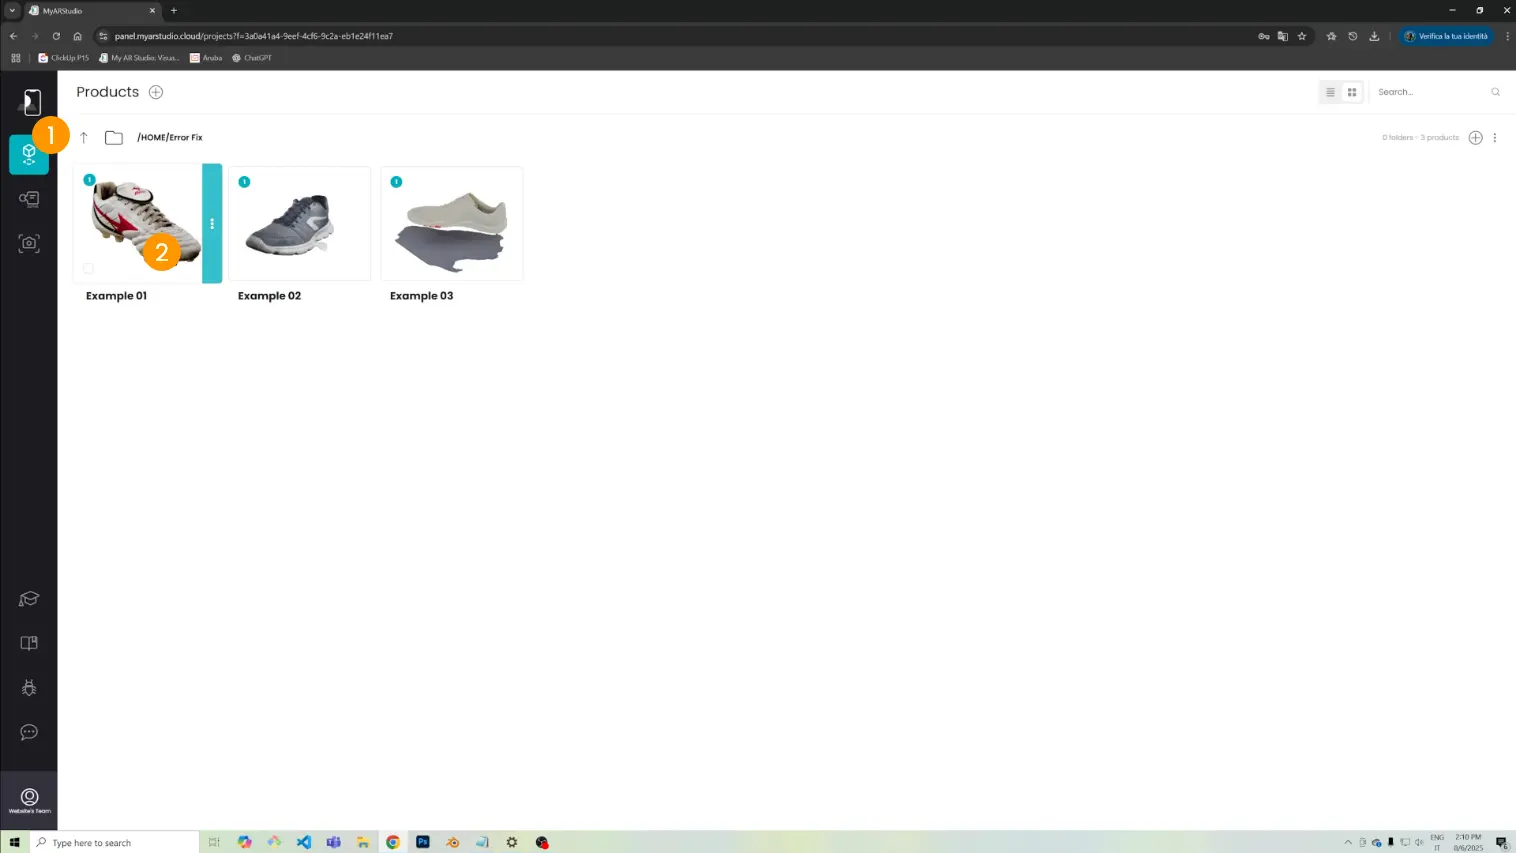
- Go to the Products page 1.
- Open the desired product 2.
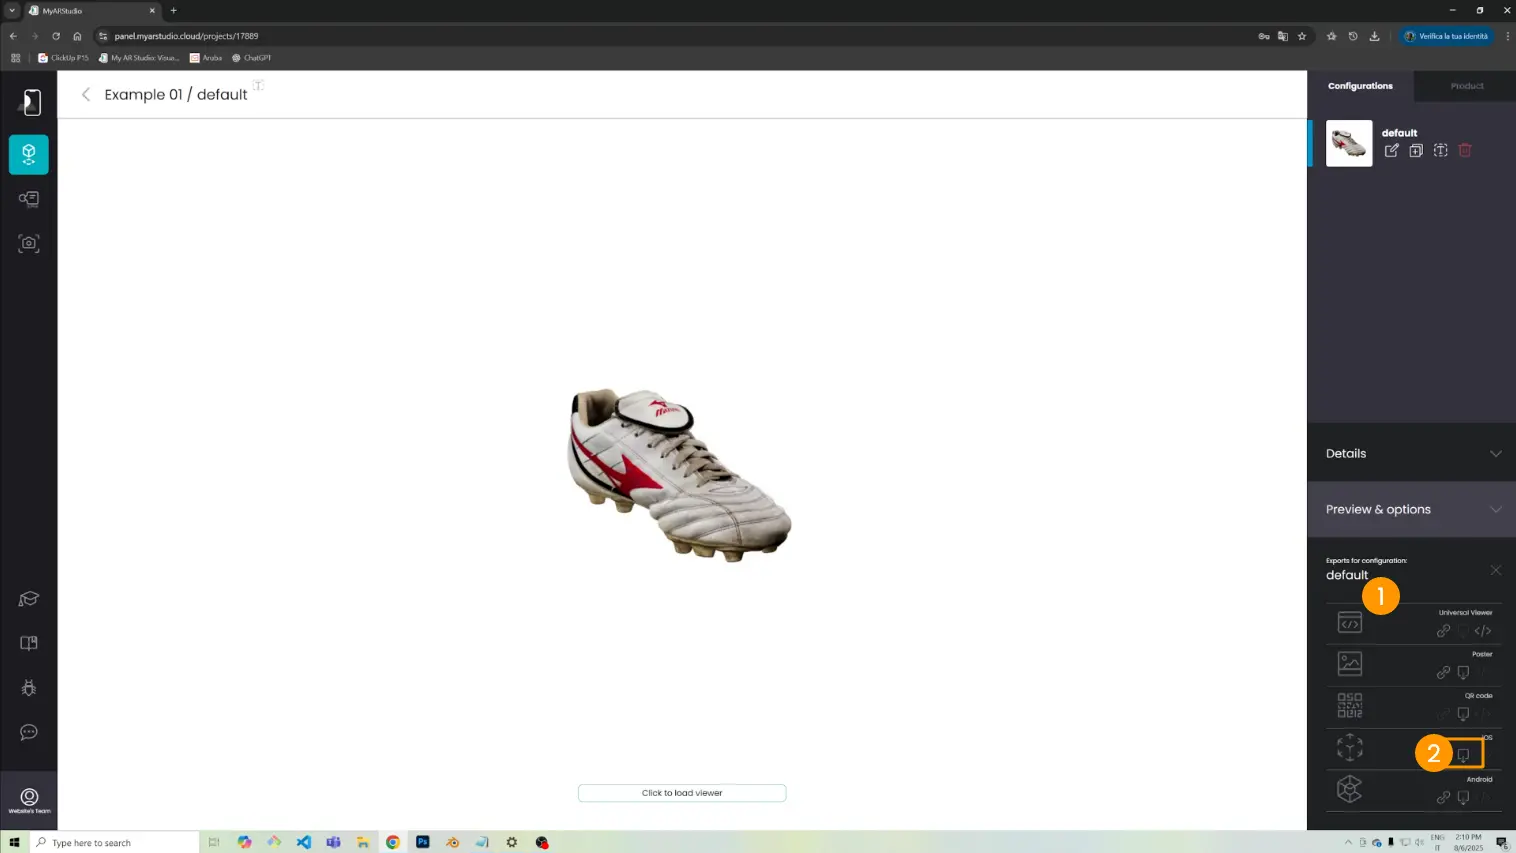
In the lower right corner, under Export for configuration 1, download the file in .glb format by clicking the download icon 2.
Importing the Model into Blender
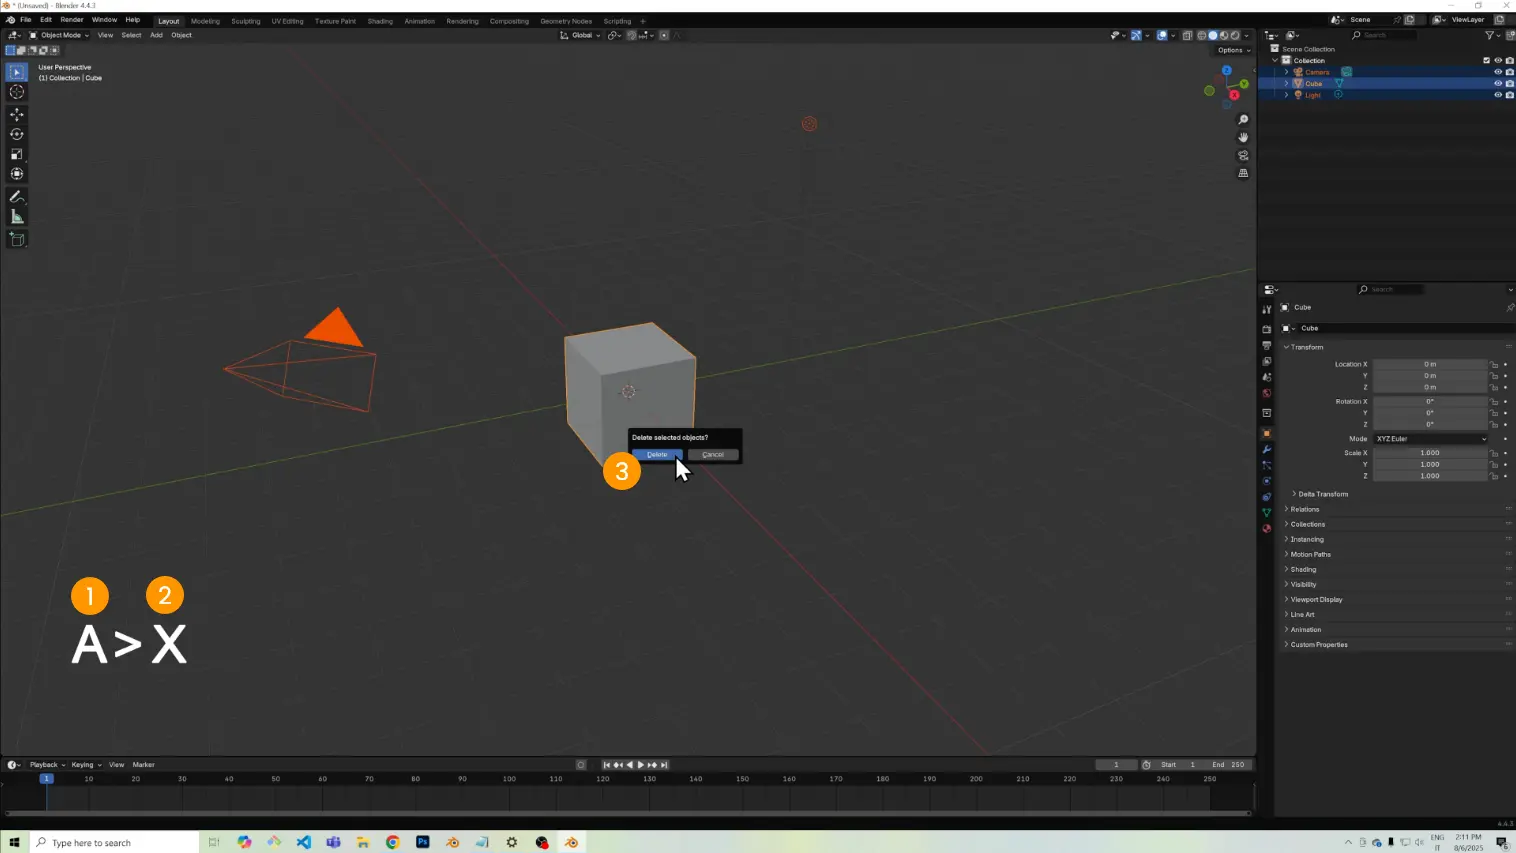
Open Blender. To start with a clean scene:
- Press A 1 to select all objects.
- Press X 2.
- Confirm with Delete 3.
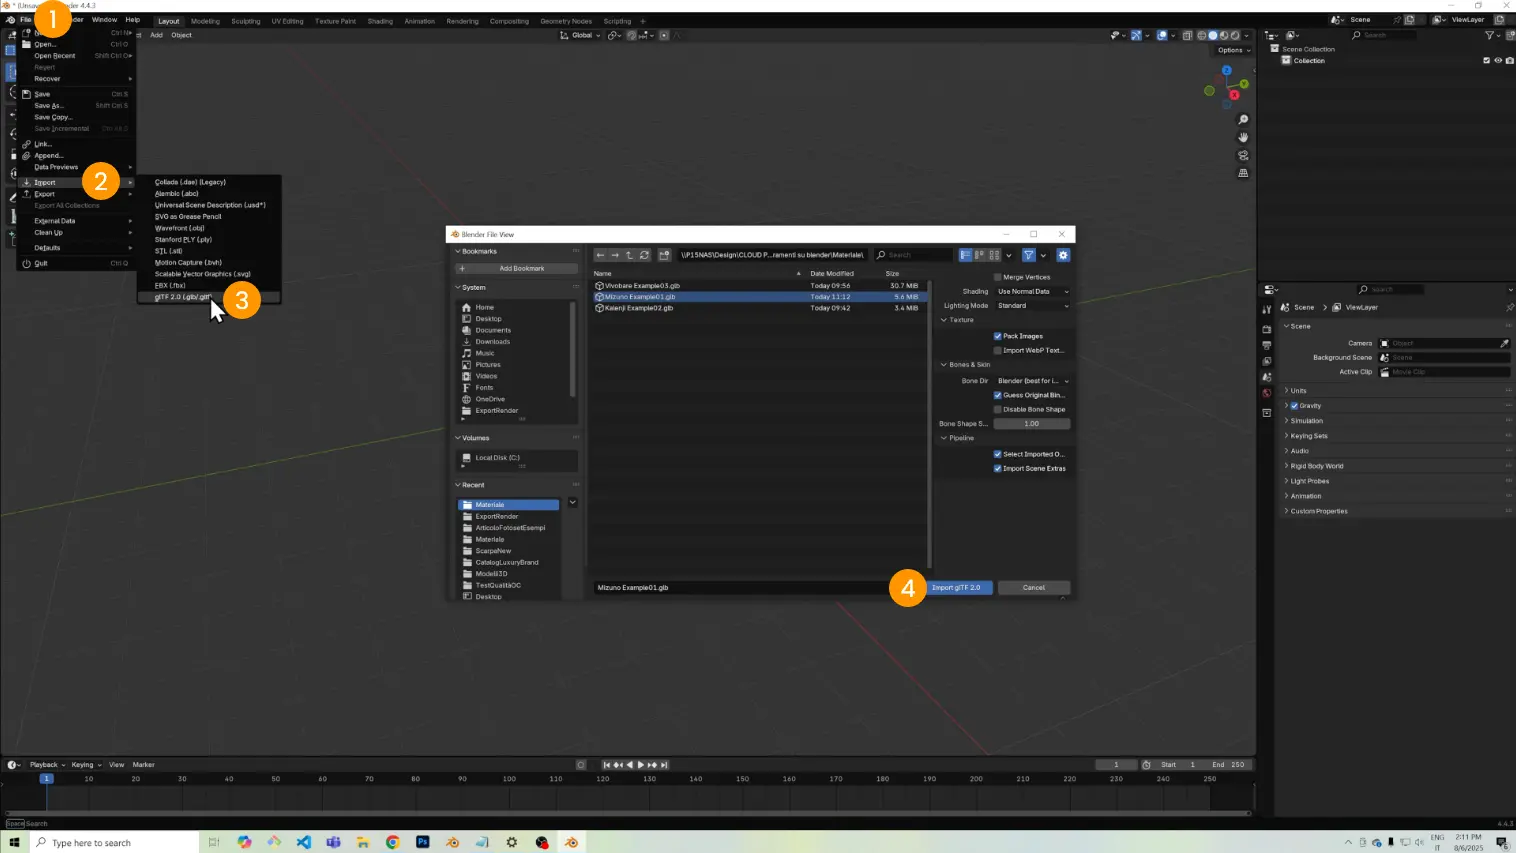
- Go to File 1 > Import 2 > glTF 2.0 (.glb) 3.
- Select the file downloaded from My AR Studio and click Import 4.
Fix Case n°1 - Small Bumps and Texture Retouching
In this example, the model has small bumps on the inner side.
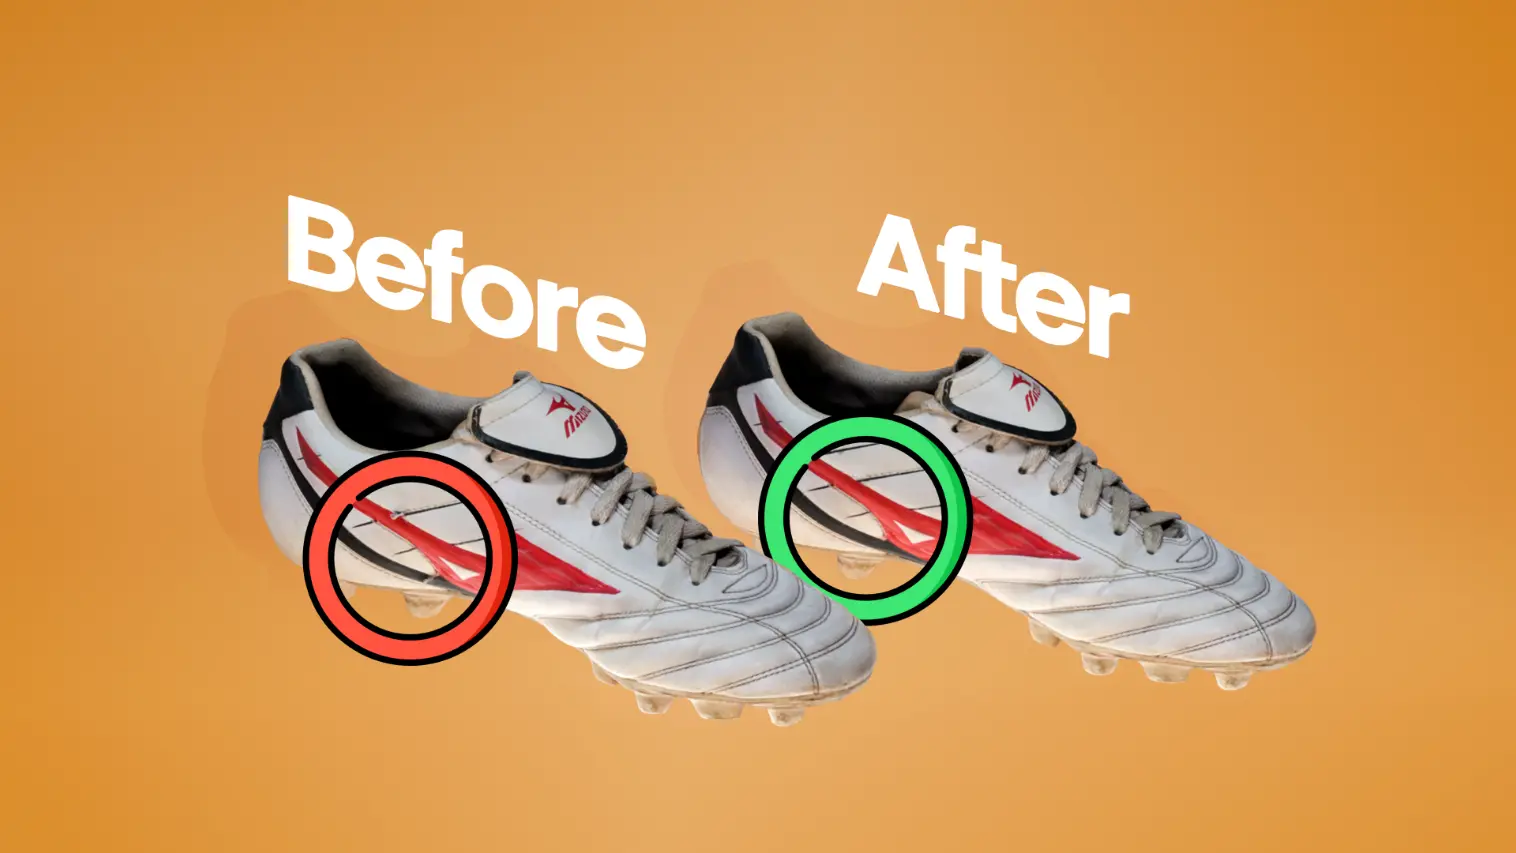
Remove the Bumps
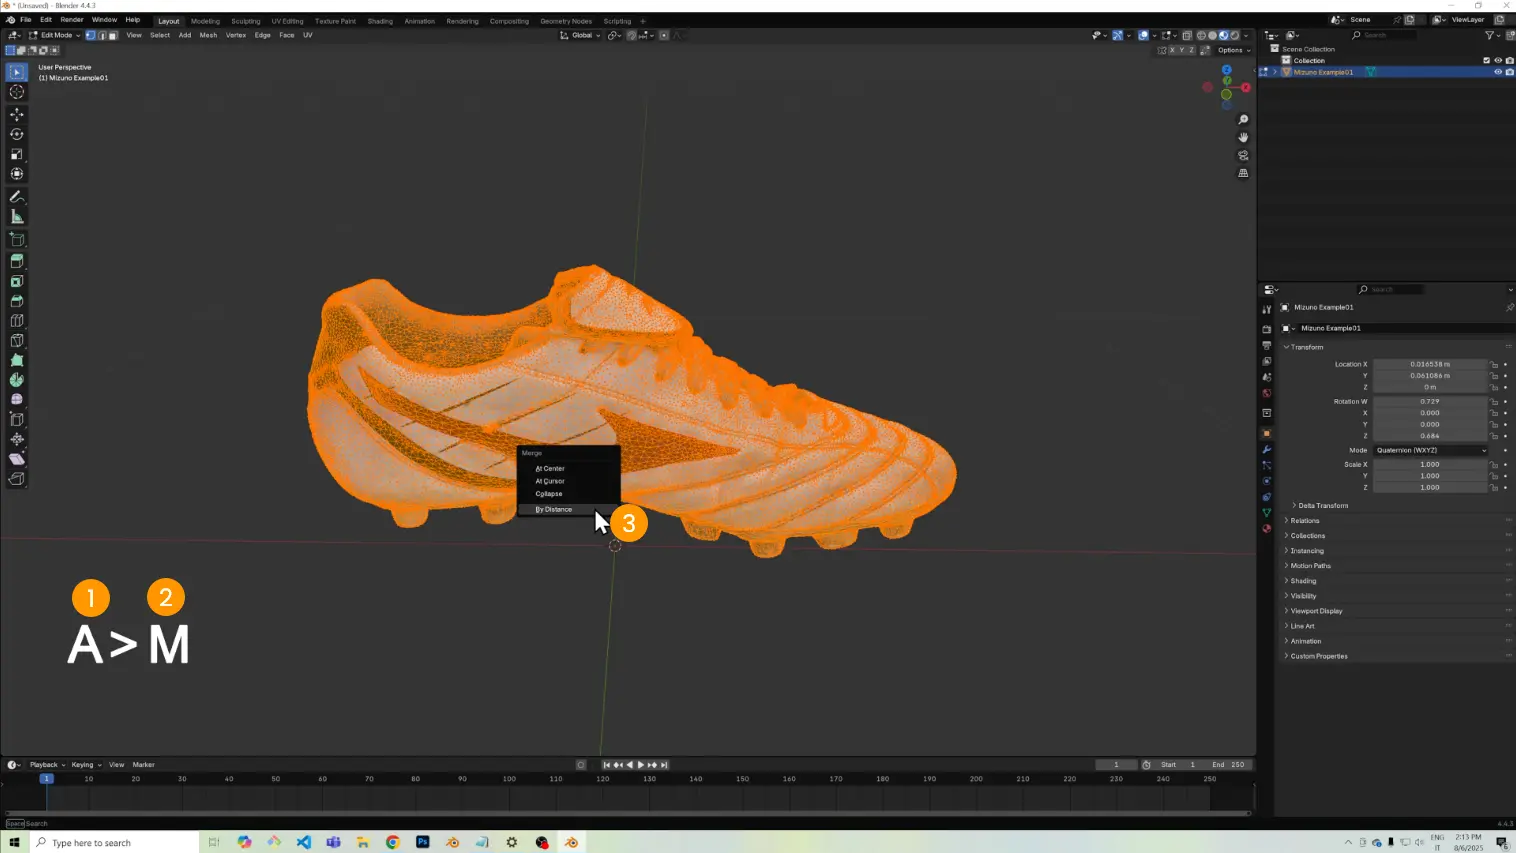
To start, select the shoe and run a Merge by Distance to merge overlapping vertices:
- Select the model.
- Press Tab to enter Edit Mode.
- Press A 1 to select the entire mesh.
- Press M 2 and choose By Distance 3.
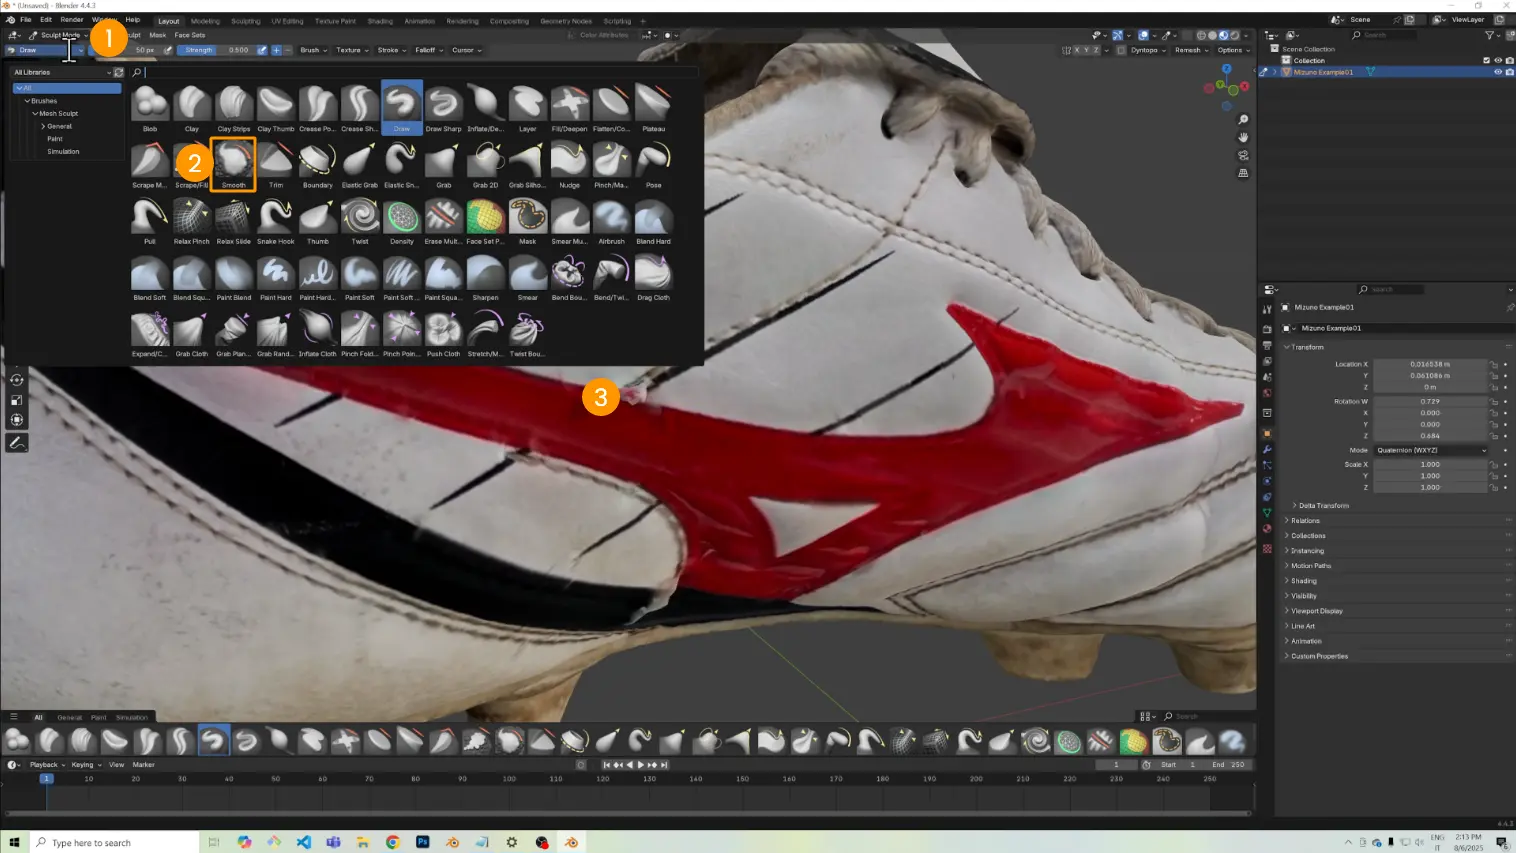
Switch to Sculpt Mode 1, select the Smooth brush 2, and gently brush over the affected area 3.
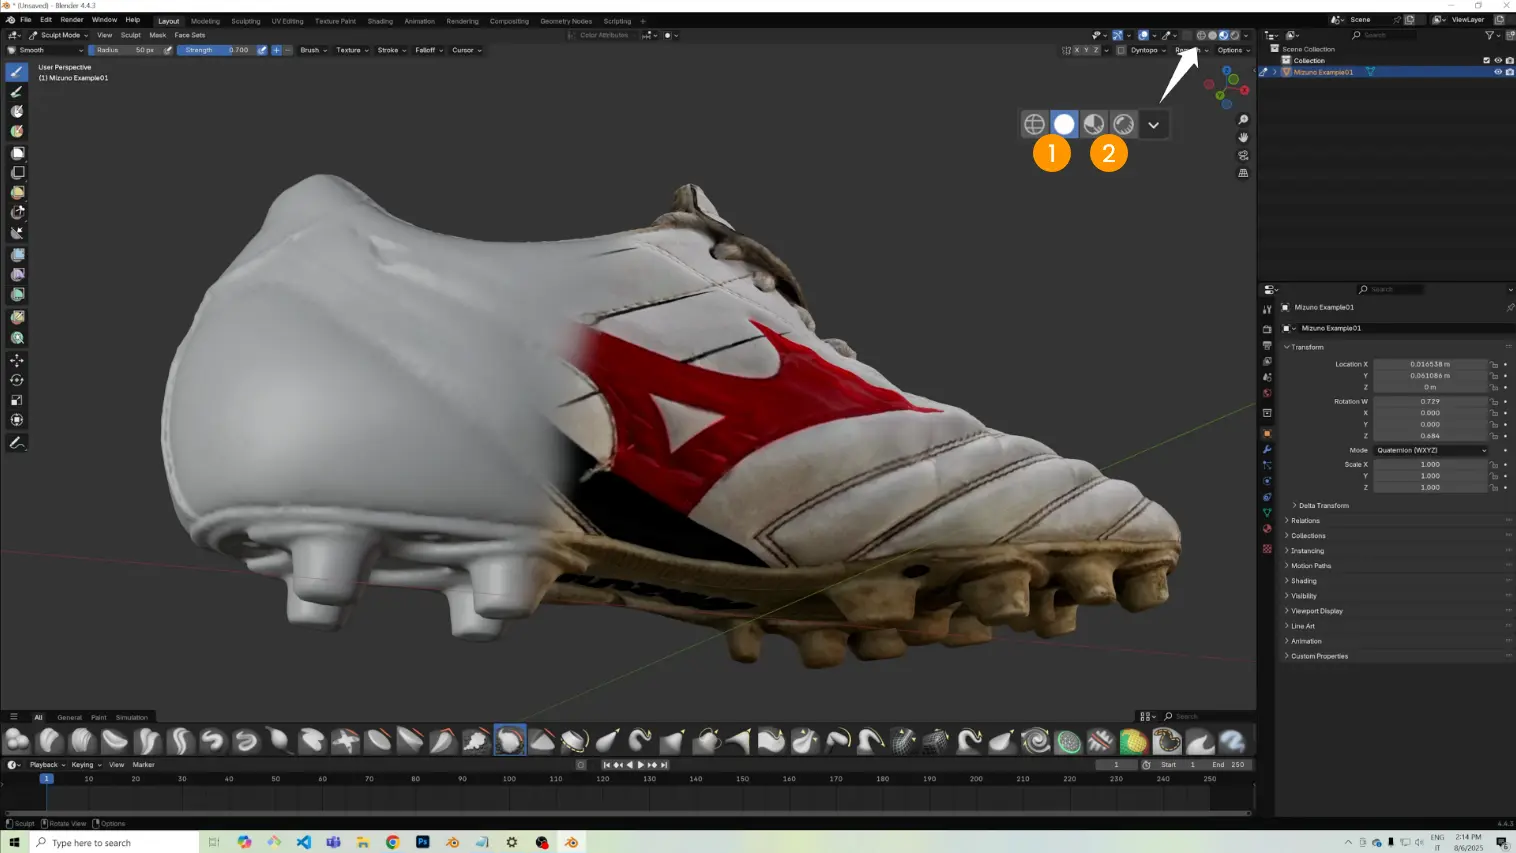
Retouch the Texture
Switch from Solid 1 view to Material Preview 2 (icon at the top right).
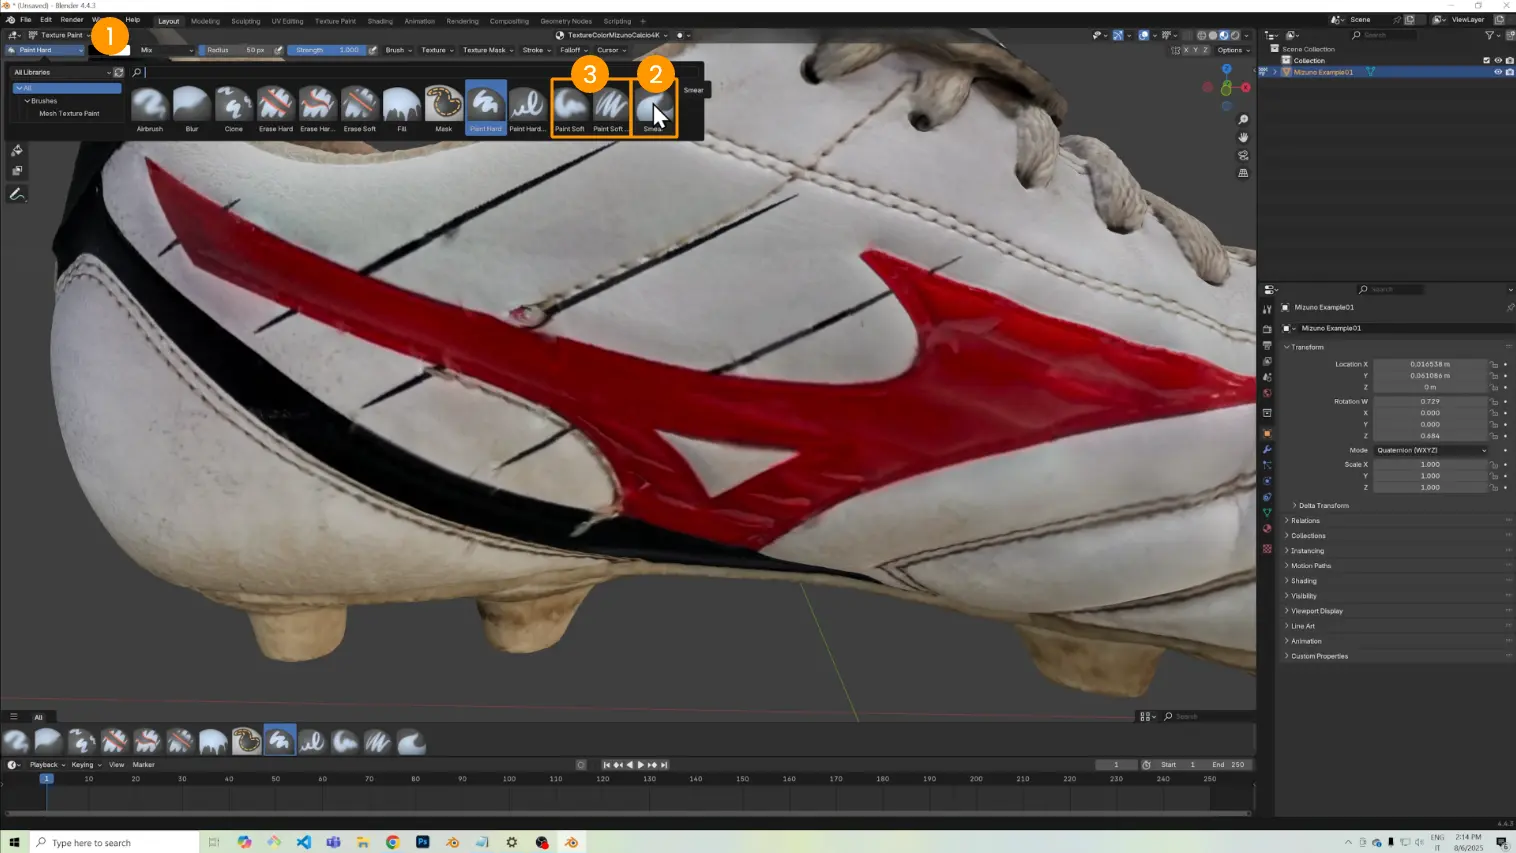
Go to Texture Paint 1.
Use the Smear 2 and Soft Paint brushes 3 to manually fix the texture.
Export the Fixed Model
Return to Object Mode.
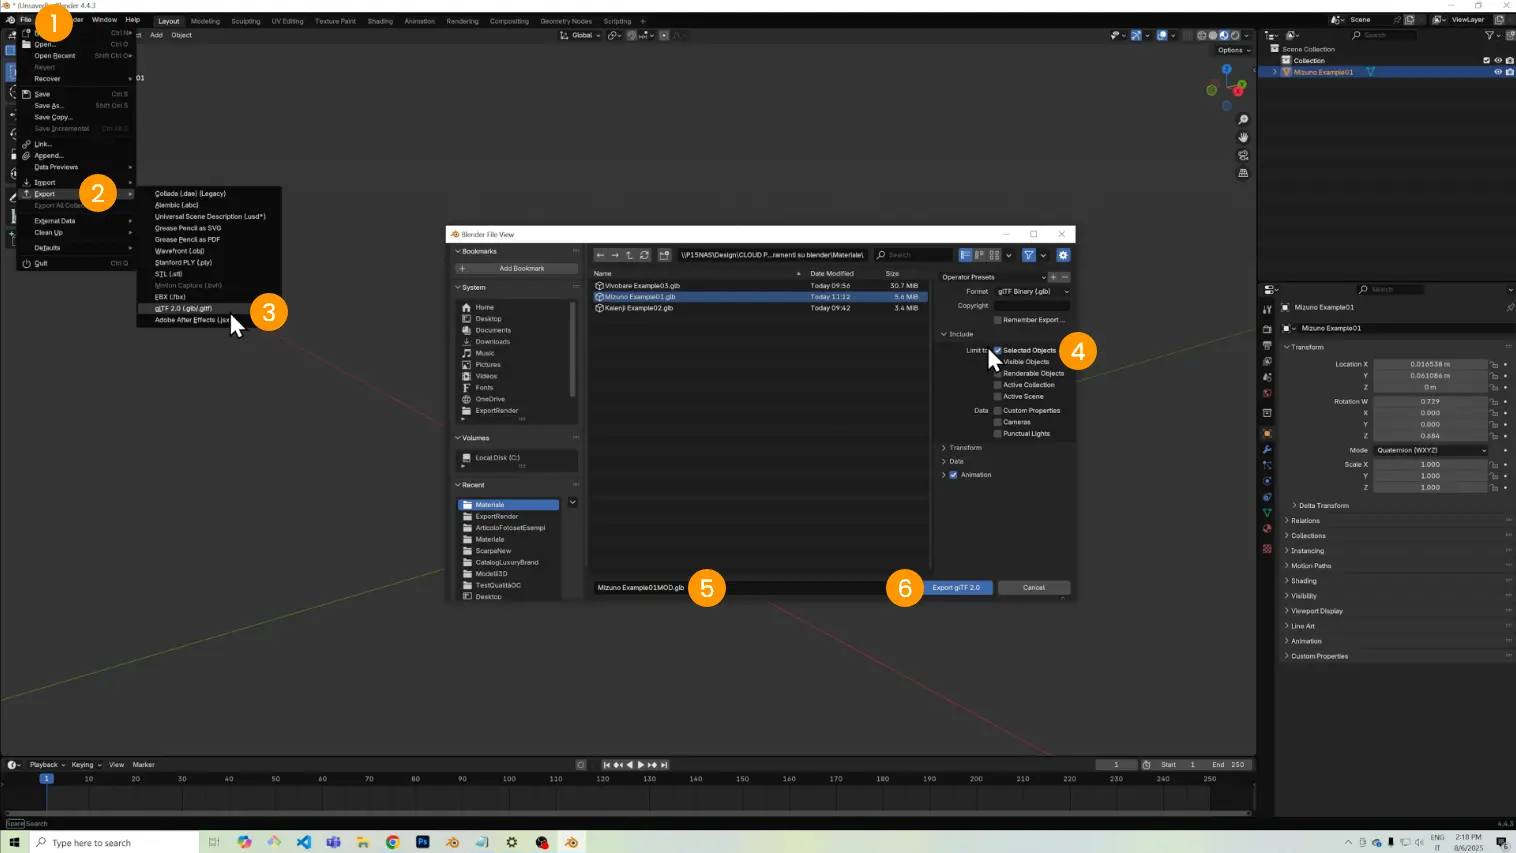
With the model selected, go to File 1 > Export 2 > glTF 2.0 3.
In the export options, select Only Selected Objects 4.
Rename the file 5 and click Export glTF 2.0 6.
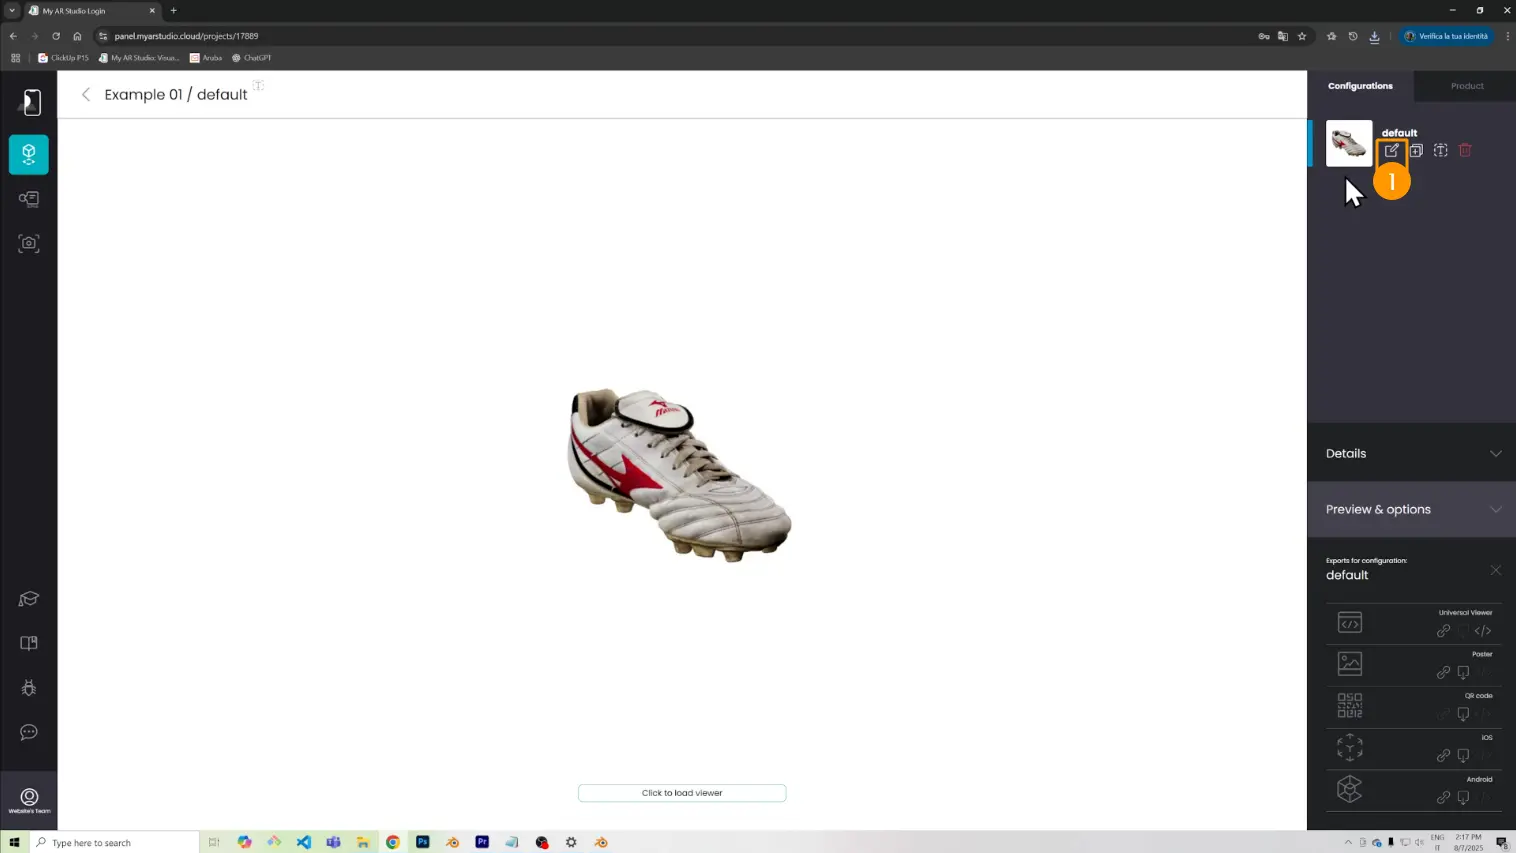
Back in My AR Studio, open the product and go to the Edit section 1.
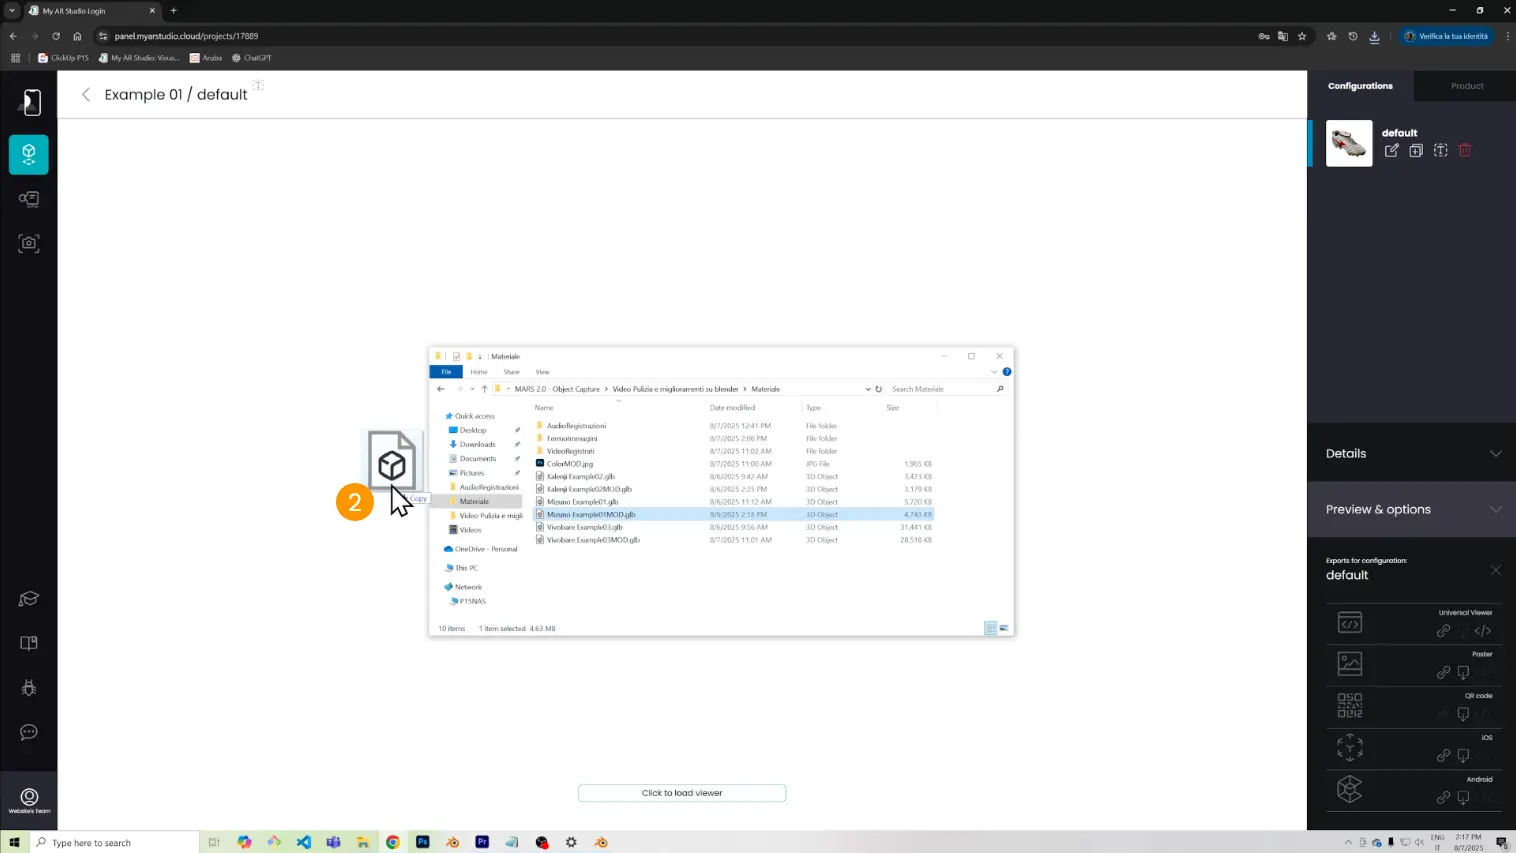
Drag and drop the new .glb file 2 to replace the old one.
Fix Case n°2 - Larger Bump
Here, the model has a more noticeable bump.
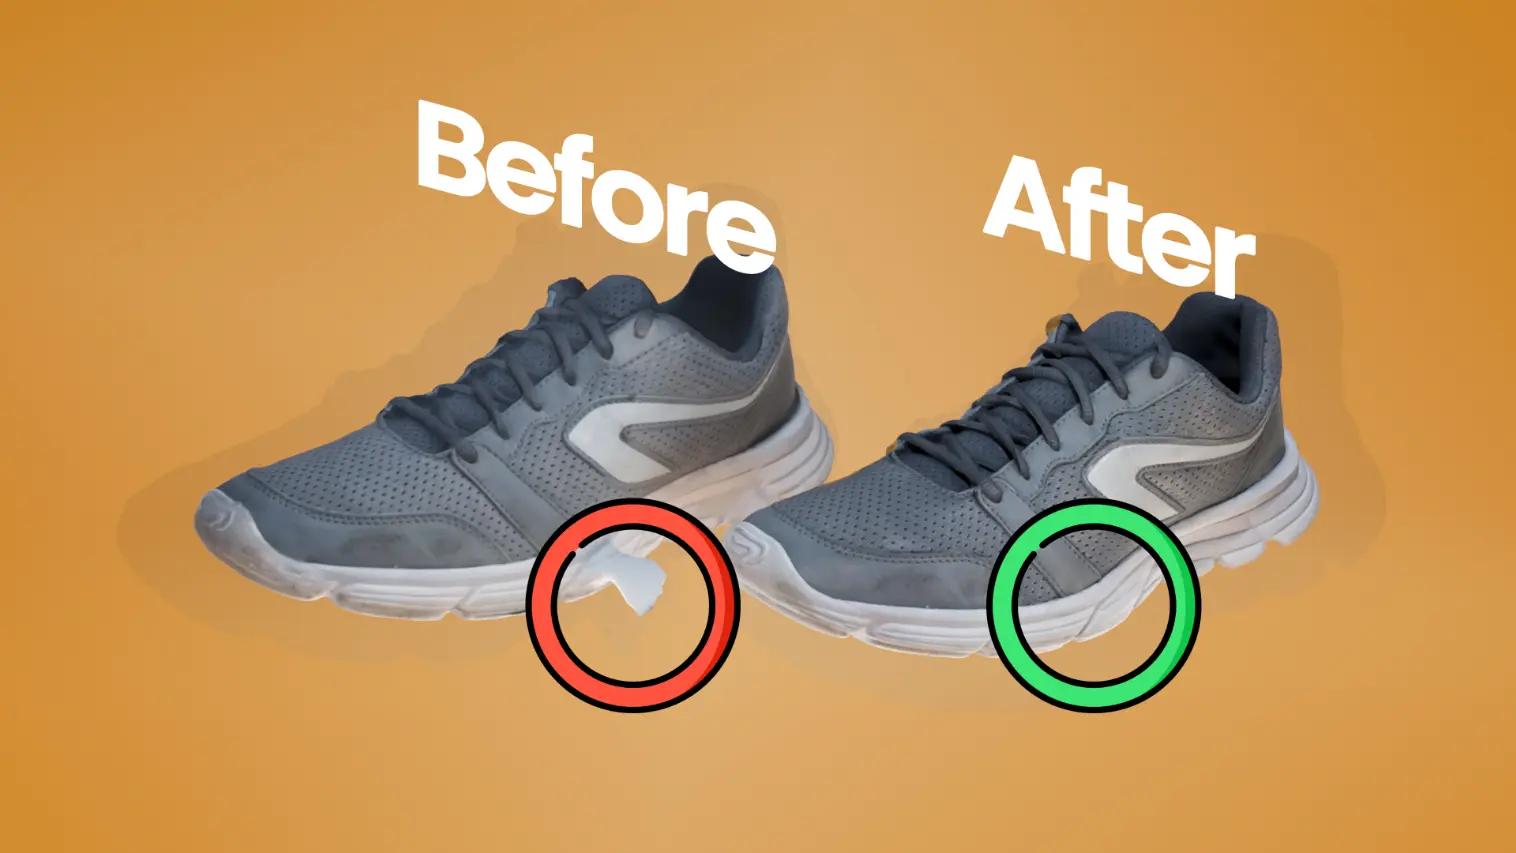
The steps to fix this model are the same as in Case n°1:
Perform a Merge by Distance, Smooth the bump in Sculpt Mode,
Retouch the area in Texture Paint with Smear and Soft Paint to even out the surface.
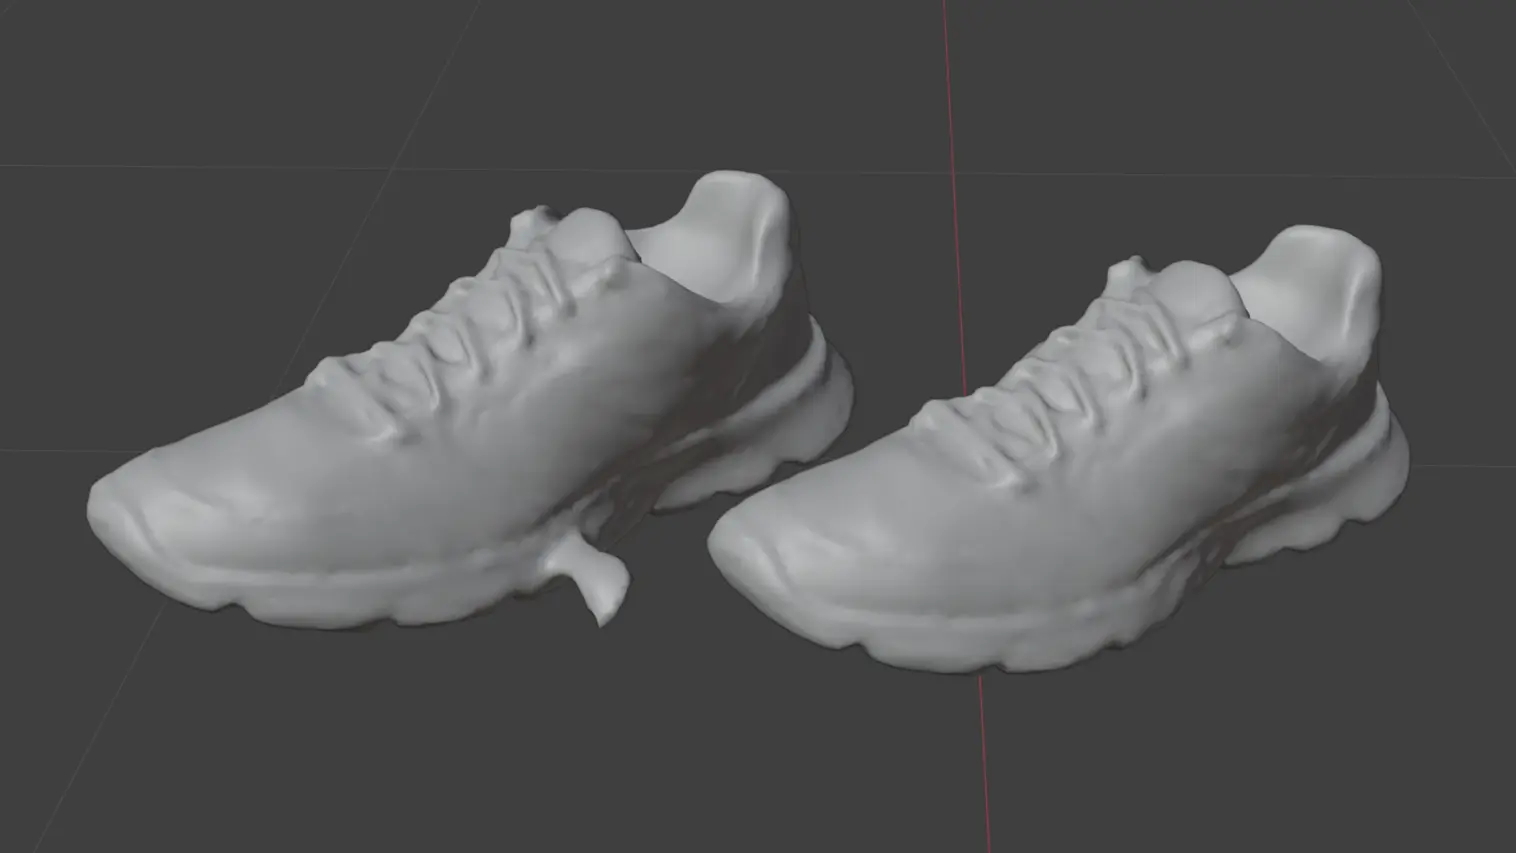
Fix Case n°3 - Removing Parts, Patching the Mesh, and Editing Textures in Photoshop
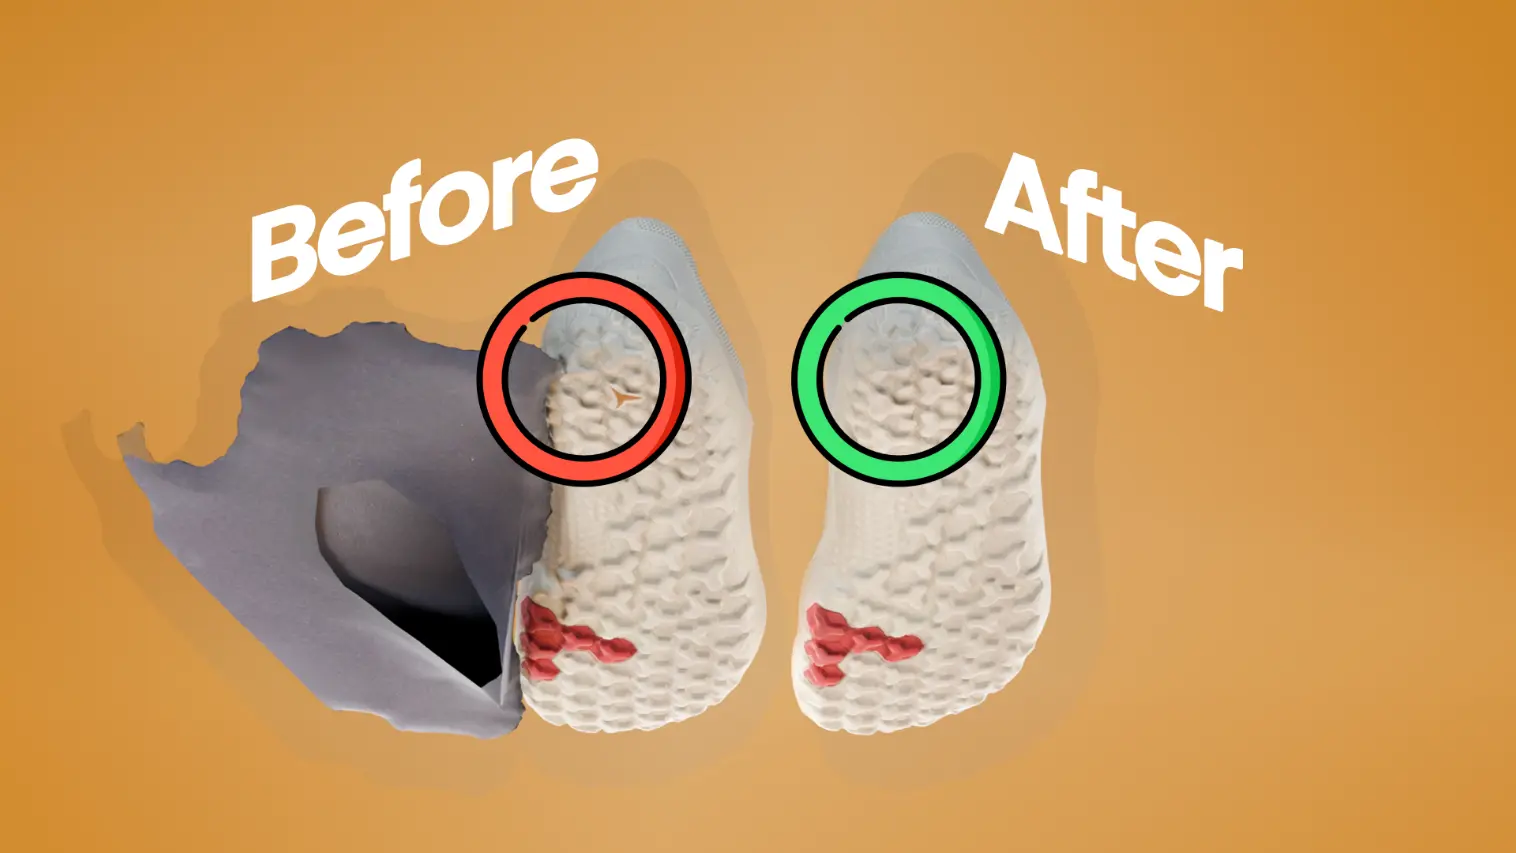
In this case, the issue is more complex: some parts of the mesh need to be removed and rebuilt.
Remove Mesh Parts
Perform Merge by Distance as before.
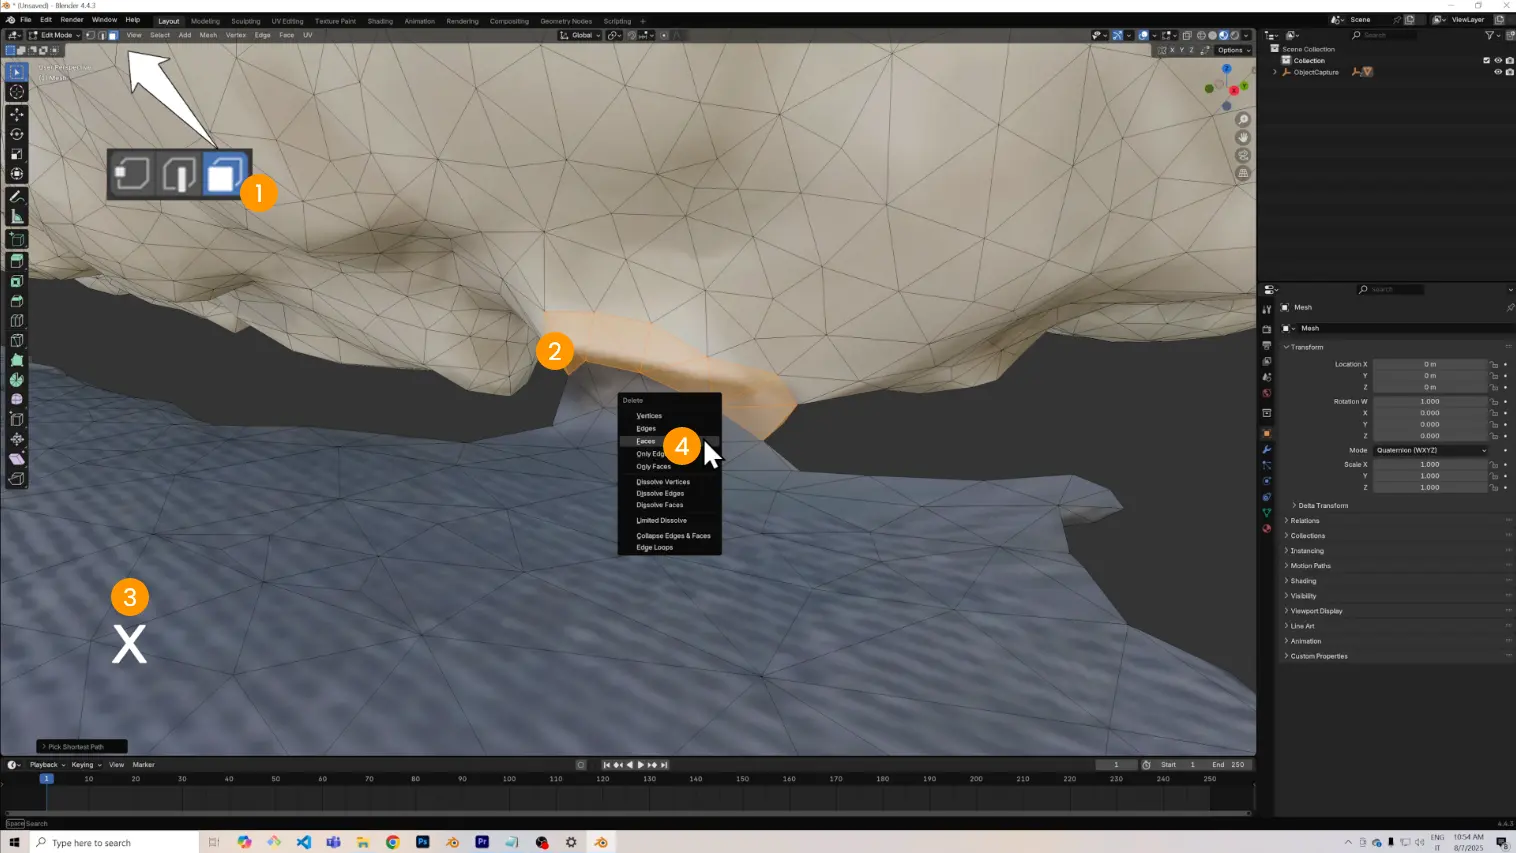
In Edit Mode:
- Switch to Face Selection Mode 1.
- Select the connection faces 2 between the part to keep and the part to delete (Shift + Click for multiple selections).
- Press X 3 > Faces 4 to delete the selected faces.
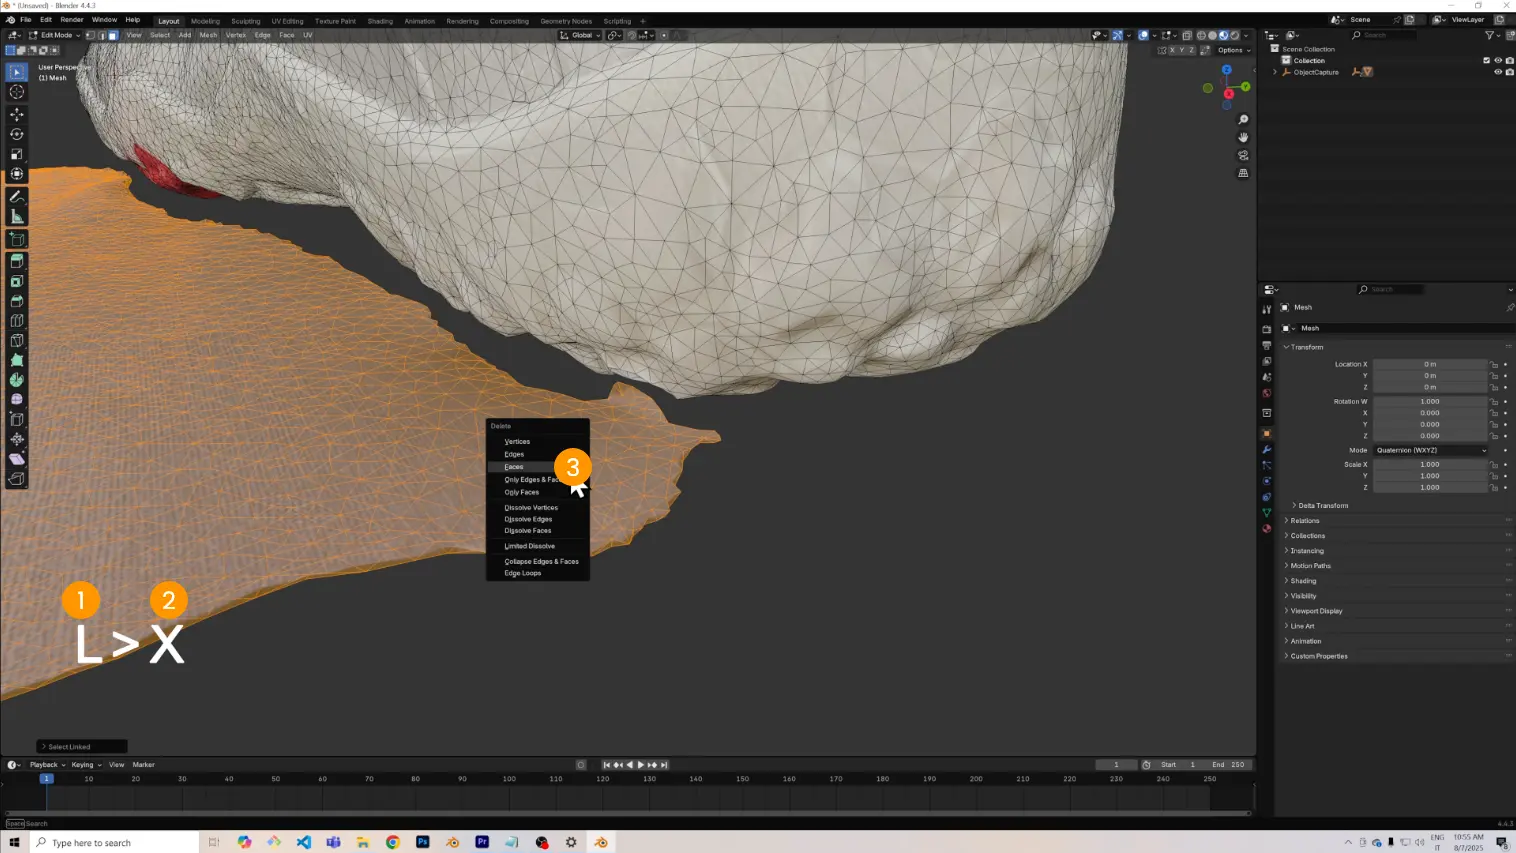
Hover the mouse over the mesh you want to delete, press L 1 to select the mesh entirely, and delete it with X 2 > Faces 3.
Close the Hole
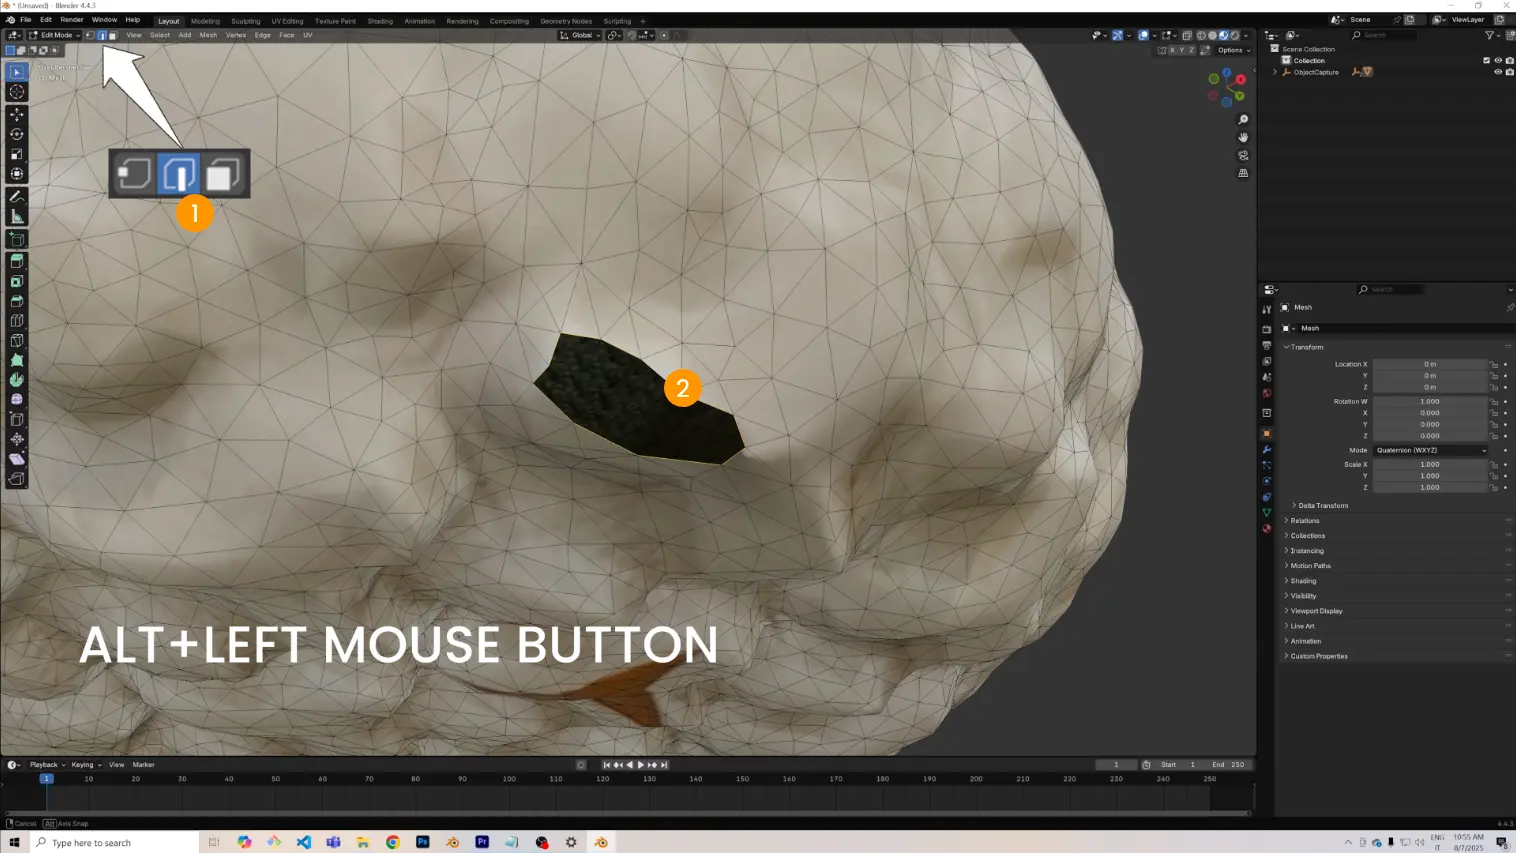
Switch to Edge Selection Mode 1. Select the edge loop around the hole 2 (Alt + Click).
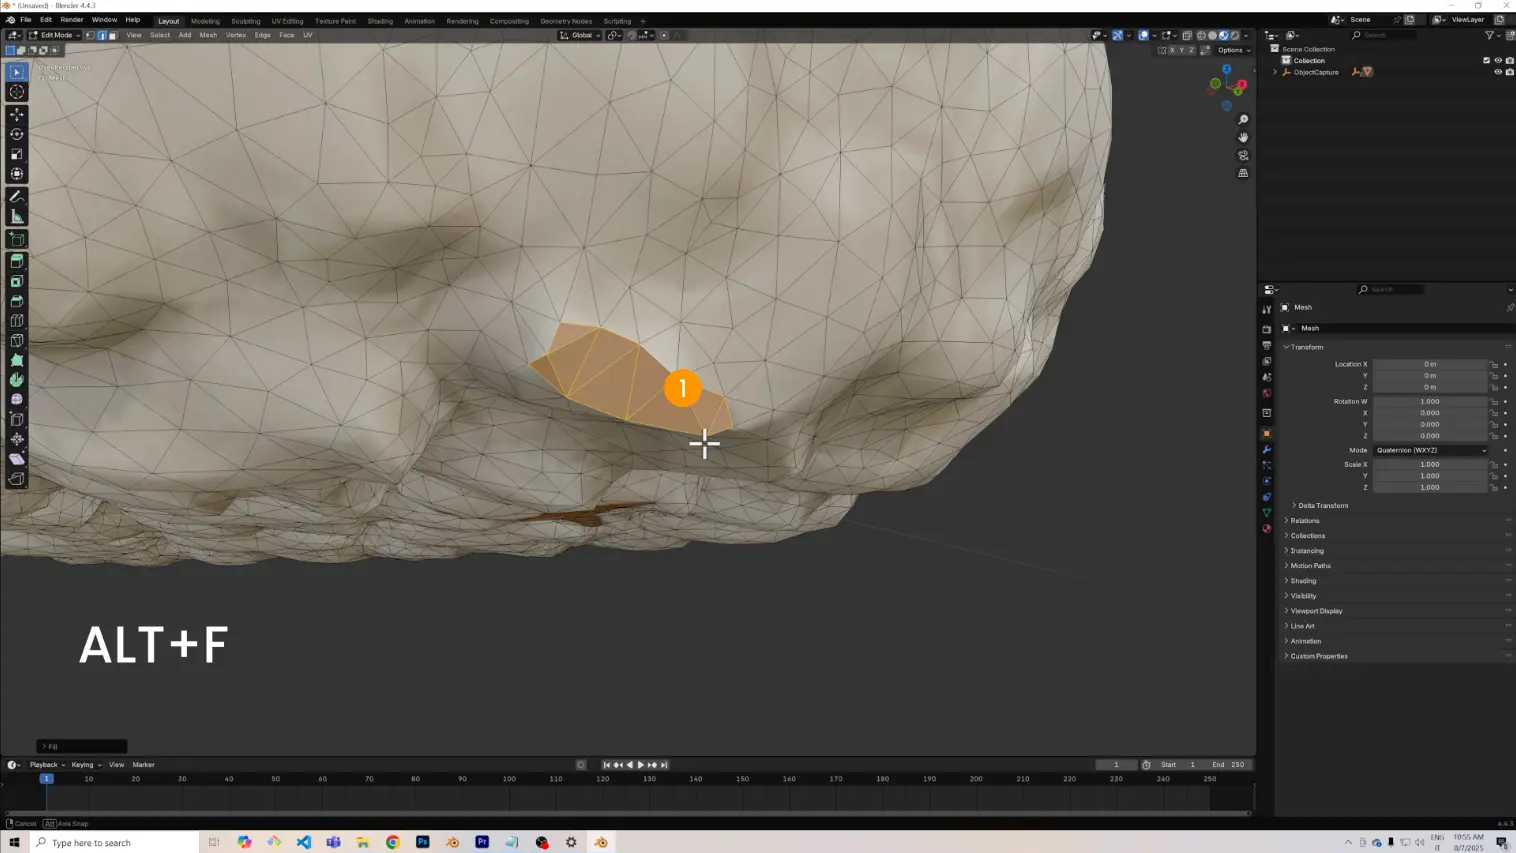
Press Alt + F 1 to automatically fill the surface.
Fix the UVs
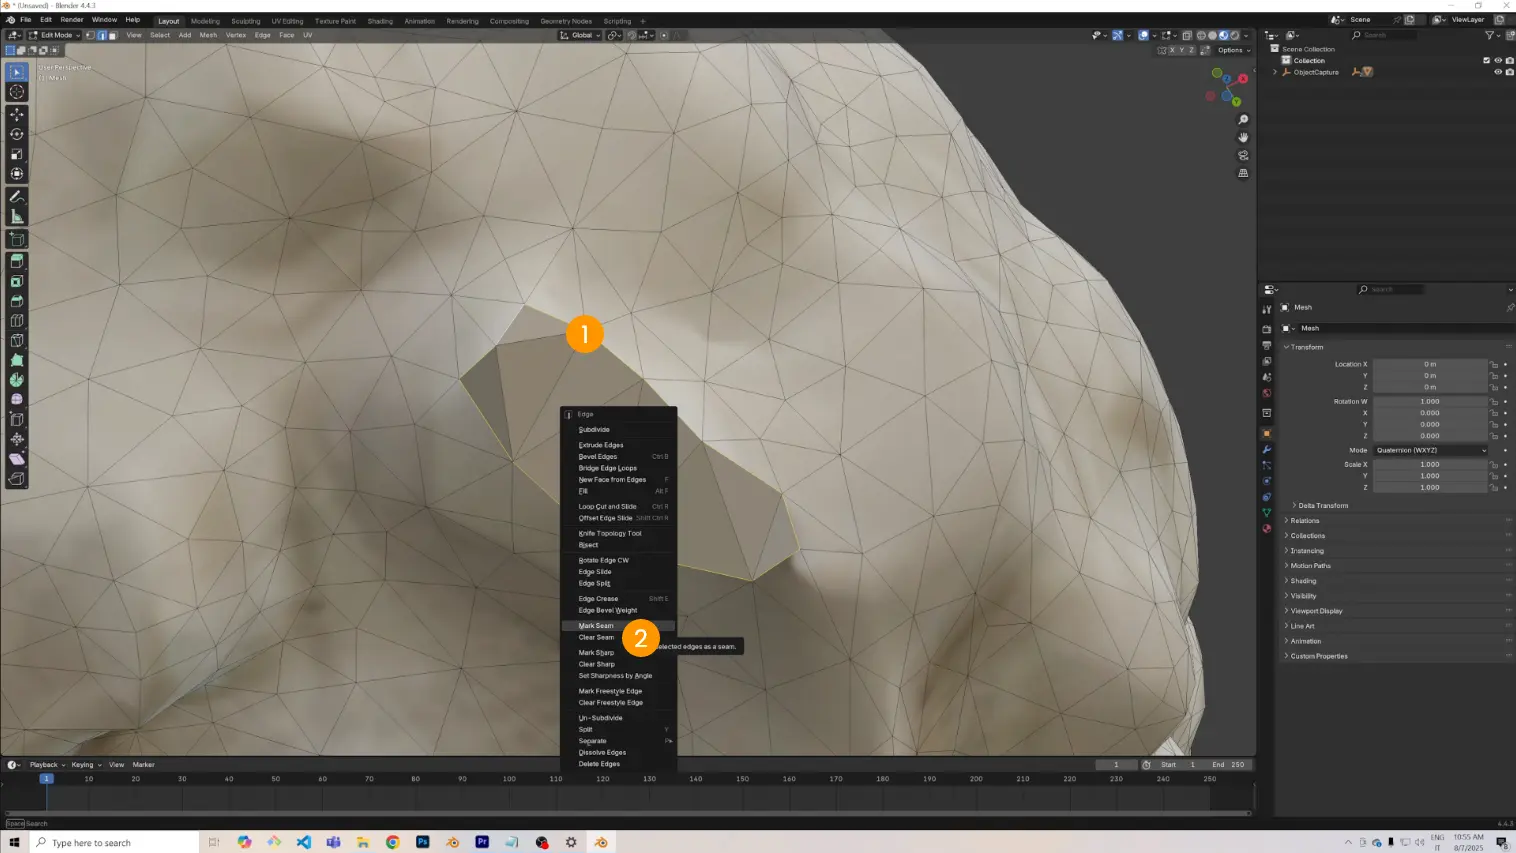
Select the created edge loop 1, right-click > Mark Seam 2.
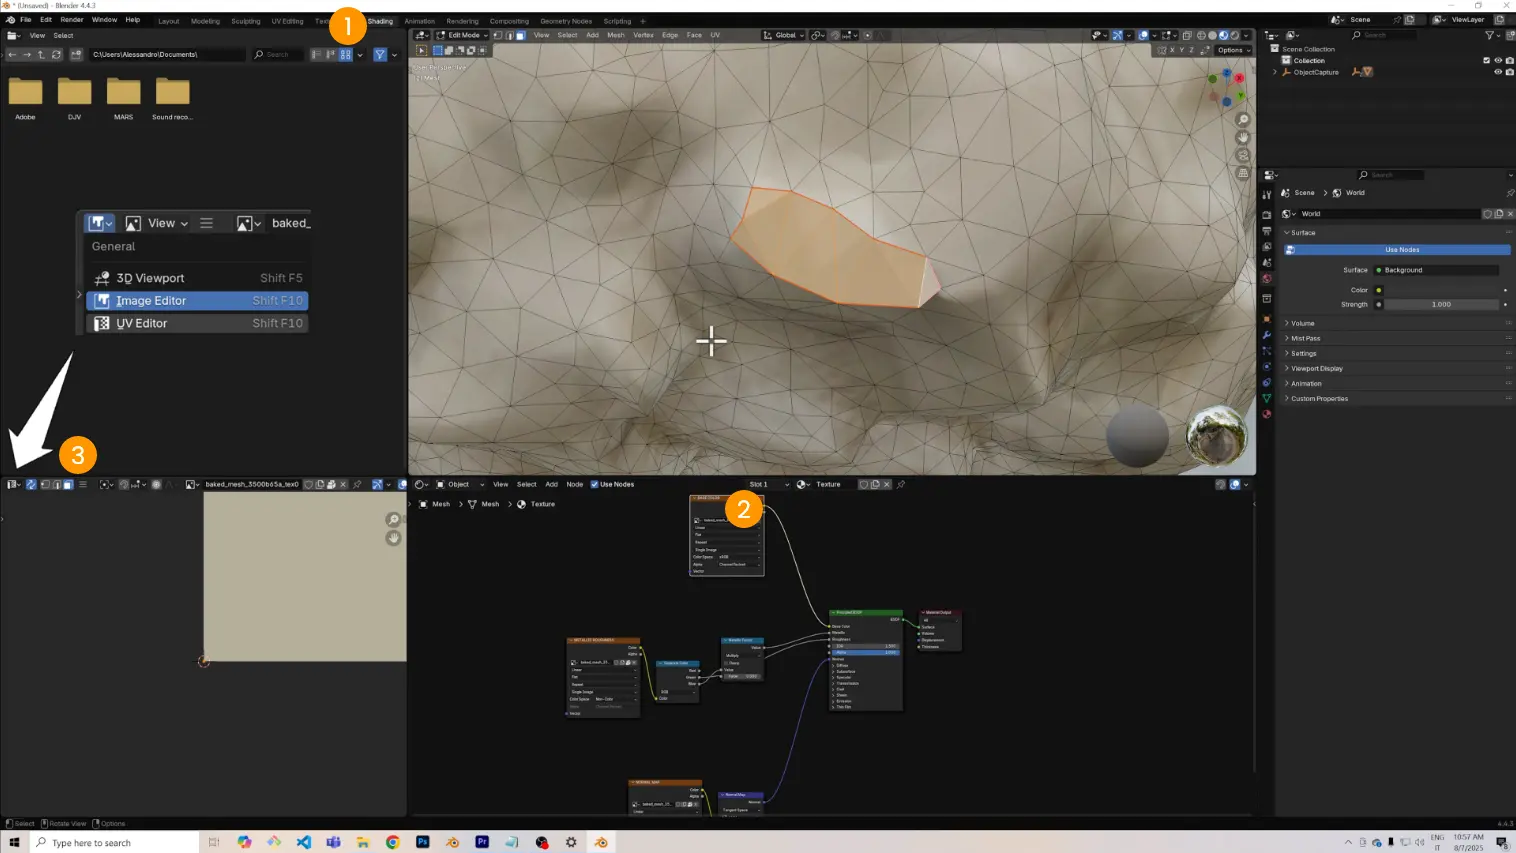
Open the Shading tab 1 and select the Texture Color node 2.
In the bottom-left panel, switch from Image Editor to UV Editor 3.
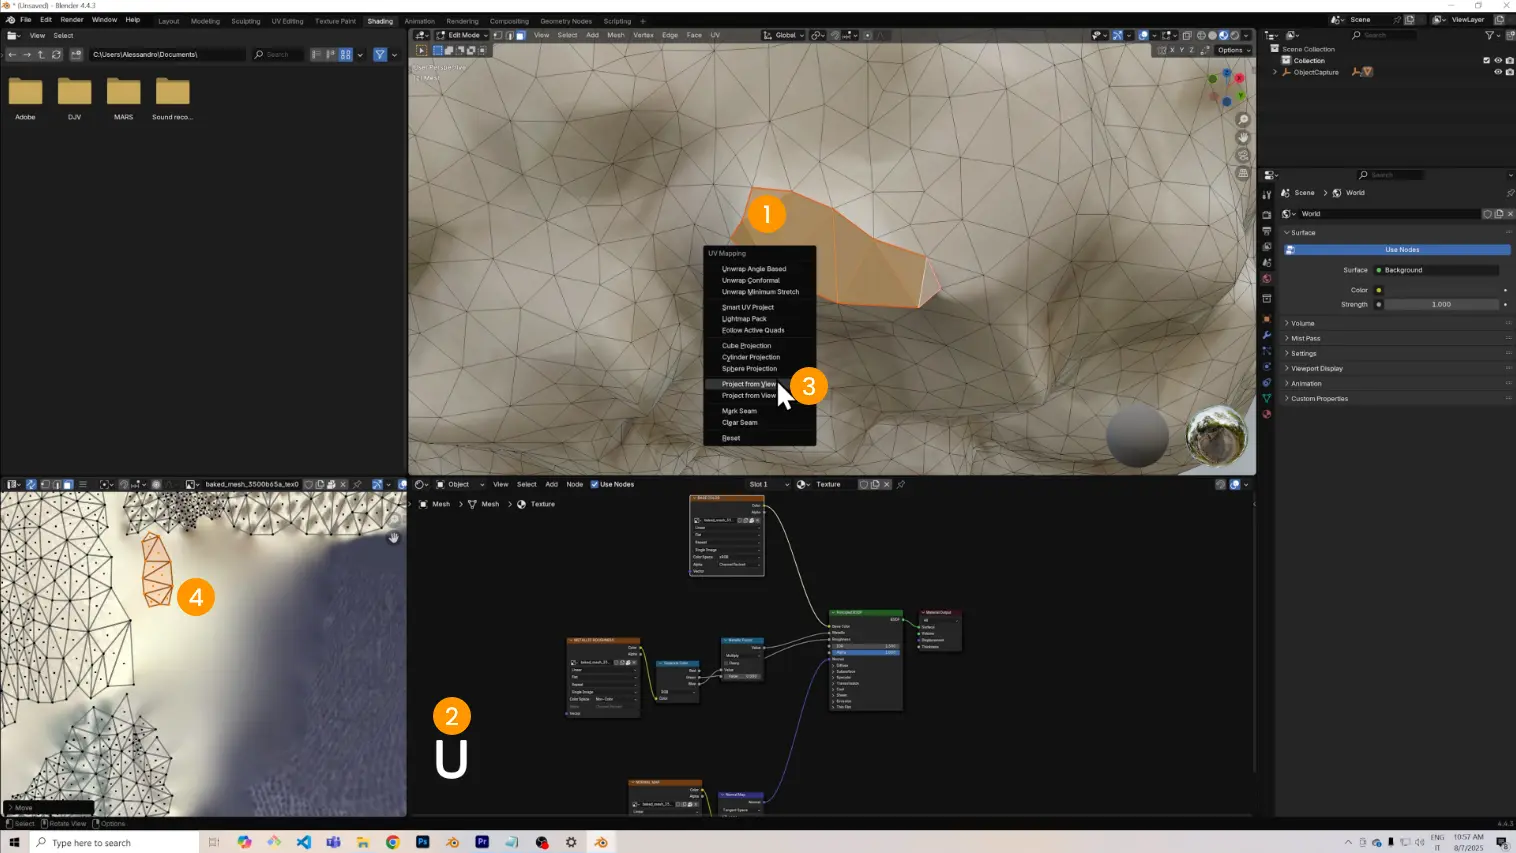
In Face Selection Mode, select the new faces 1.
Press U 2 > Project from View 3 (ensure the model is aligned to a your front view).
In the UV Editor, move and scale the new piece 4 to blend it with the texture.
Advanced Texture Editing in Photoshop
For more complex corrections, edit the texture externally:
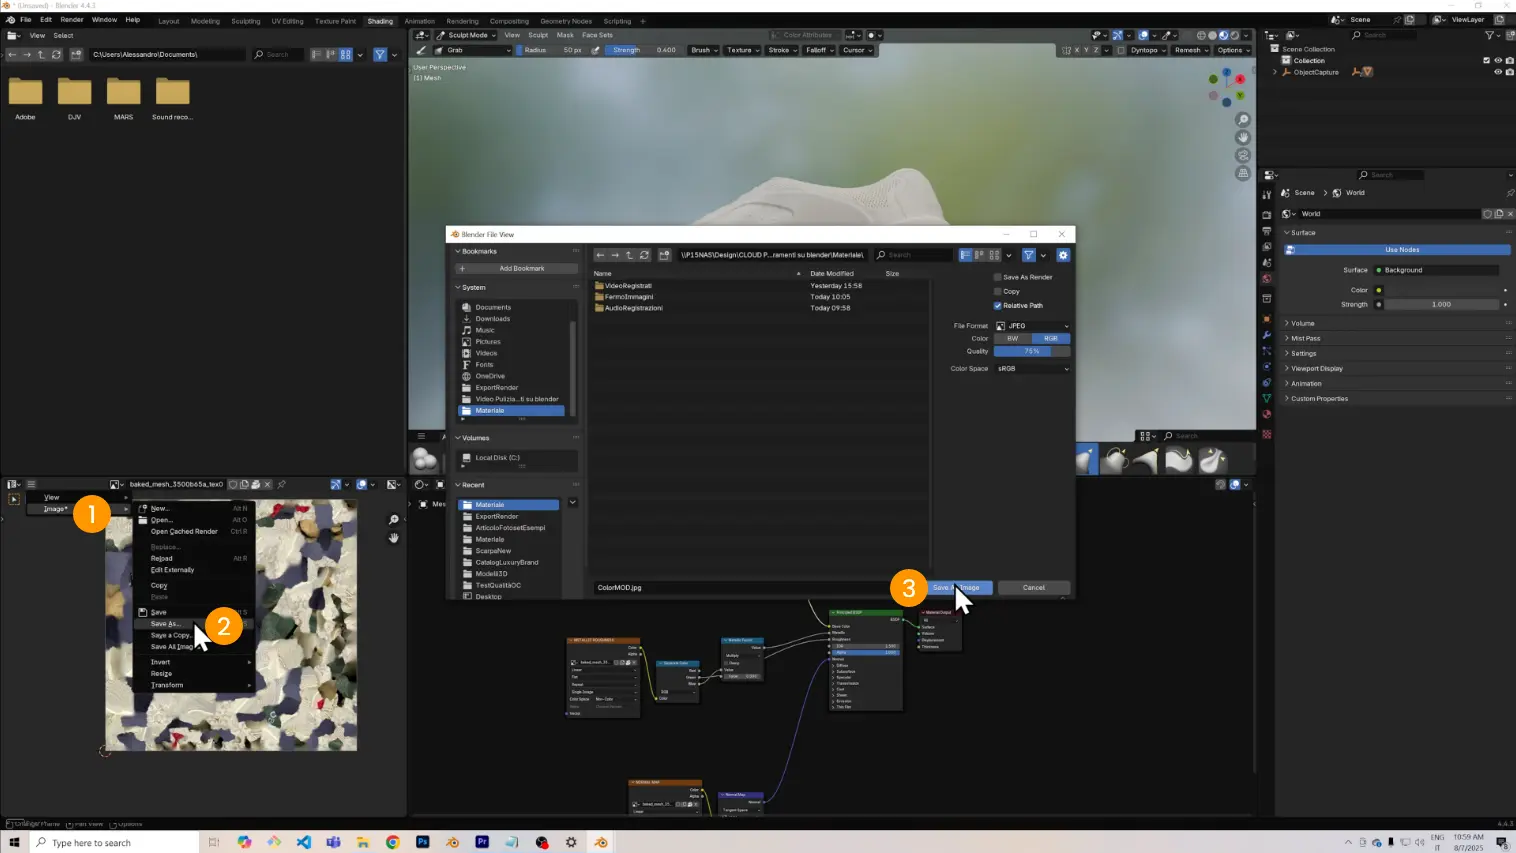
- In Shading Editor, select the texture node.
- In UV Editor, go to Image 1 > Save As 2
- save the texture 3.
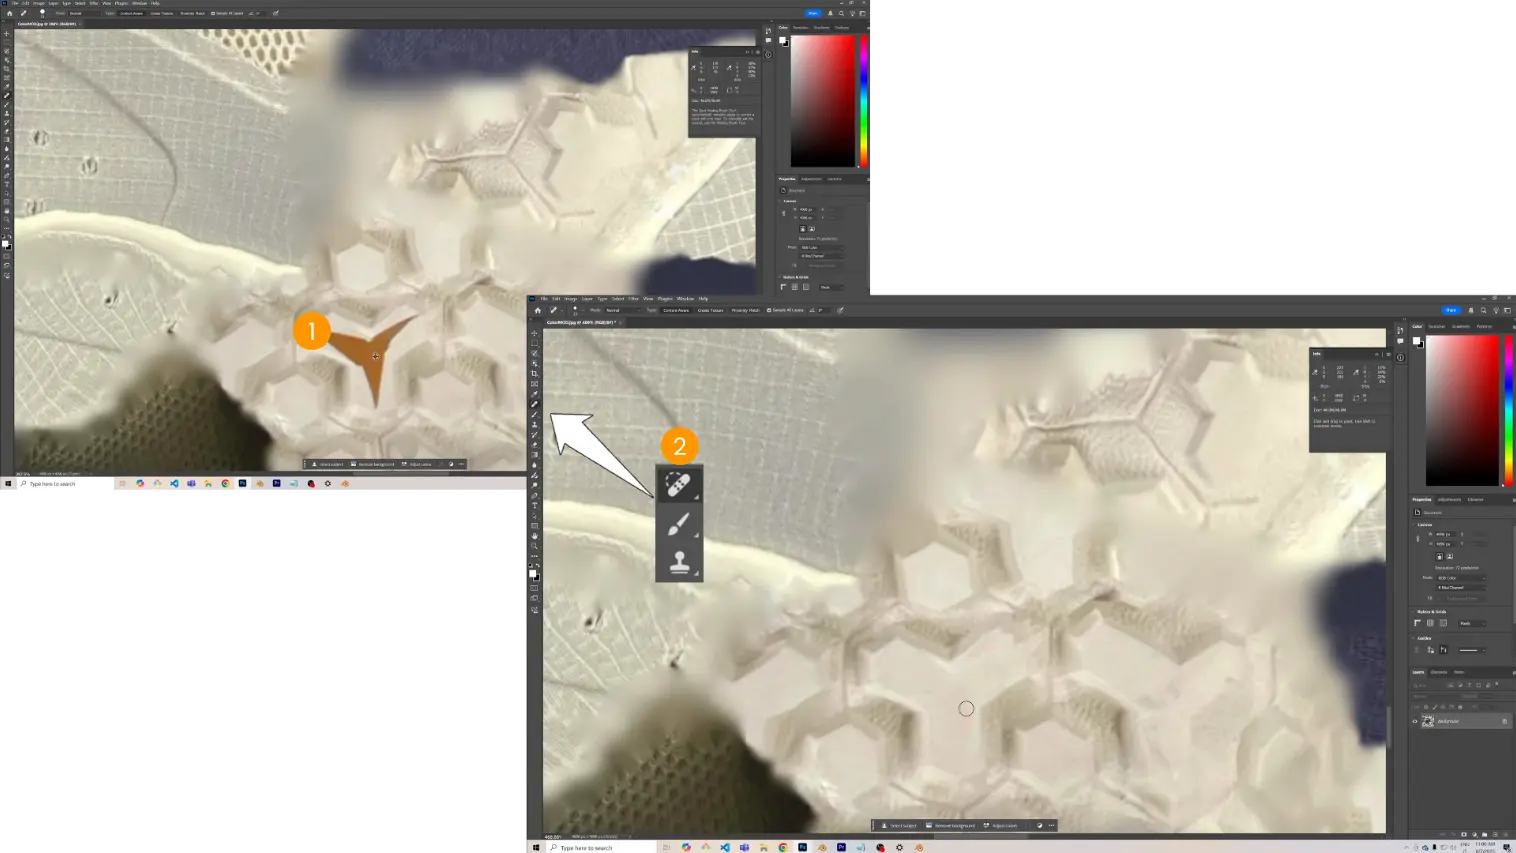
- Open it in Photoshop.
- Use tools like Brush, Clone Stamp, and Fill Content-Aware 2 to remove artifacts or blemishes 1.
Save the file with the same name to overwrite it.
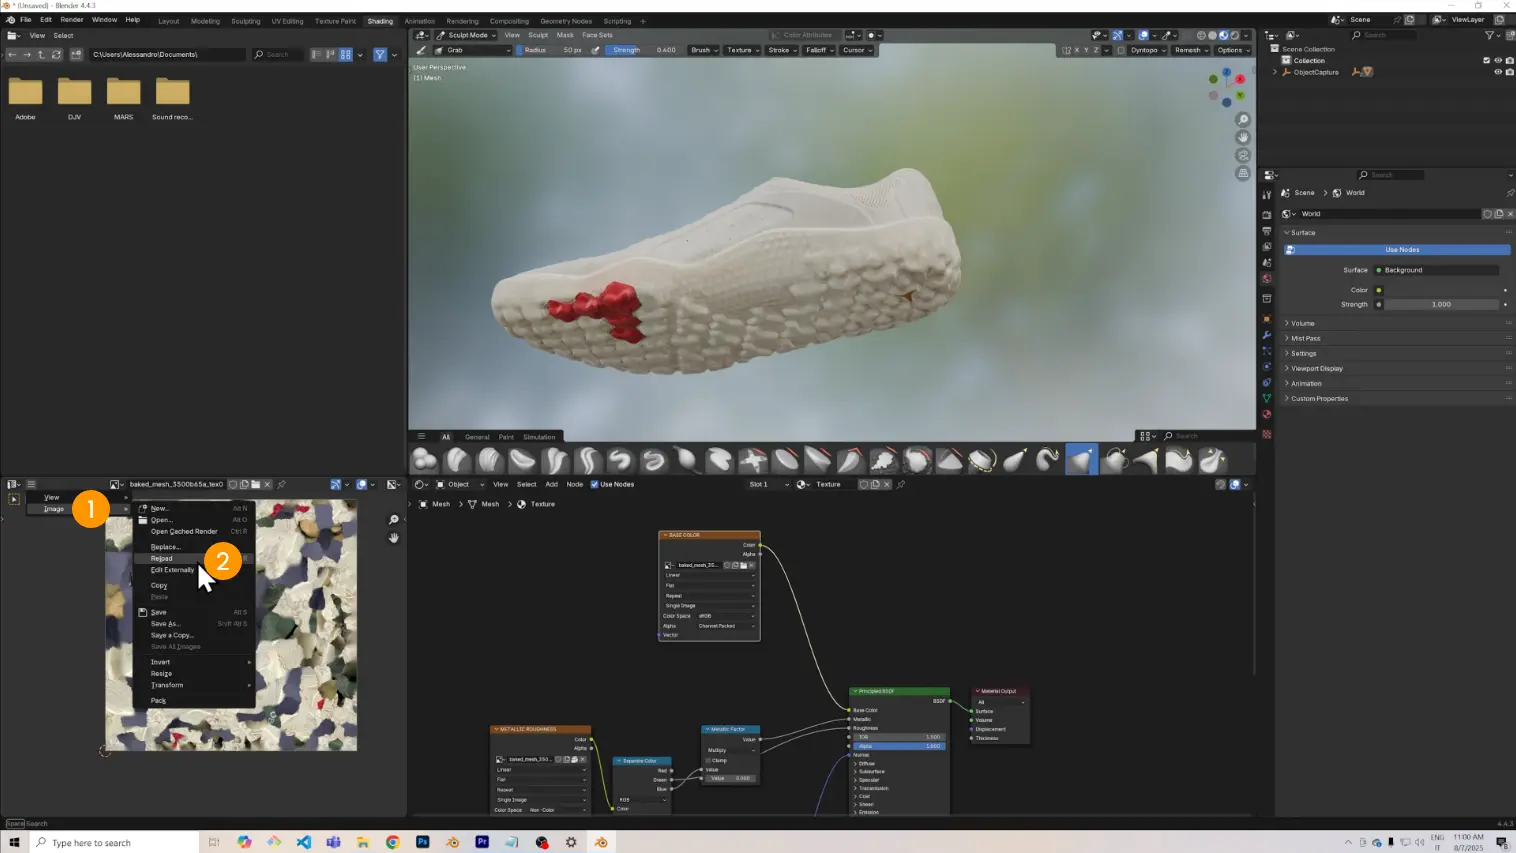
Back in Blender, in UV Editor, click Image 1 > Reload 2 to refresh the texture.
Conclusion
We've seen how to quickly and efficiently fix common defects in Object Capture-generated models, avoiding the need to rebuild them from scratch. These steps will help you achieve clean, polished 3D models ready for augmented reality or other 3D applications.