Example photosets
Examples of Photoset for Object Capture
With the introduction of the new Object Capture feature in My AR Studio, you can now create realistic 3D models from simple photo sequences.
In this section, we'll show you some practical examples of photo setups, each tailored to a different use case, to help you achieve the best results during capture.
| Example Subject |
Photo Setup | Lighting | Photo Capture | Device Used | Photo Resolution | Number of Photos | Download Link |
|---|---|---|---|---|---|---|---|
| 1 Sneaker |
Turntable on table, white cloth/A4 sheets | 3-point LED (front + 2 sides) | 4 rotations + detail shots | iPhone 12 Pro | 1080x1080 (low) | 155 | Download |
| 2 Toy |
Turntable on table, neutral cloth, white wall | 3-point LED (front + 2 sides) | 4 rotations + detail shots | iPhone 12 Pro | 3024x3024 (high) | 144 | Download |
| 3 Sneaker |
Turntable in Foldio3 studio, background removed | Foldio3 built-in LEDs (2 sides + top) | 4 rotations + detail shots | iPhone 12 Pro | 3024x3024 (high) | 156 | Download |
| 4 Sneaker |
Turntable in Foldio3 studio, black backdrop | Foldio3 built-in LEDs (2 sides + top) | 4 rotations + detail shots | DSLR camera | 6240x4160 (ultra-high) | 153 | Download |
Example 1 - Sneaker on a Home Setup
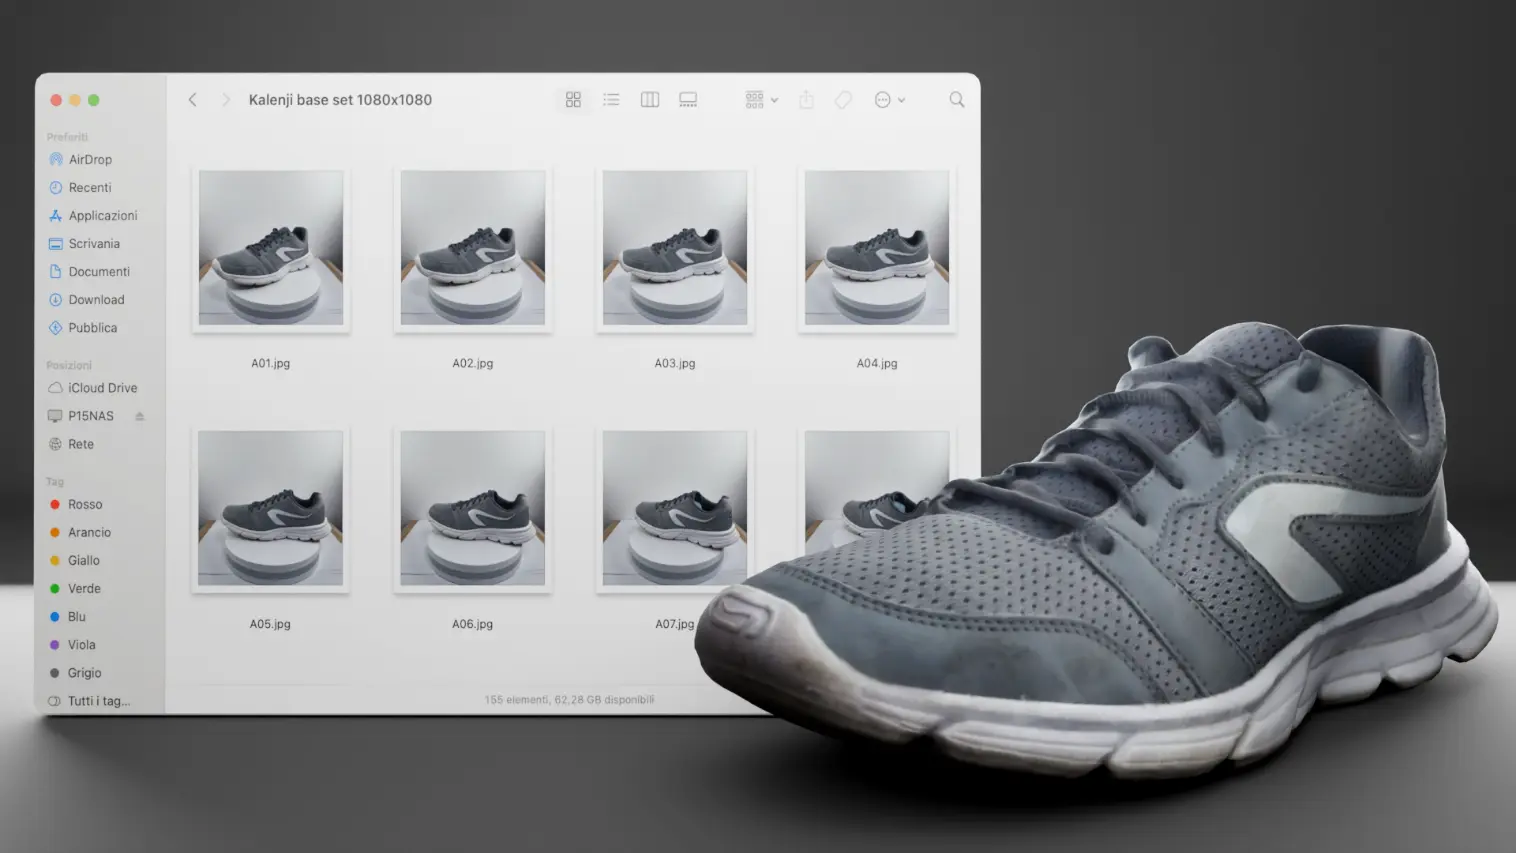
Subject: Sneaker
Photos taken with: iPhone 12 Pro (12 Megapixel camera)
Photo resolution: 1080x1080 (low resolution)
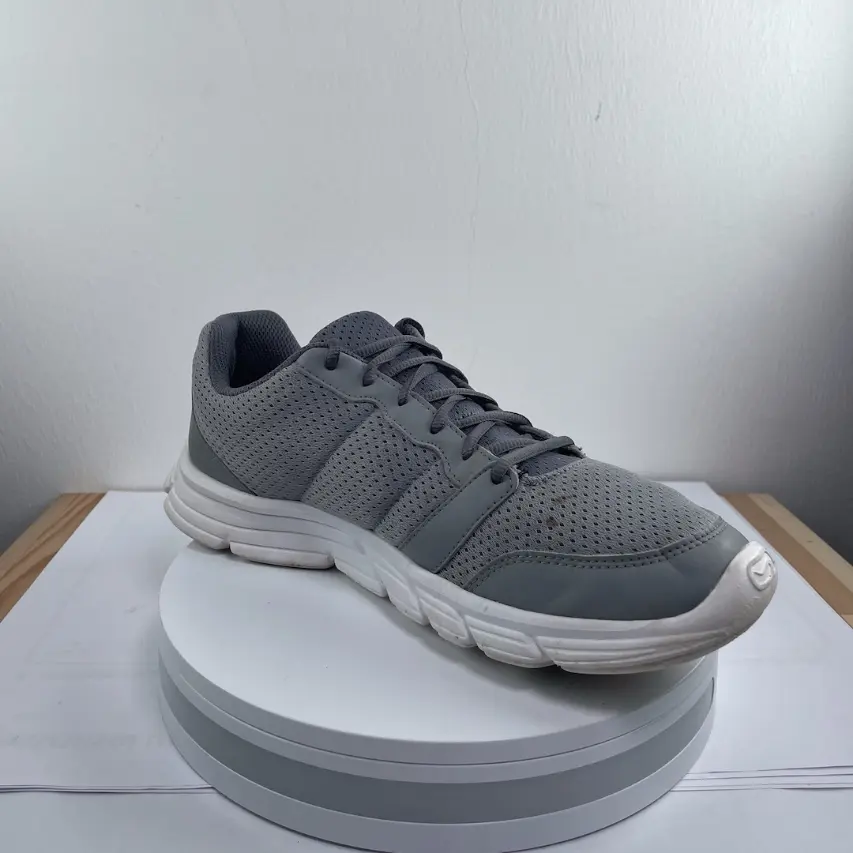
Photo setup
For this example, we used a turntable placed on a flat table surface, covered with a simple white cloth or A4 sheets. This neutral background helps visually isolate the subject and simplifies the 3D reconstruction phase.
Lighting
We used a 3-point LED light setup:
-
1 One front light (directed at the subject)
-
2 Two side lights (positioned at 80-90° relative to the front light)
This setup ensures even lighting, reduces harsh shadows, and improves surface detail readability.
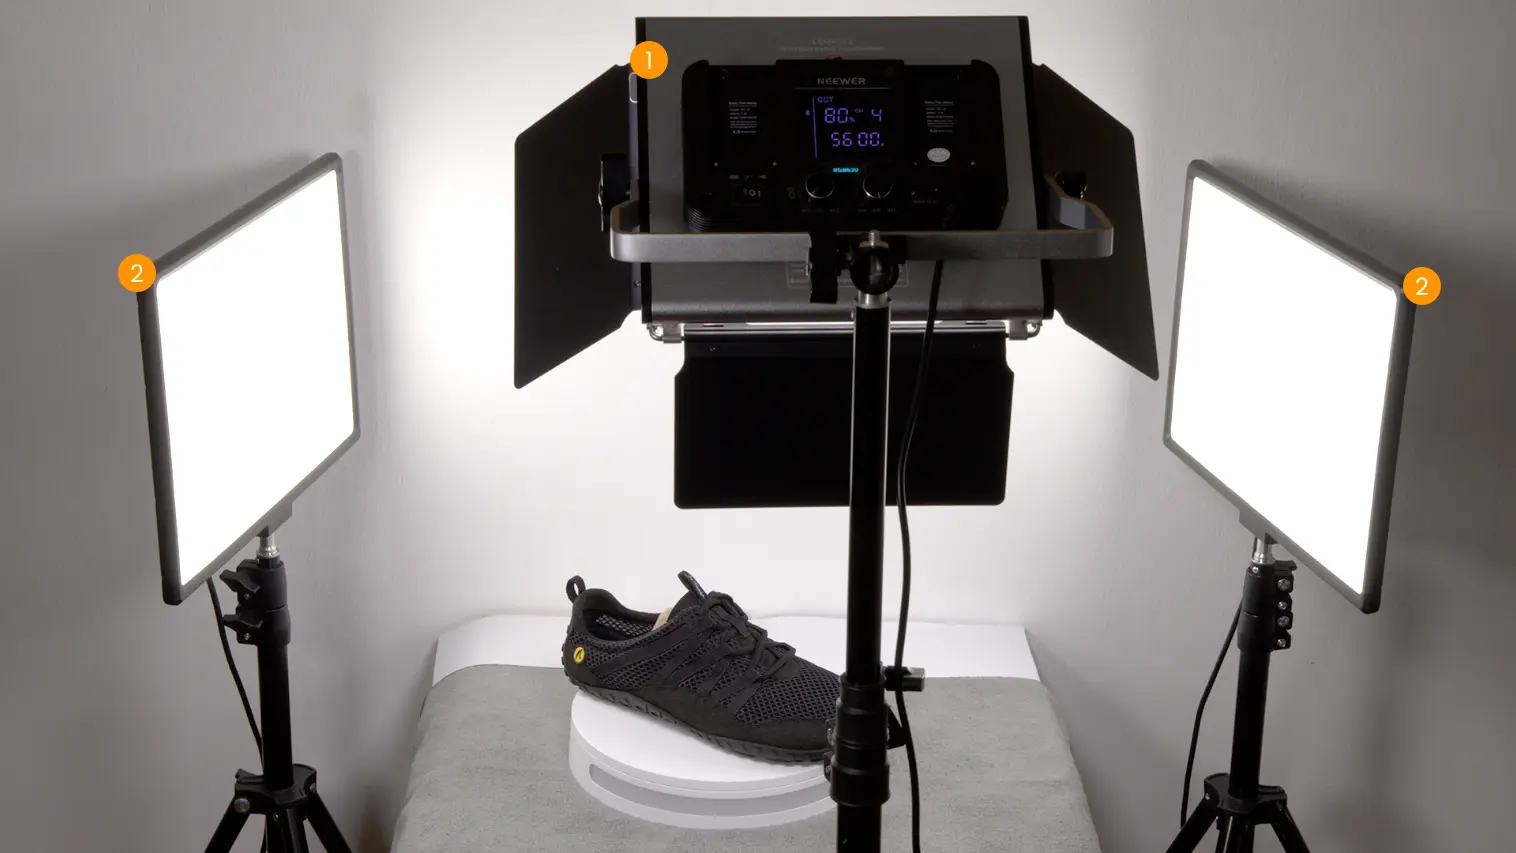
Photo capture
To get an accurate 3D model, it's crucial to take a well-aligned and evenly distributed series of photos around the object.
Suggested workflow:
- 1 First rotation: smartphone at object level, front view - 36 shots
- 2 Second rotation: raise the smartphone by approx. 20 cm - 36 more shots
- 3 Third rotation: return to initial position, rotate the object 90° inward - 36 shots
- 4 Fourth rotation: rotate the object 90° outward - final 36 shots
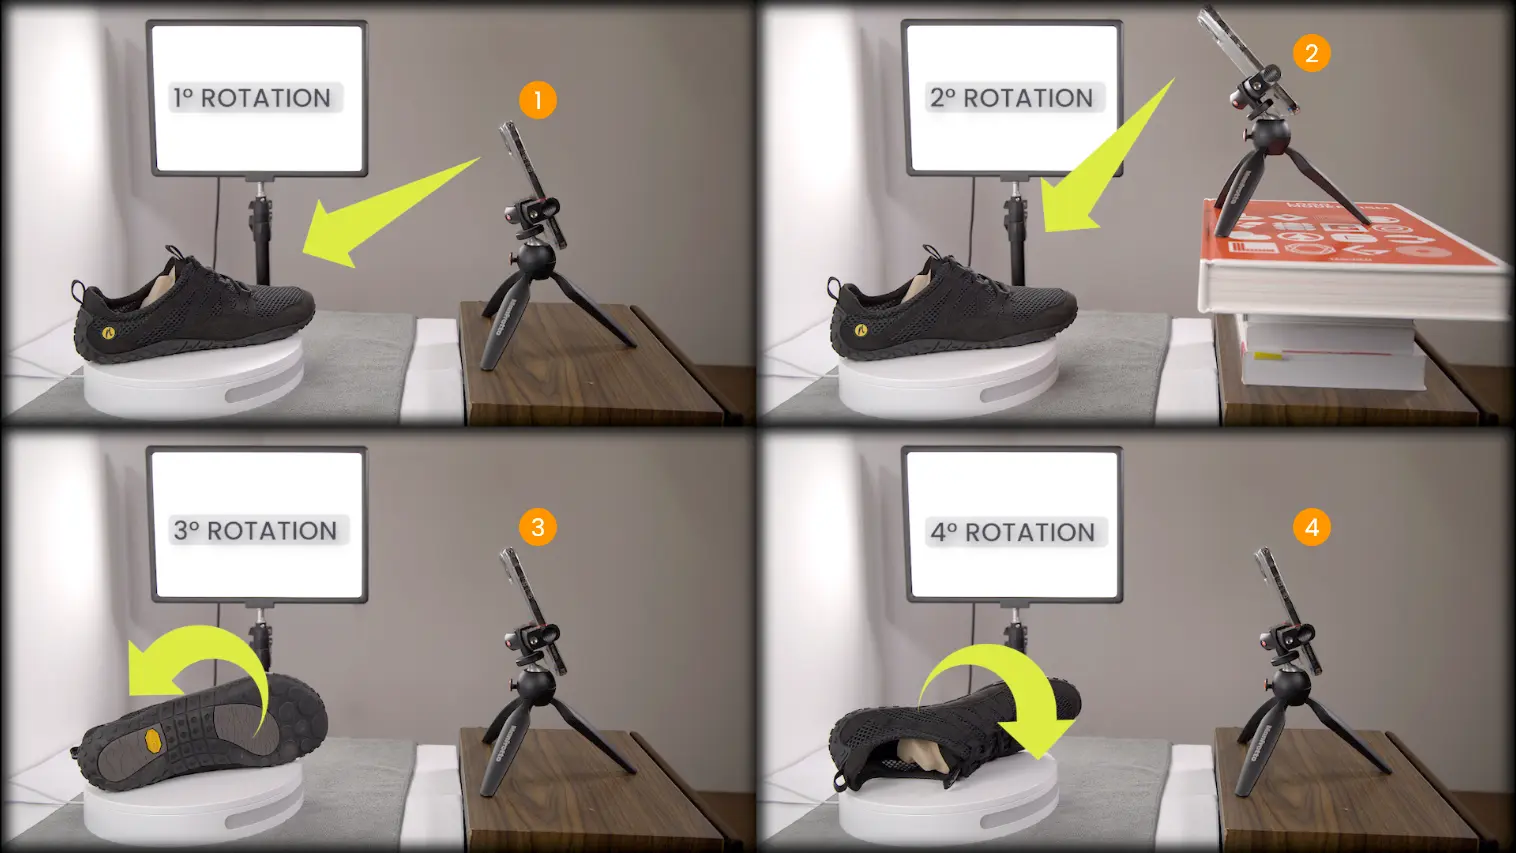
- 5 Extra detail shots: take 5-10 close-ups of stitches, laces, and inner parts
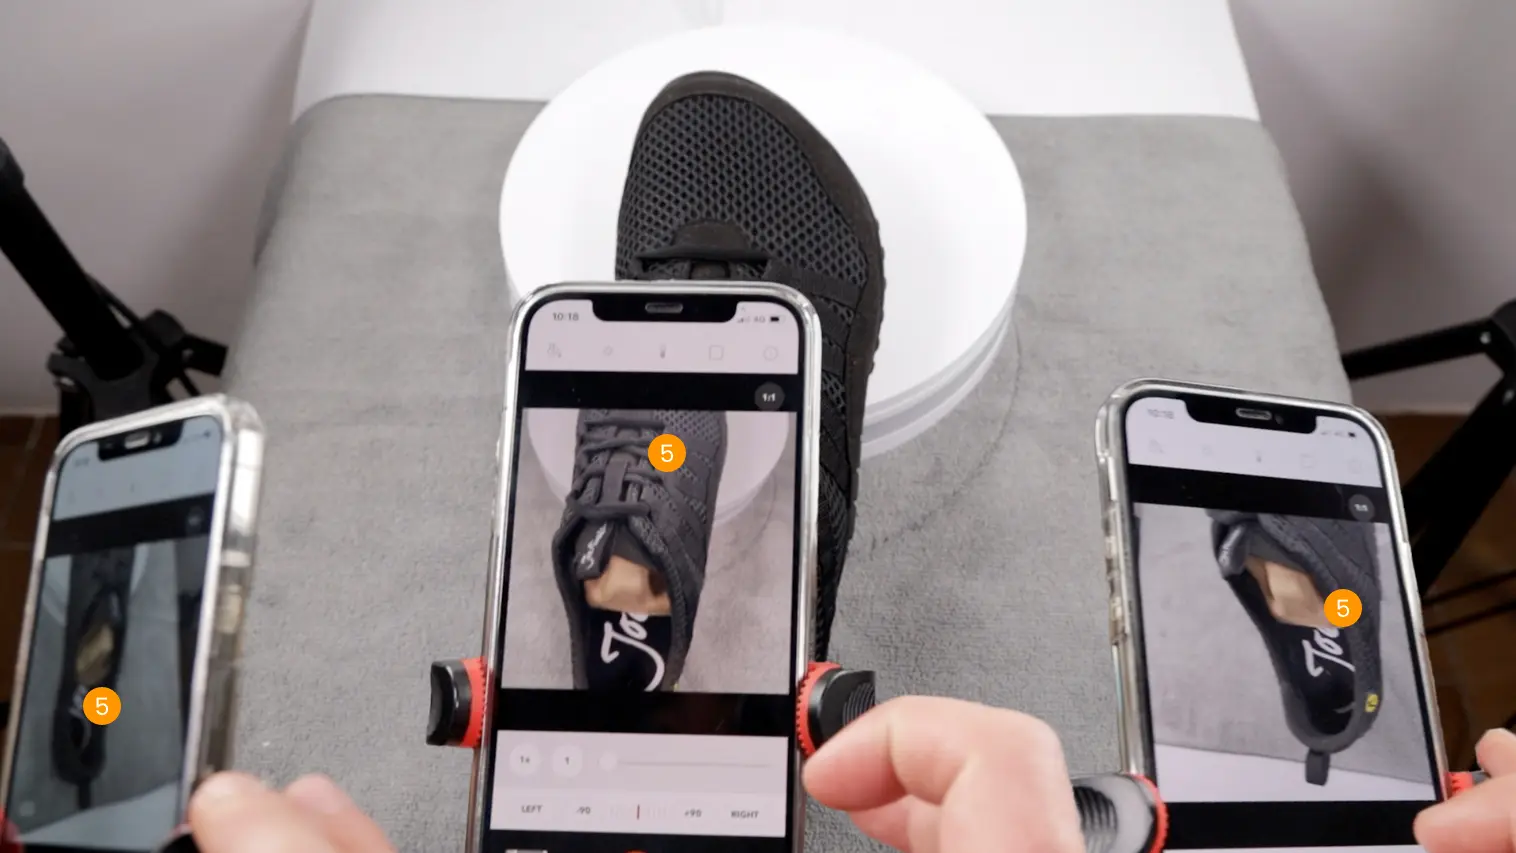
This multi-angle technique allows capturing the subject from all perspectives, including hidden top and bottom details.
For more information about lighting and shooting sequence see: How to take photos
Result
Despite the low image resolution (1080x1080), the combination of good lighting, a clean background, and a well-structured rotation yields an accurate 3D model suitable for AR viewing, digital catalogs, and interactive showcases.
Download the ready-to-use photo set and try the Object Capture now!
Download the photoset and try it yourself!Example 2 - Toy on a Basic Setup
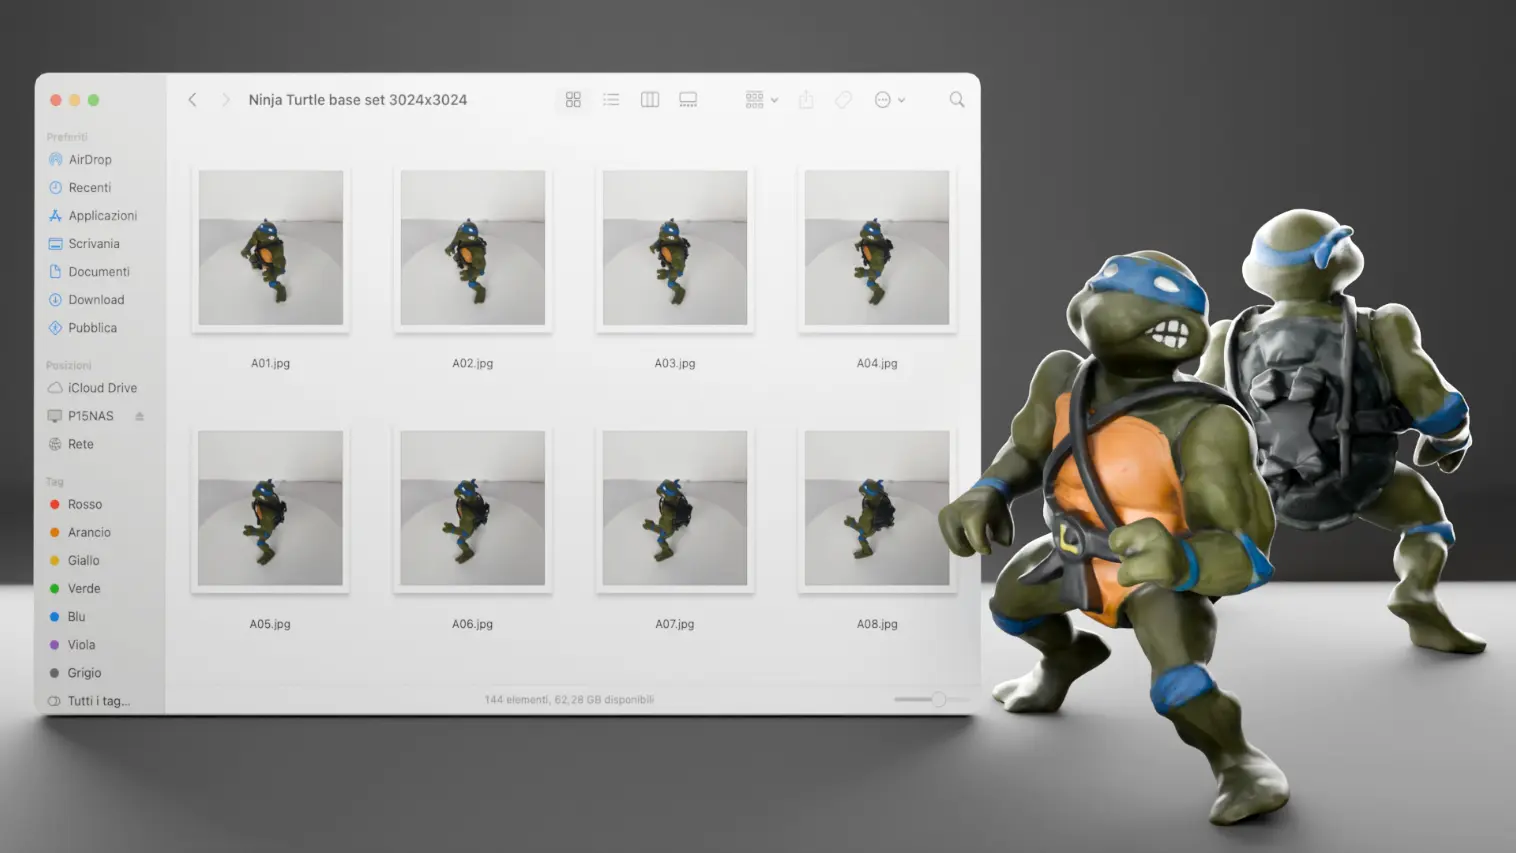
Subject: Small/medium-sized toy
Photos taken with: iPhone 12 Pro (12 Megapixel camera)
Photo resolution: 3024x3024 (high resolution)
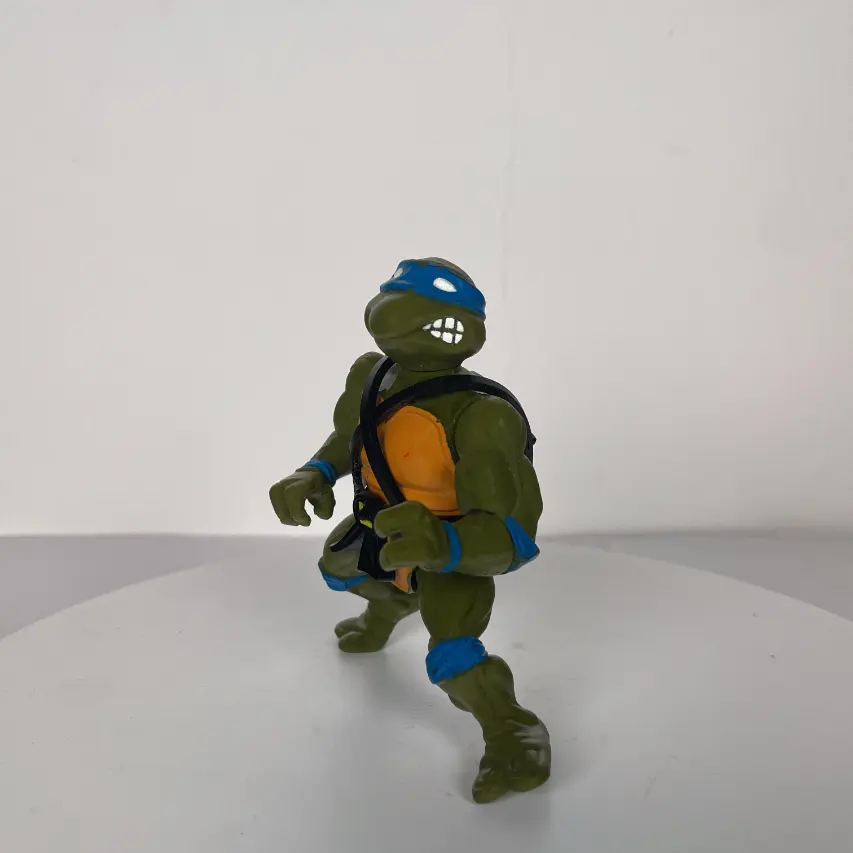
Photo setup
This example shows how excellent results can be achieved even with a basic setup, perfect for a home environment or an improvised photo studio. The toy was placed on a turntable centered on a stable table, with a neutral cloth or white sheets beneath it to unify the background and ease subject isolation. The background was a simple white wall - ideal for visual separation.
Lighting
We used the same 3-point LED light setup:
-
One front light (directed at the subject)
-
Two side lights (at 80-90° relative to the front light)
This configuration ensures homogeneous lighting, minimizes strong shadows, and enhances visual details.
Photo capture
To ensure full coverage from all angles, the same 4-rotation method was used, along with close-ups:
- First rotation: smartphone at object level, front view - 36 shots
- Second rotation: raise smartphone by approx. 20 cm - 36 more shots
- Third rotation: return to first position, rotate object 90° inward - 36 shots
- Fourth rotation: rotate object 90° outward - final 36 shots
- Extra detail shots: 5-10 close-ups of corners, joints, and sculpted details
Good image quality directly impacts 3D model fidelity, mesh accuracy, and texture definition.
For more information about lighting and shooting sequence see: How to take photos
Result
This setup provides a solid and effective foundation for creating a realistic 3D model, especially suitable for AR visualization, e-commerce, and educational or gaming applications.
Download the ready-to-use photo set and try the Object Capture now!
Download the photoset and try it yourself!Example 3 - Sneaker on Foldio3 Setup with Background Removed
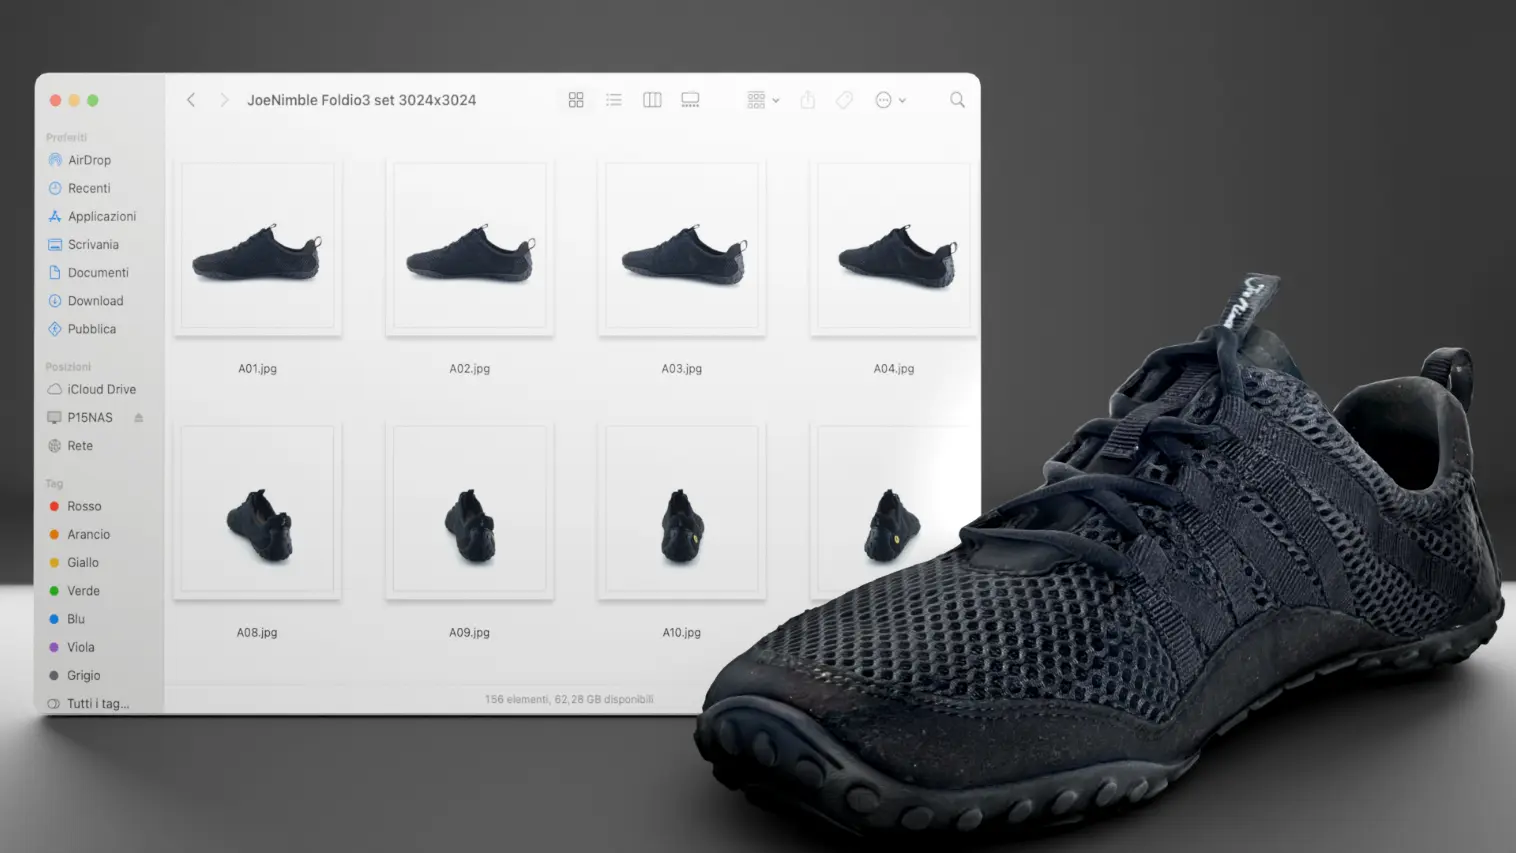
Subject: Sneaker
Photos taken with: iPhone 12 Pro (12 Megapixel camera)
Photo resolution: 3024x3024 (high resolution)
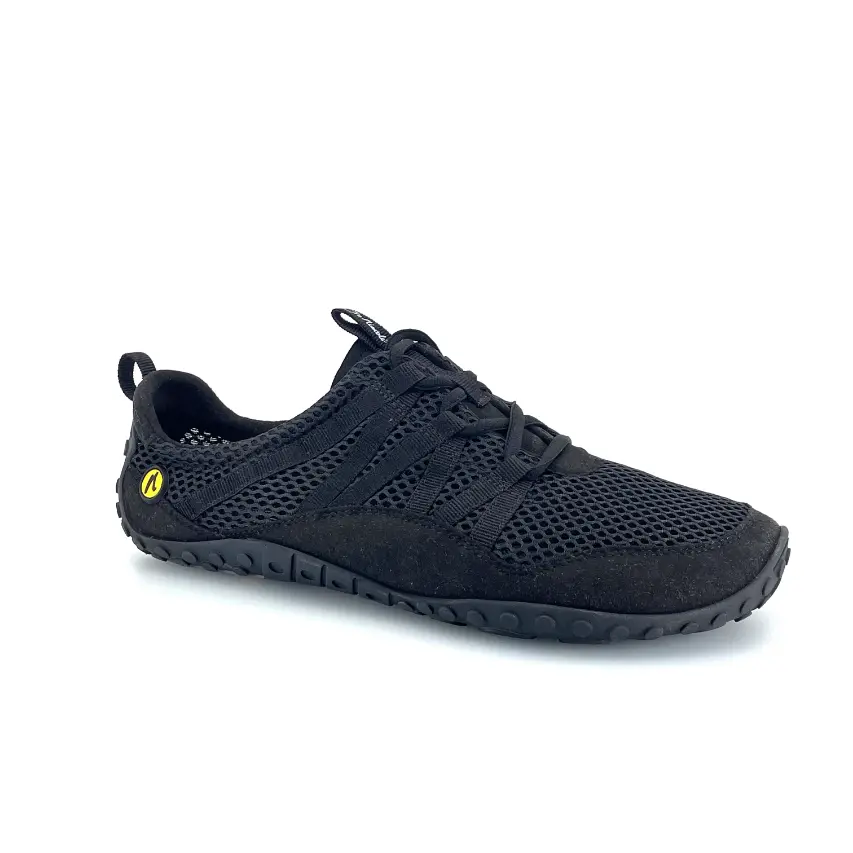
Photo setup
In this case, the sneaker was placed on a turntable inside the Foldio3 photo studio, a portable studio designed to offer a clean, controlled shooting environment. The main advantage of this setup is the total absence of visible background, which simplifies subject isolation and supports automatic segmentation.
Lighting
Lighting was handled entirely by Foldio3's built-in system:
-
Two side LED sticks, symmetrically positioned to reduce shadows
-
One top LED strip for even overhead lighting
This configuration produces soft, even light, minimizing reflections and color shifts between shots.
Photo capture
As in previous examples, the acquisition strategy included 4 rotations and close-up shots:
- First rotation: smartphone at object level, front view - 36 shots
- Second rotation: raise smartphone by approx. 20 cm - 36 more shots
- Third rotation: return to first position, rotate object 90° inward - 36 shots
- Fourth rotation: rotate object 90° outward - final 36 shots
- Extra detail shots: 5-10 close-ups of stitching, laces, and inner parts
High-quality shots ensure greater accuracy in 3D reconstruction, improve mesh structure, and enhance texture realism.
For more information about lighting and shooting sequence see: How to take photos
Result
The final result is a highly detailed 3D model, ideal for digital catalogs, e-commerce, or AR applications. The Foldio3 setup offers a professional yet compact solution, perfect for users seeking both quality and speed in their digitization workflow.
Download the ready-to-use photo set and try the Object Capture now!
Download the photoset and try it yourself!Example 4 - Sneaker on Foldio3 Setup with Black Background
Subject: Light-colored sneaker
Photos taken with: DSLR camera
Photo resolution: 6240x4160 (ultra-high resolution)
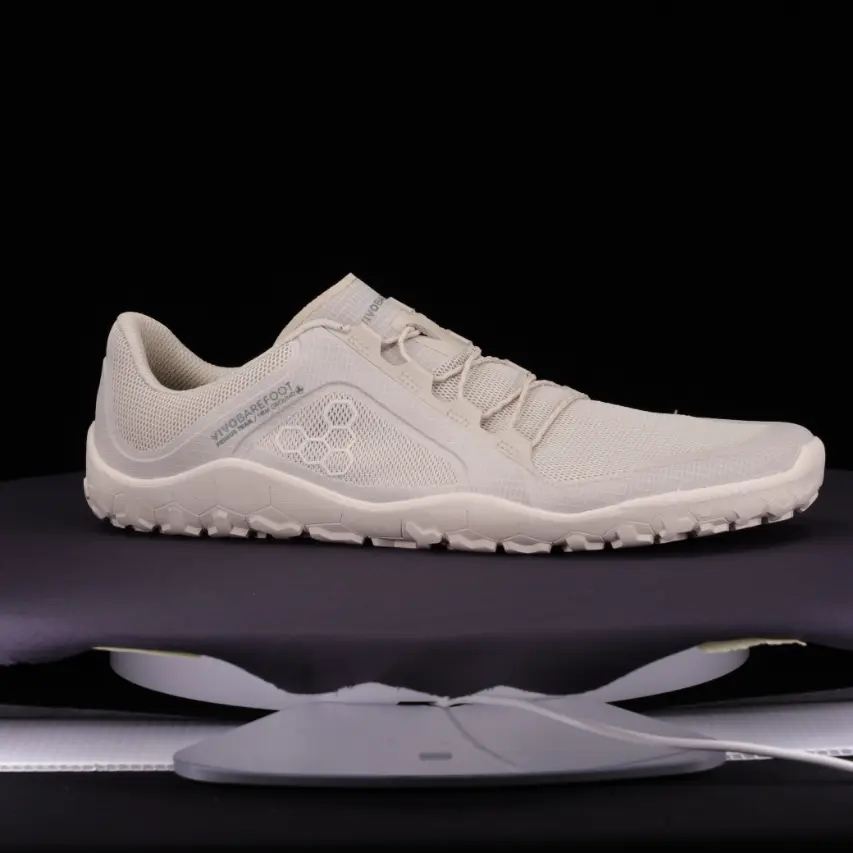
Photo setup
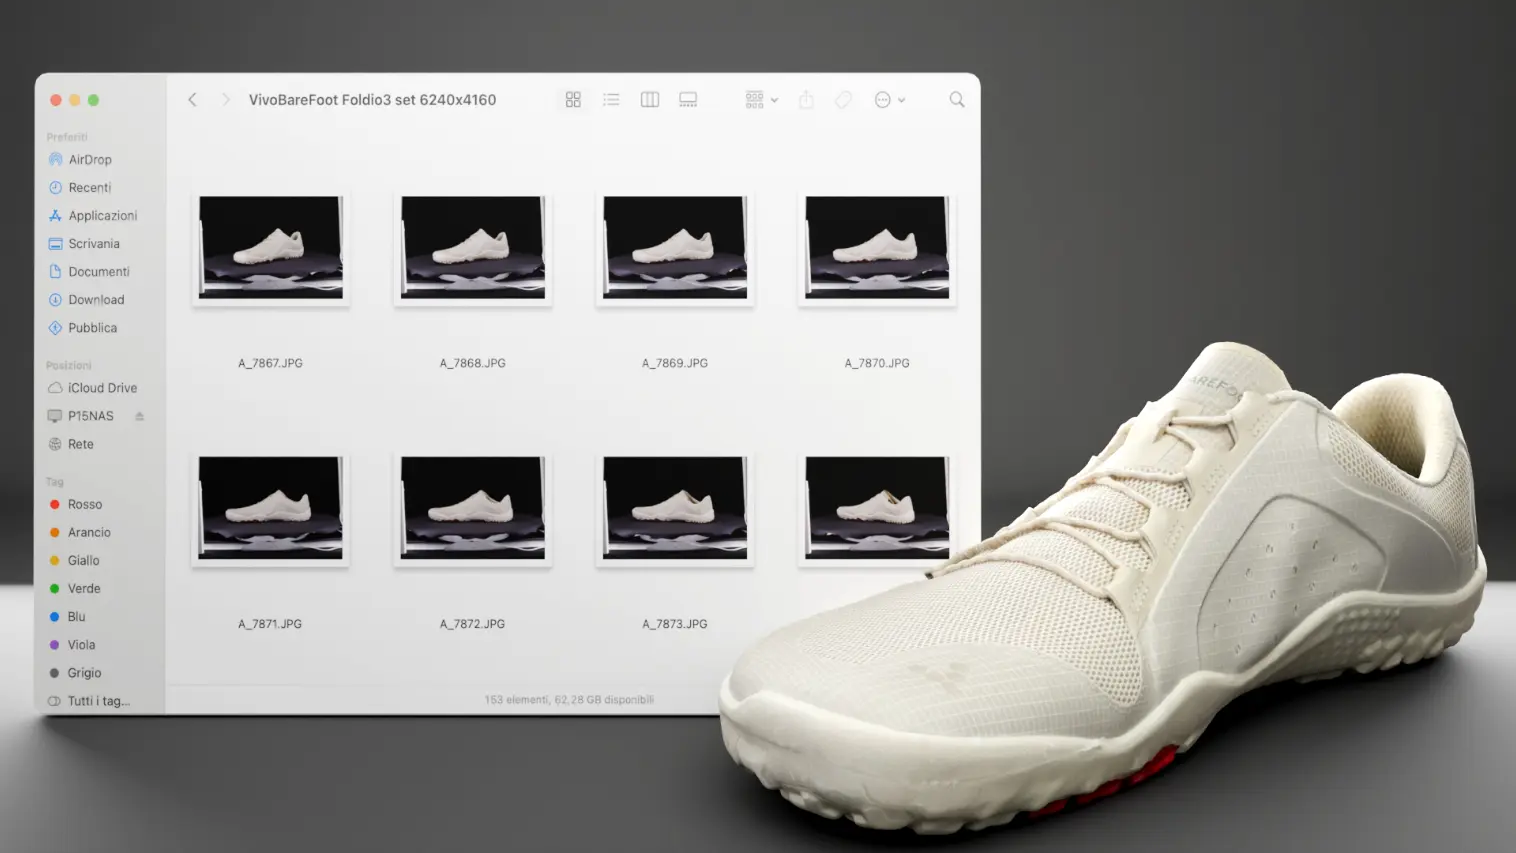
This shoot was carried out inside the Foldio3 photo studio using a light-colored sneaker. The object was placed at the center of the turntable in a fully controlled environment, designed to eliminate visual distractions and provide a uniform background.
Unlike previous cases, a black backdrop was used here, creating sharp contrast with the light subject. This kind of background is ideal for enhancing contours and aiding focus - especially for objects with light surfaces.
Lighting
Lighting was handled entirely by Foldio3's built-in system:
-
Two symmetrical side LED sticks to reduce shadows
-
One top LED strip for even overhead lighting
This setup provides balanced lighting, minimizes unwanted reflections, and improves consistency between shots.
Photo capture
As with the other examples, the acquisition was structured into 4 rotations plus detail shots:
- First rotation: smartphone at object level, front view - 36 shots
- Second rotation: raise smartphone by approx. 20 cm - 36 more shots
- Third rotation: return to first position, rotate object 90° inward - 36 shots
- Fourth rotation: rotate object 90° outward - final 36 shots
- Extra detail shots: 5-10 close-ups of stitching, laces, and internal parts
High image quality is key to achieving an accurate 3D model, with clean mesh geometry and high-fidelity textures.
For more information about lighting and shooting sequence see: How to take photos
Result
Thanks to the 6240x4160 resolution and a well-balanced setup, a precise and detailed 3D model was obtained, featuring sharp textures and well-defined edges. This configuration is especially effective for light-colored or complex-surfaced objects, delivering professional-grade results ready for AR or e-commerce applications.
Download the ready-to-use photo set and try the Object Capture now!
Download the photoset and try it yourself!