Introduction
In this section, you will learn how to use AR Tag, a powerful feature of My AR Studio that allows you to enrich your physical campaigns with interactive augmented reality content.
What is AR Tag?
AR-Tag is an advanced technology that lets you view interactive augmented reality tags directly on your smartphone. The Tags appear as floating pop-ups, freely placeable in the space near your campaign, enhancing the experience with digital information.
Click here for an overview of AR Tag.
Example of AR-Tag usage
In this scenario, we have three key elements:
- The physical catalog
- The smartphone
- AR-Tag
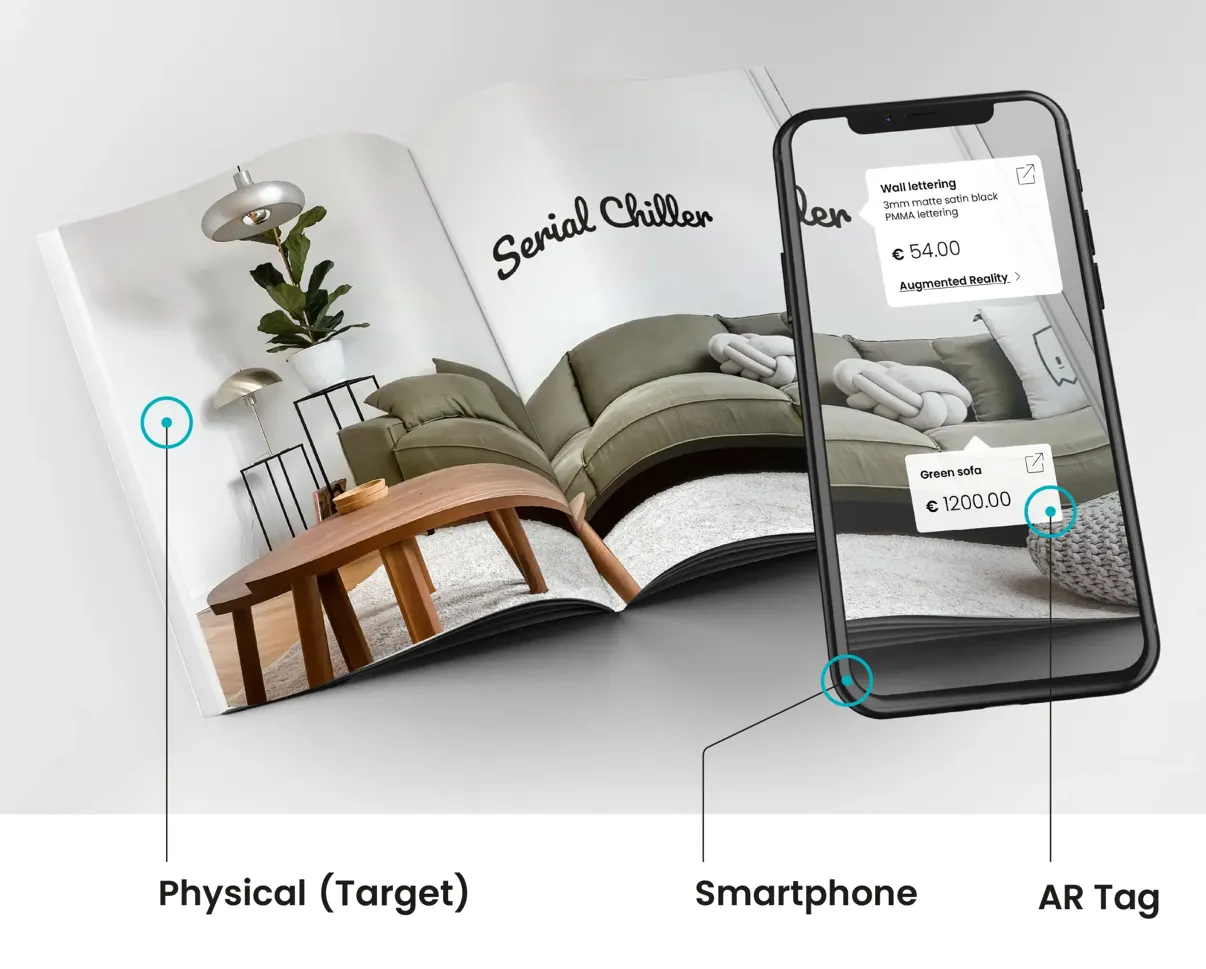
In this case, the AR-Tags are made up of text and external links. When the smartphone frames the catalog with the camera, the system recognizes the image thanks to the Target, which is a previously registered image. At this point, interactive pop-ups (Tags) appear on the screen, offering detailed information.
In this example, two Tags are displayed:
- The first, positioned higher, includes a title, a short product description, the sale price, a link to the manufacturer's website, and a link to view the model in augmented reality.
- The second Tag shows the product title, price, and a link to the manufacturer's website.
Tags can contain text, images, videos, links, and even 3D models, offering an immersive and dynamic experience.
To start the experience, you scan a QR code with the smartphone.
How to use it?
To start using AR-Tags with My AR Studio, follow these simple steps:
1. Prepare the Physical Object
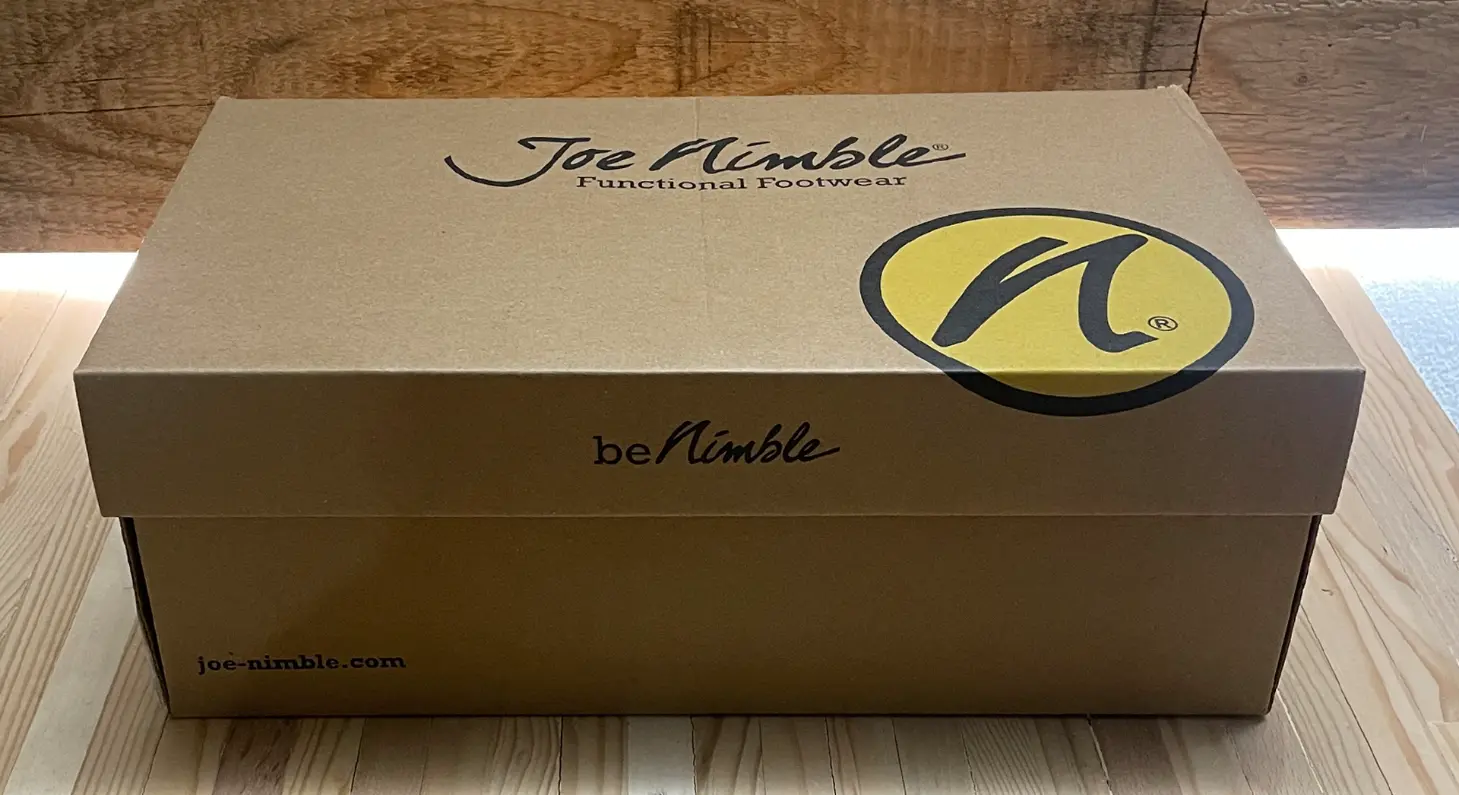
To use AR-Tag, you need a physical object. This can be a catalog, a poster, a business card, a product, or any other object containing a flat image that will be recognized by the system. The image must be registered in the AR-Tag section of My AR Studio. In our example, we use the top surface of a shoe box.
2. Upload the Image (Target) to the System
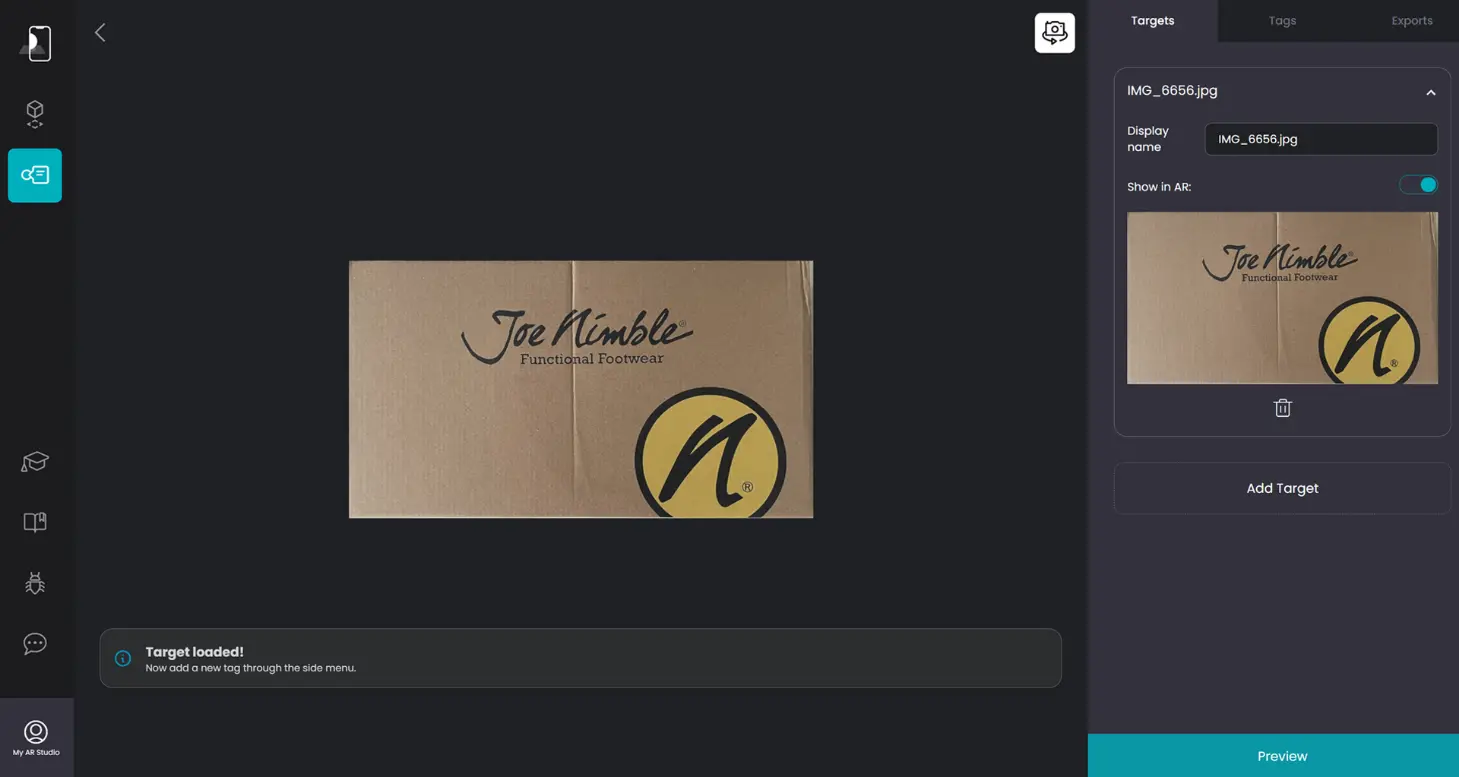
After selecting the image, upload it to our My AR Studio editor in the section dedicated to AR-Tags. This image will act as the "Target", the reference point that the system will recognize when framed with the device's camera.
3. Add Tags to the Image
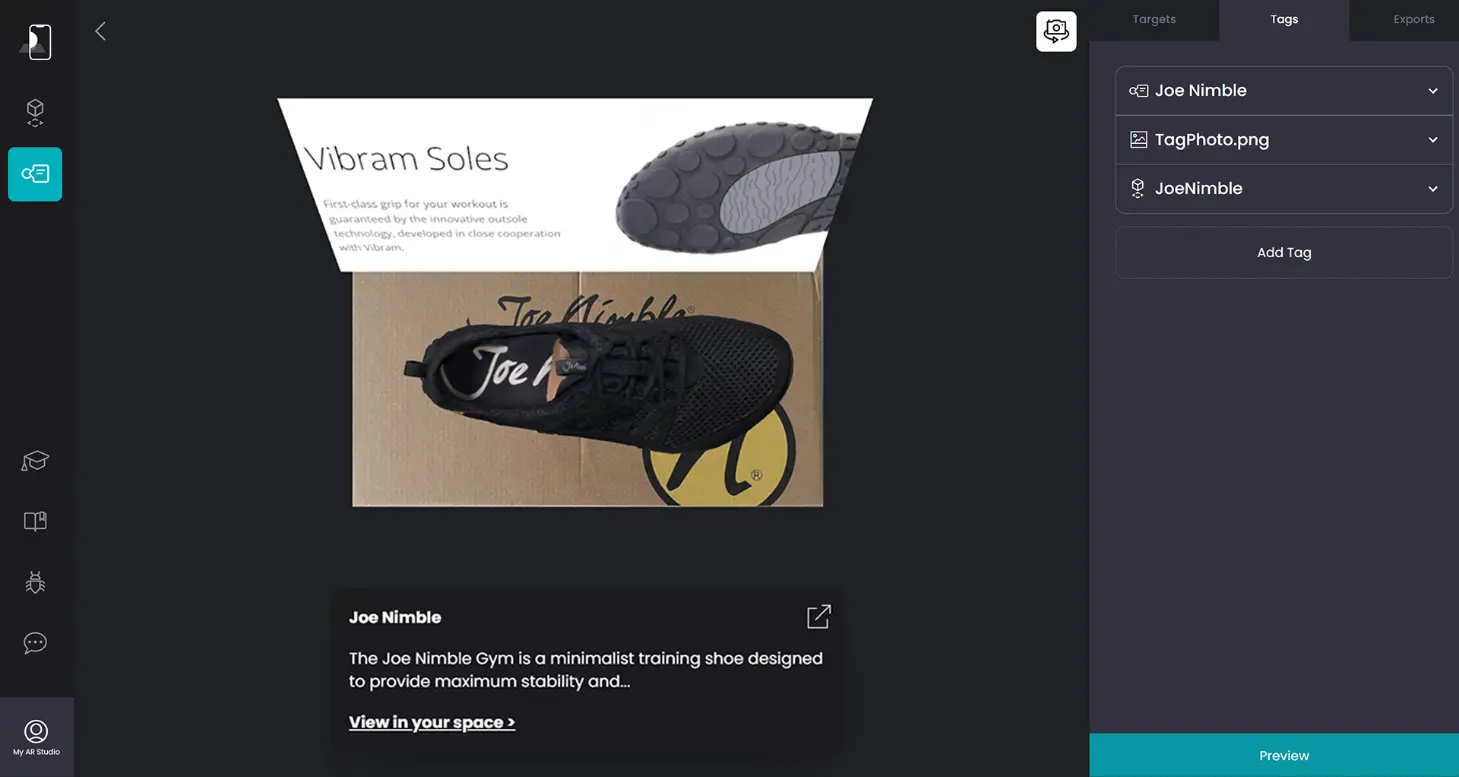
Once the image (Target) is uploaded, you can start adding your Tags directly onto the image using the My AR Studio editor. Tags can be of various types: informative (such as descriptions and details) or call to action (such as purchase links or other actions). There are no limits to your creativity: you can add as many Tags as you want!
In our example, we added:
- a text tag with title, description, link to the site where you can buy the item, and a quick command to view the shoe individually in Augmented Reality
- an image positioned at 90° to the target image with some information about the sole
- the 3D model of the shoe positioned above the target image
4. Save and Generate the QR Code
When you have finished configuring your Tags, save the project. At this point, a QR Code representing your AR Tag experience will be generated automatically.
5. Place the QR Code on the Object
The final step is to print and place the QR Code physically on your object; it is usually included in the artwork to be printed. This step allows the system to start your experience when it is scanned with a smartphone camera.
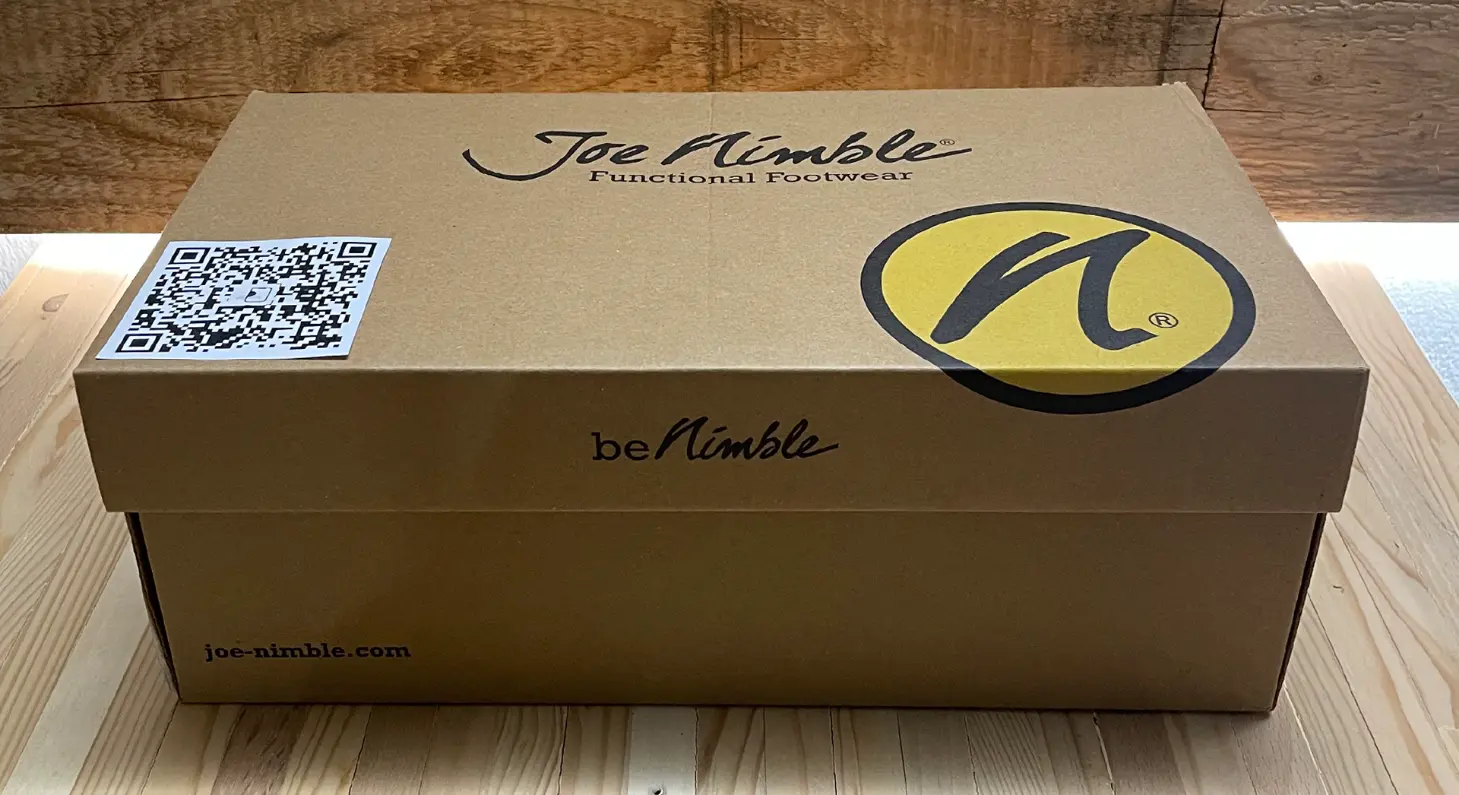
QR-codes have a lot of high contrast areas that are easily recognized by the smartphone and you can use them to enhance the tracking of your experience. To do so you need to embed the QR-code into your target image. How to do it?
- create a new AR Tag project
- upload a dummy target image
- save (this generates the QR-code for your AR Tag experience)
- download the QR code
- embed the QR code into your real target image (for example using Photoshop)
- remove the dummy target in My AR Studio
- add a new target using the real target image with the embedded QR-code
- create your experience as usual
In this way you create in advance the QR-code for your experience and you can insert it into your creativity image and benefit for more features for the tracking.
6. View the Tags in Augmented Reality
Now scan the QR Code with your smartphone to start the experience and frame the object to view the interactive Tags in augmented reality. The Tags you created will appear directly above the target image, offering an immersive and interactive experience.
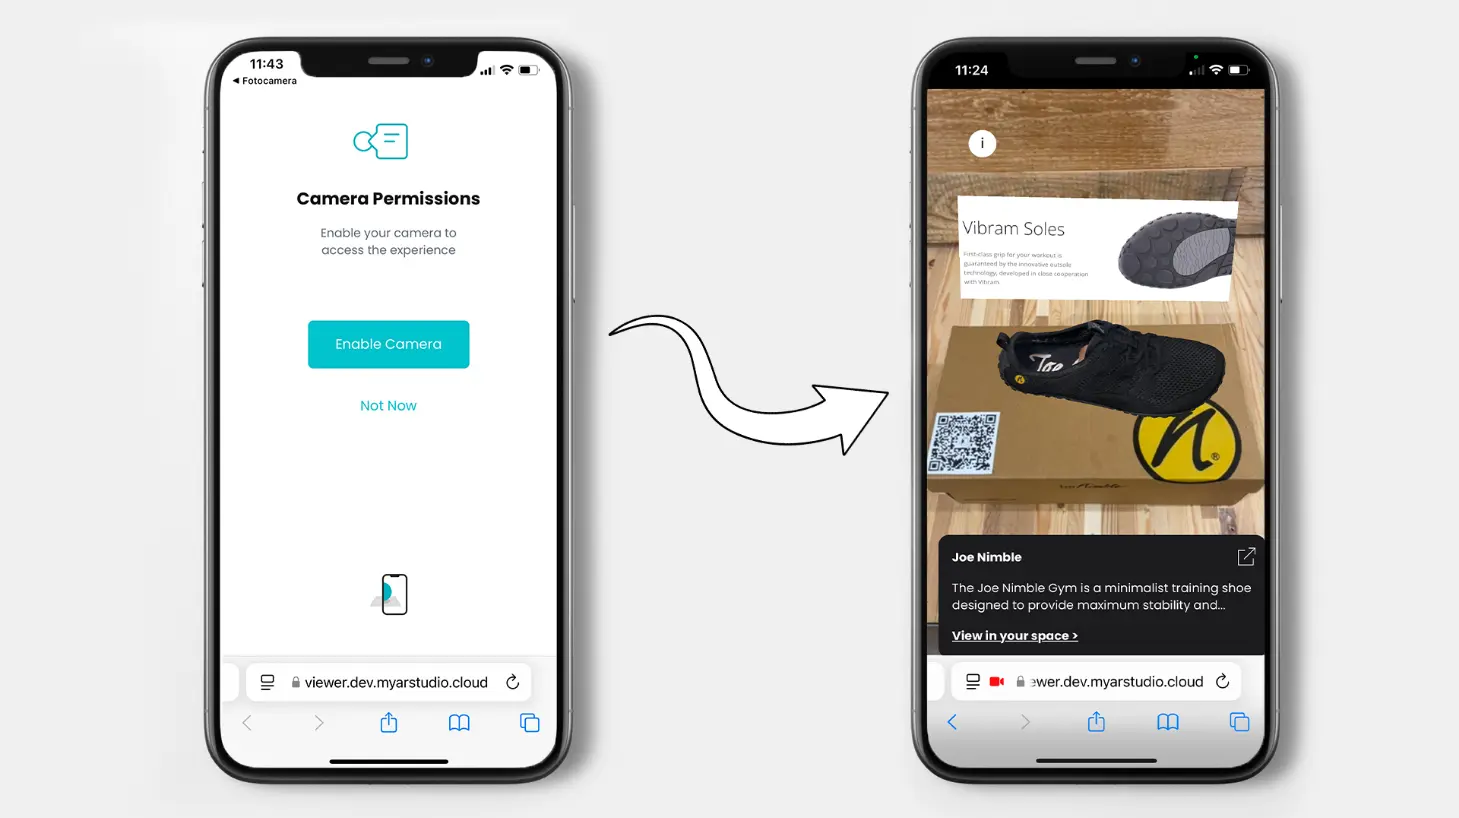
With My AR Studio, you can easily upload a target image, add informative or call to action Tags, generate a QR Code, and view everything in augmented reality, enriching your audience's experience without the need for external apps.